
| Sv translation | |||||||||||
|---|---|---|---|---|---|---|---|---|---|---|---|
| |||||||||||
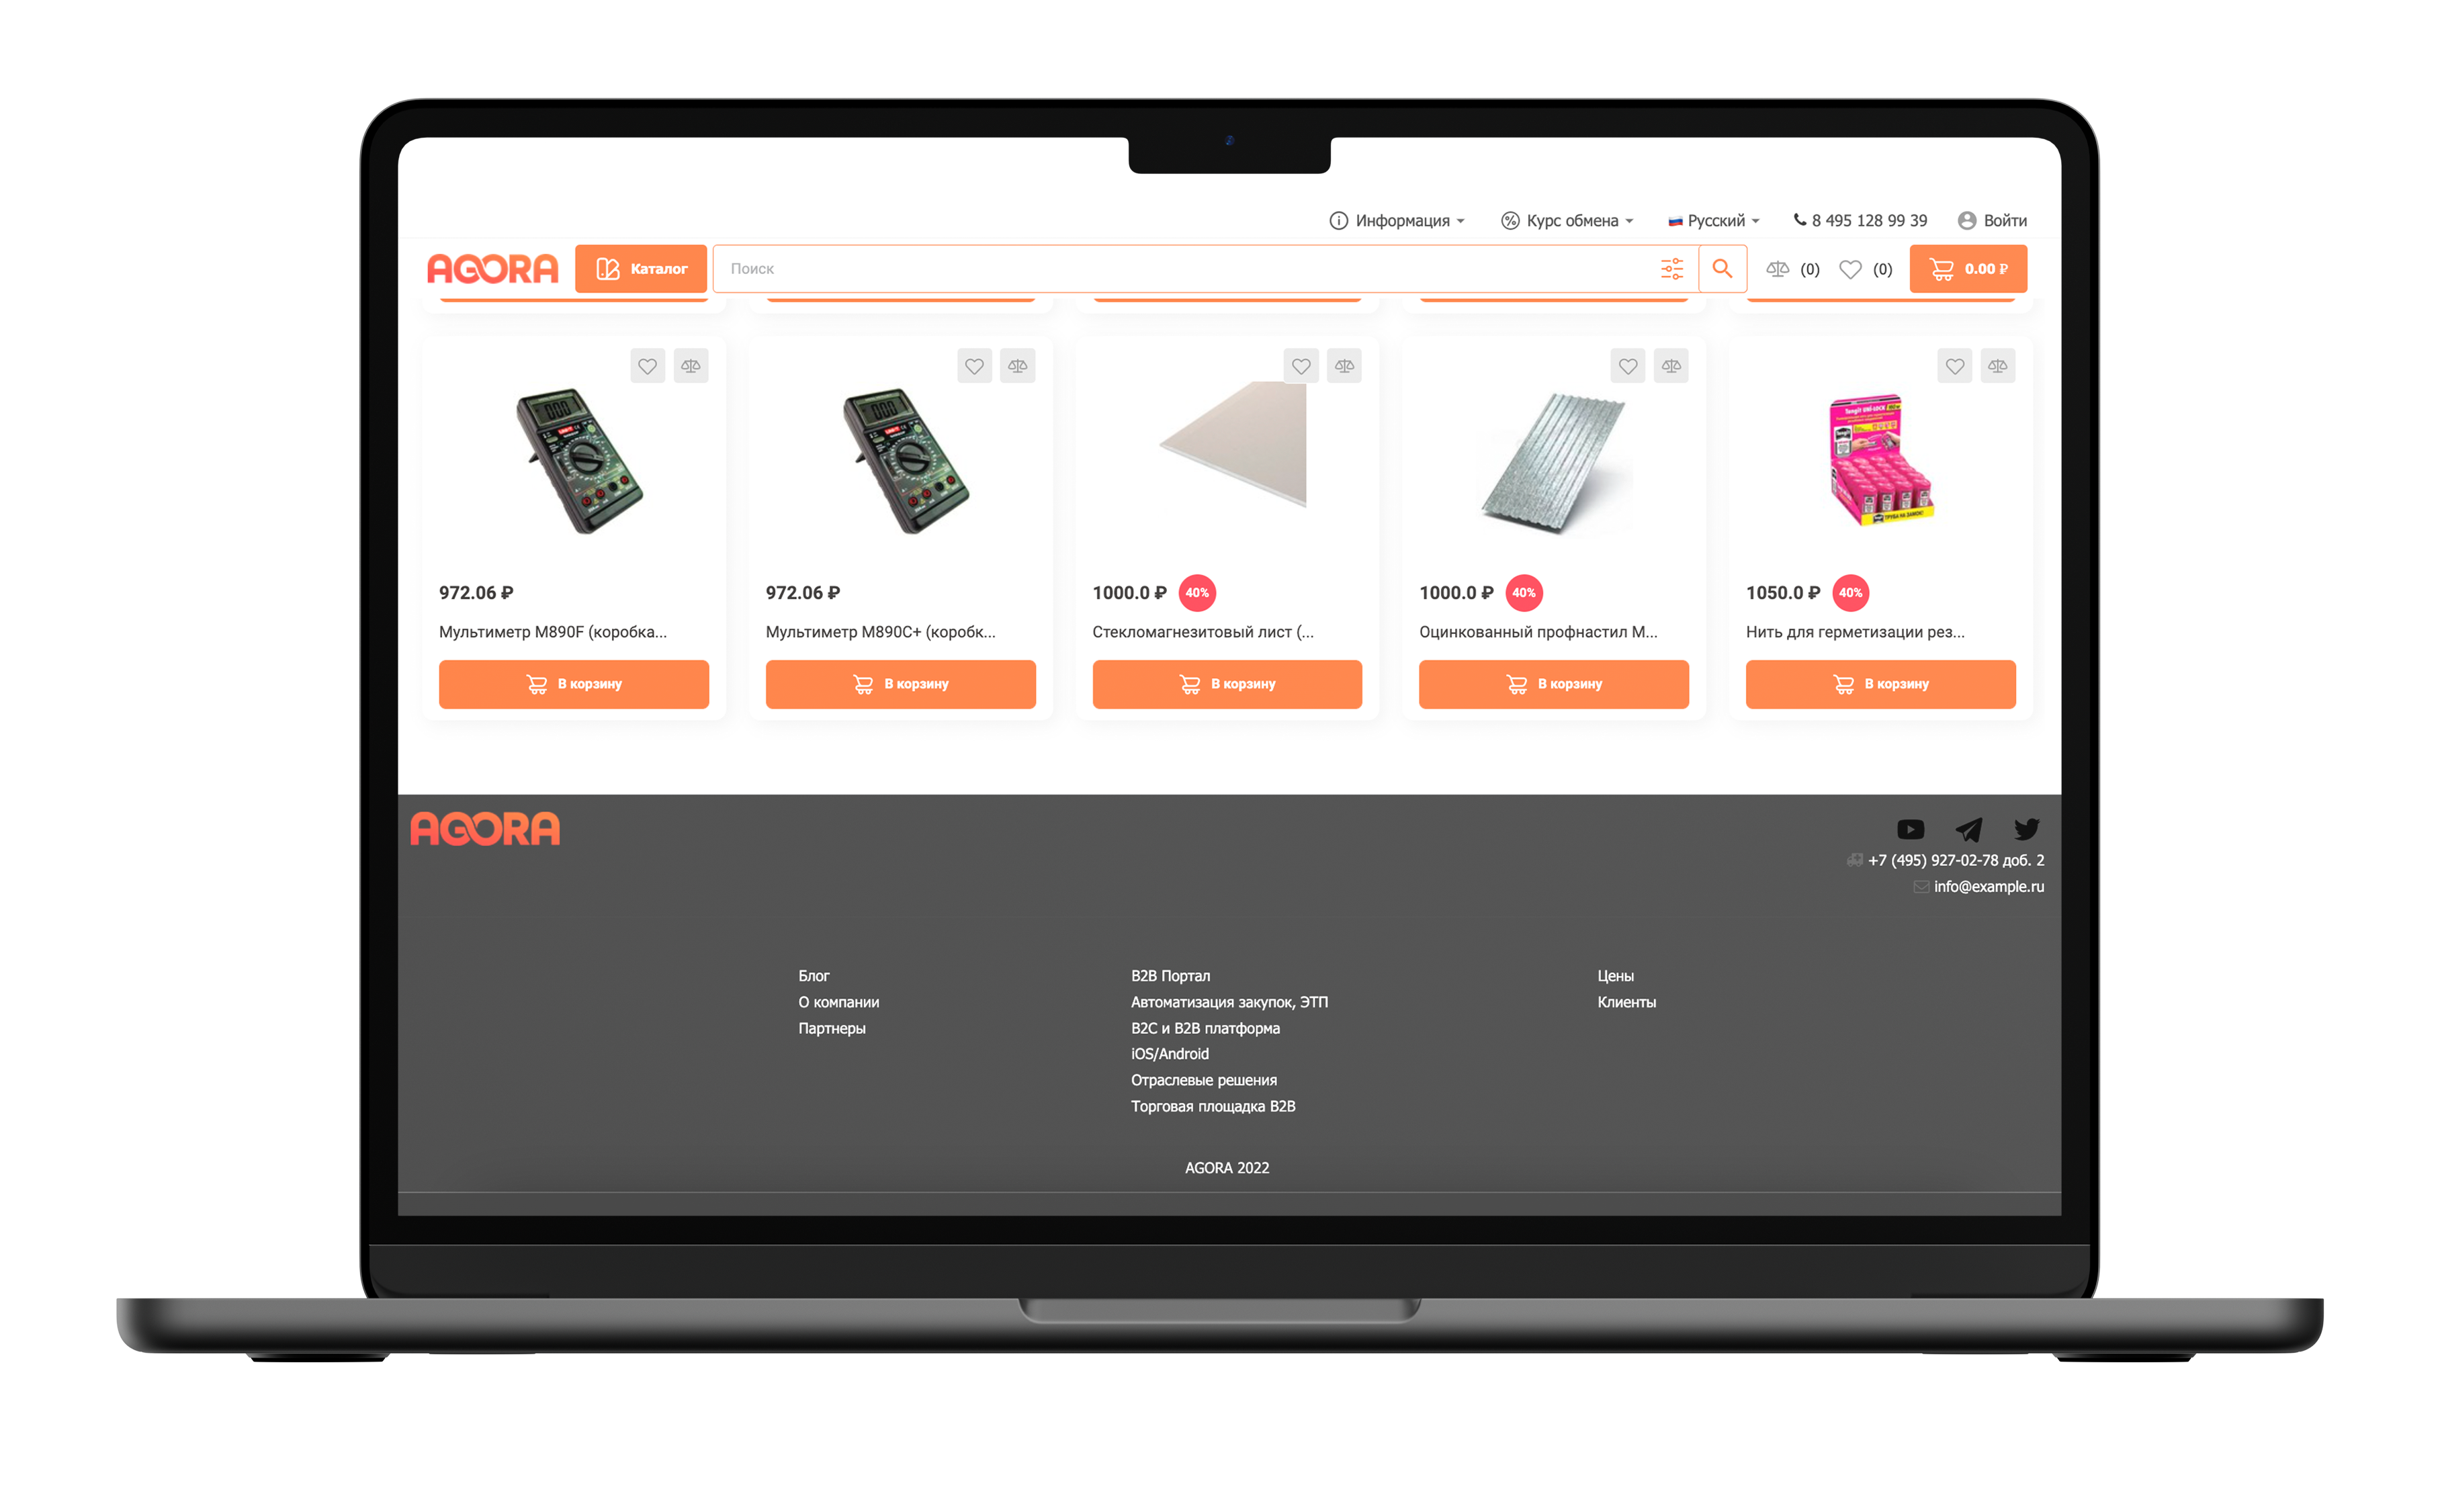
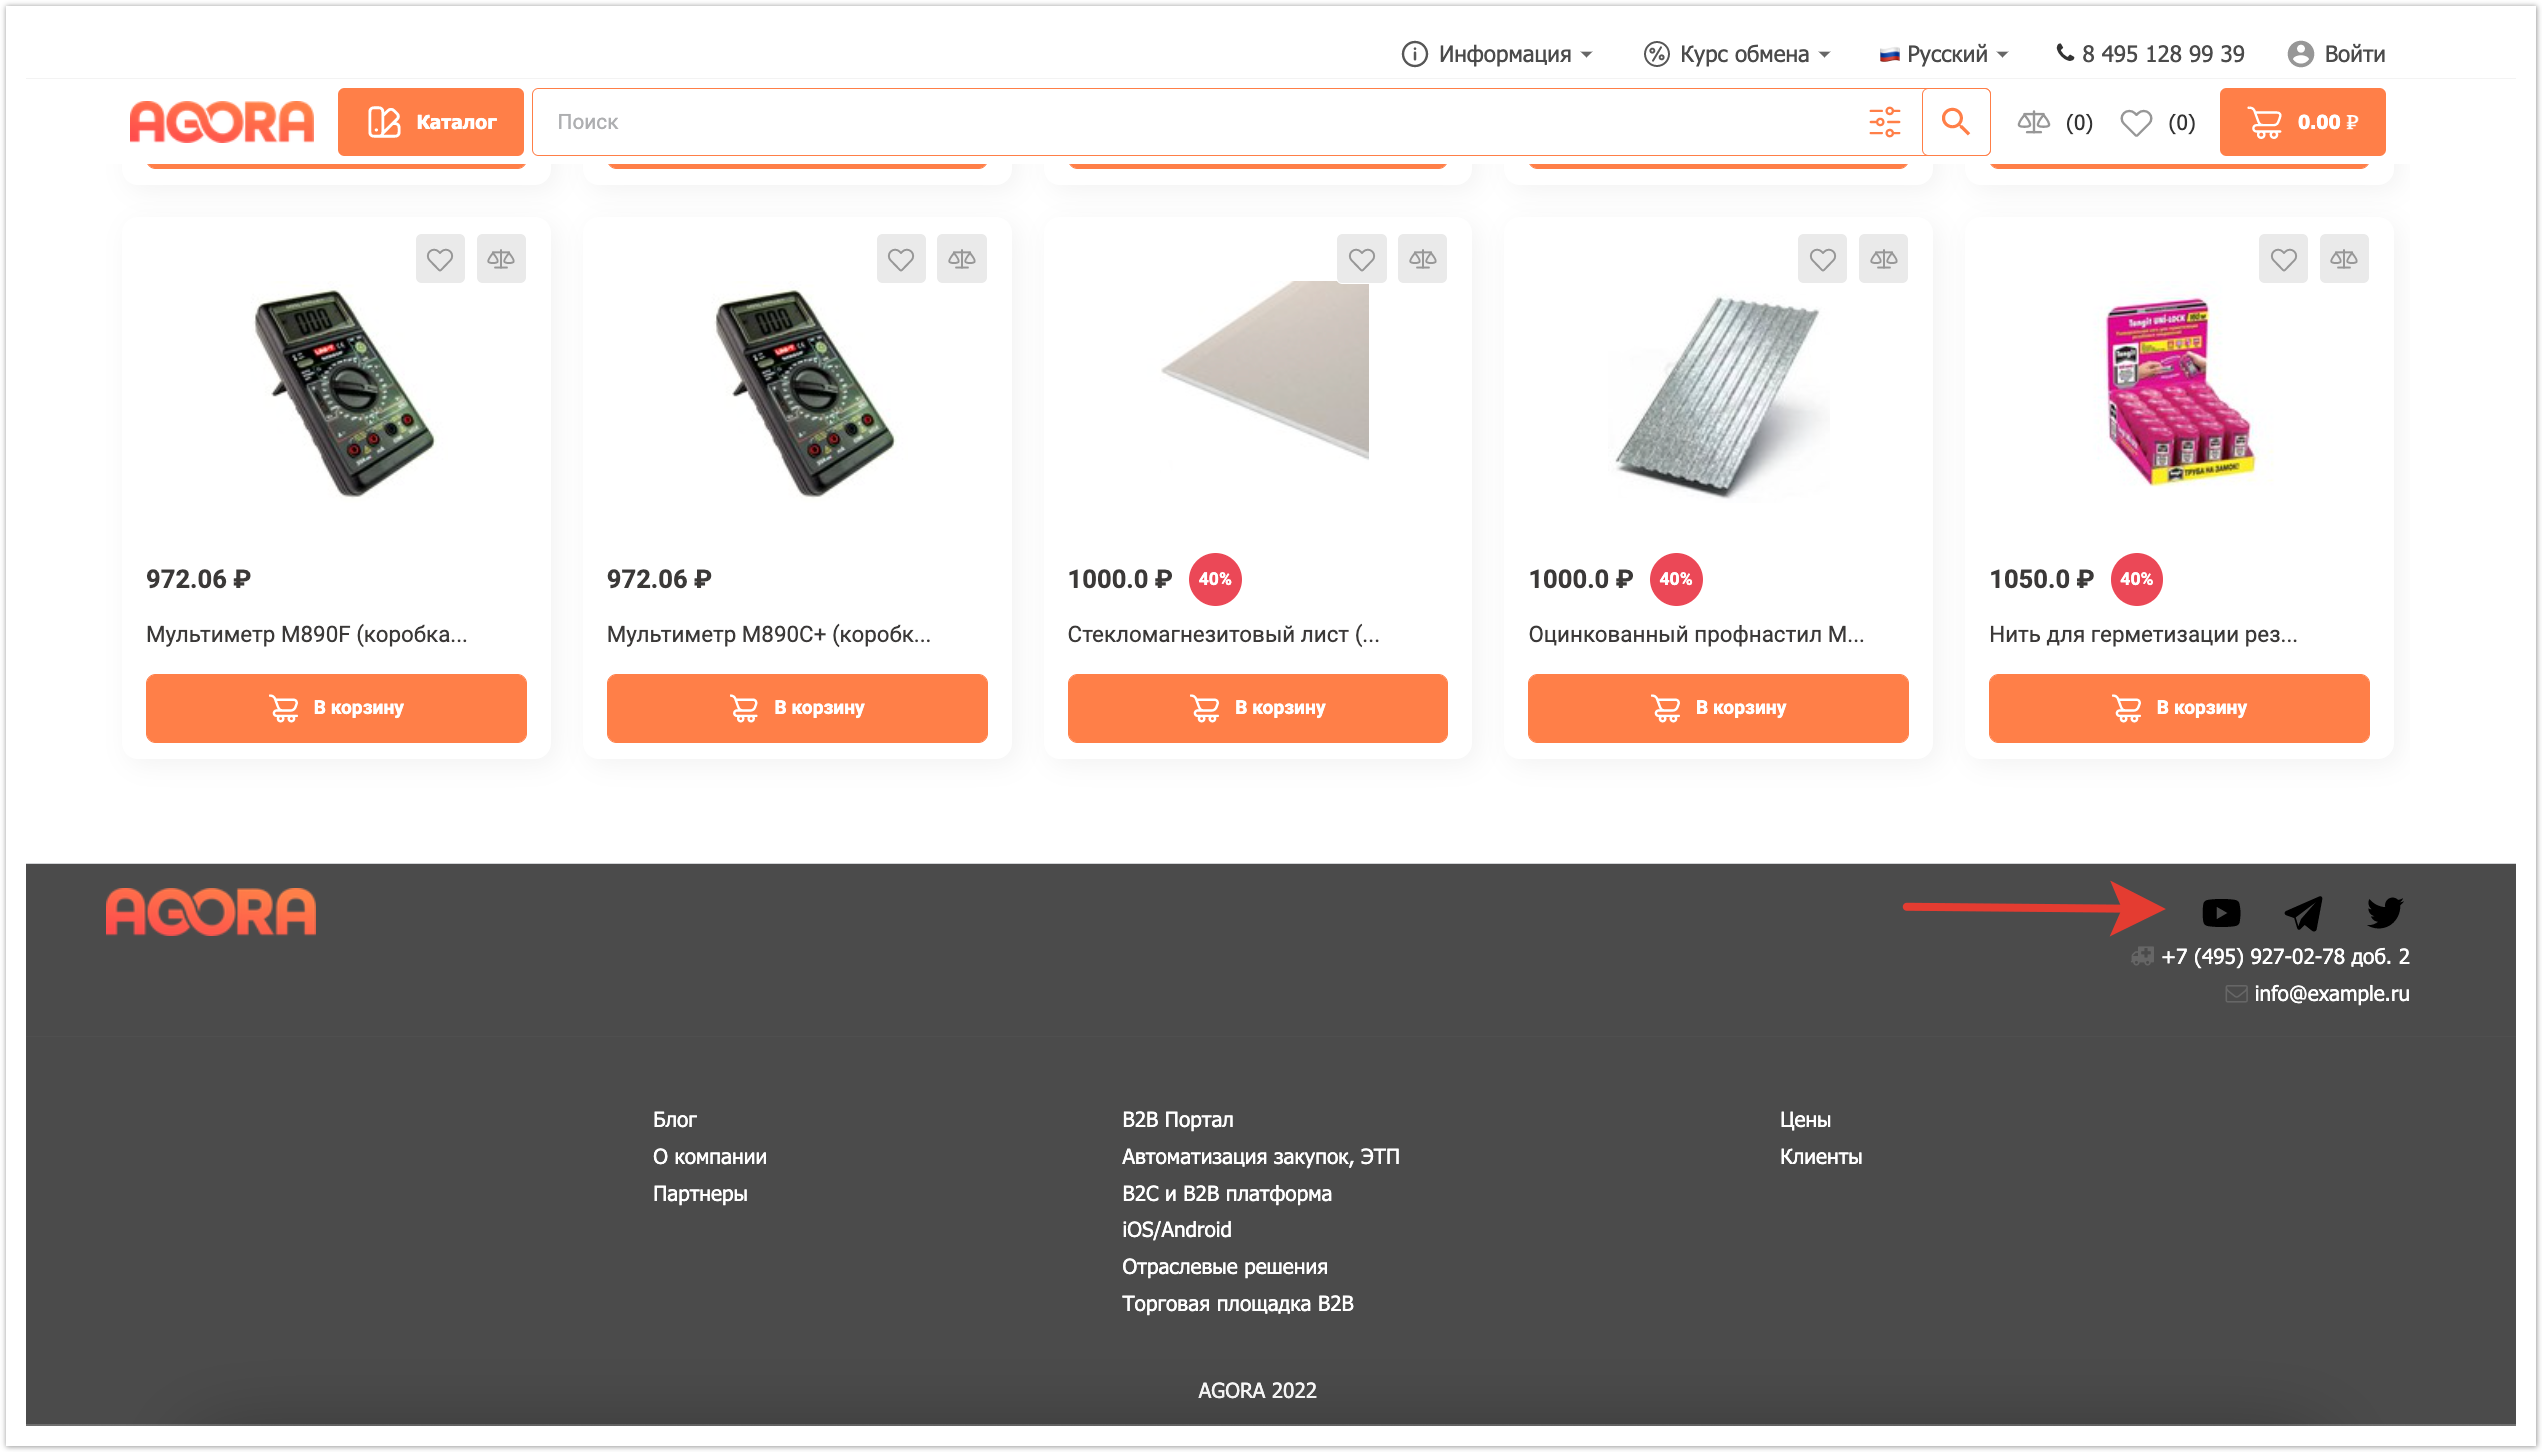
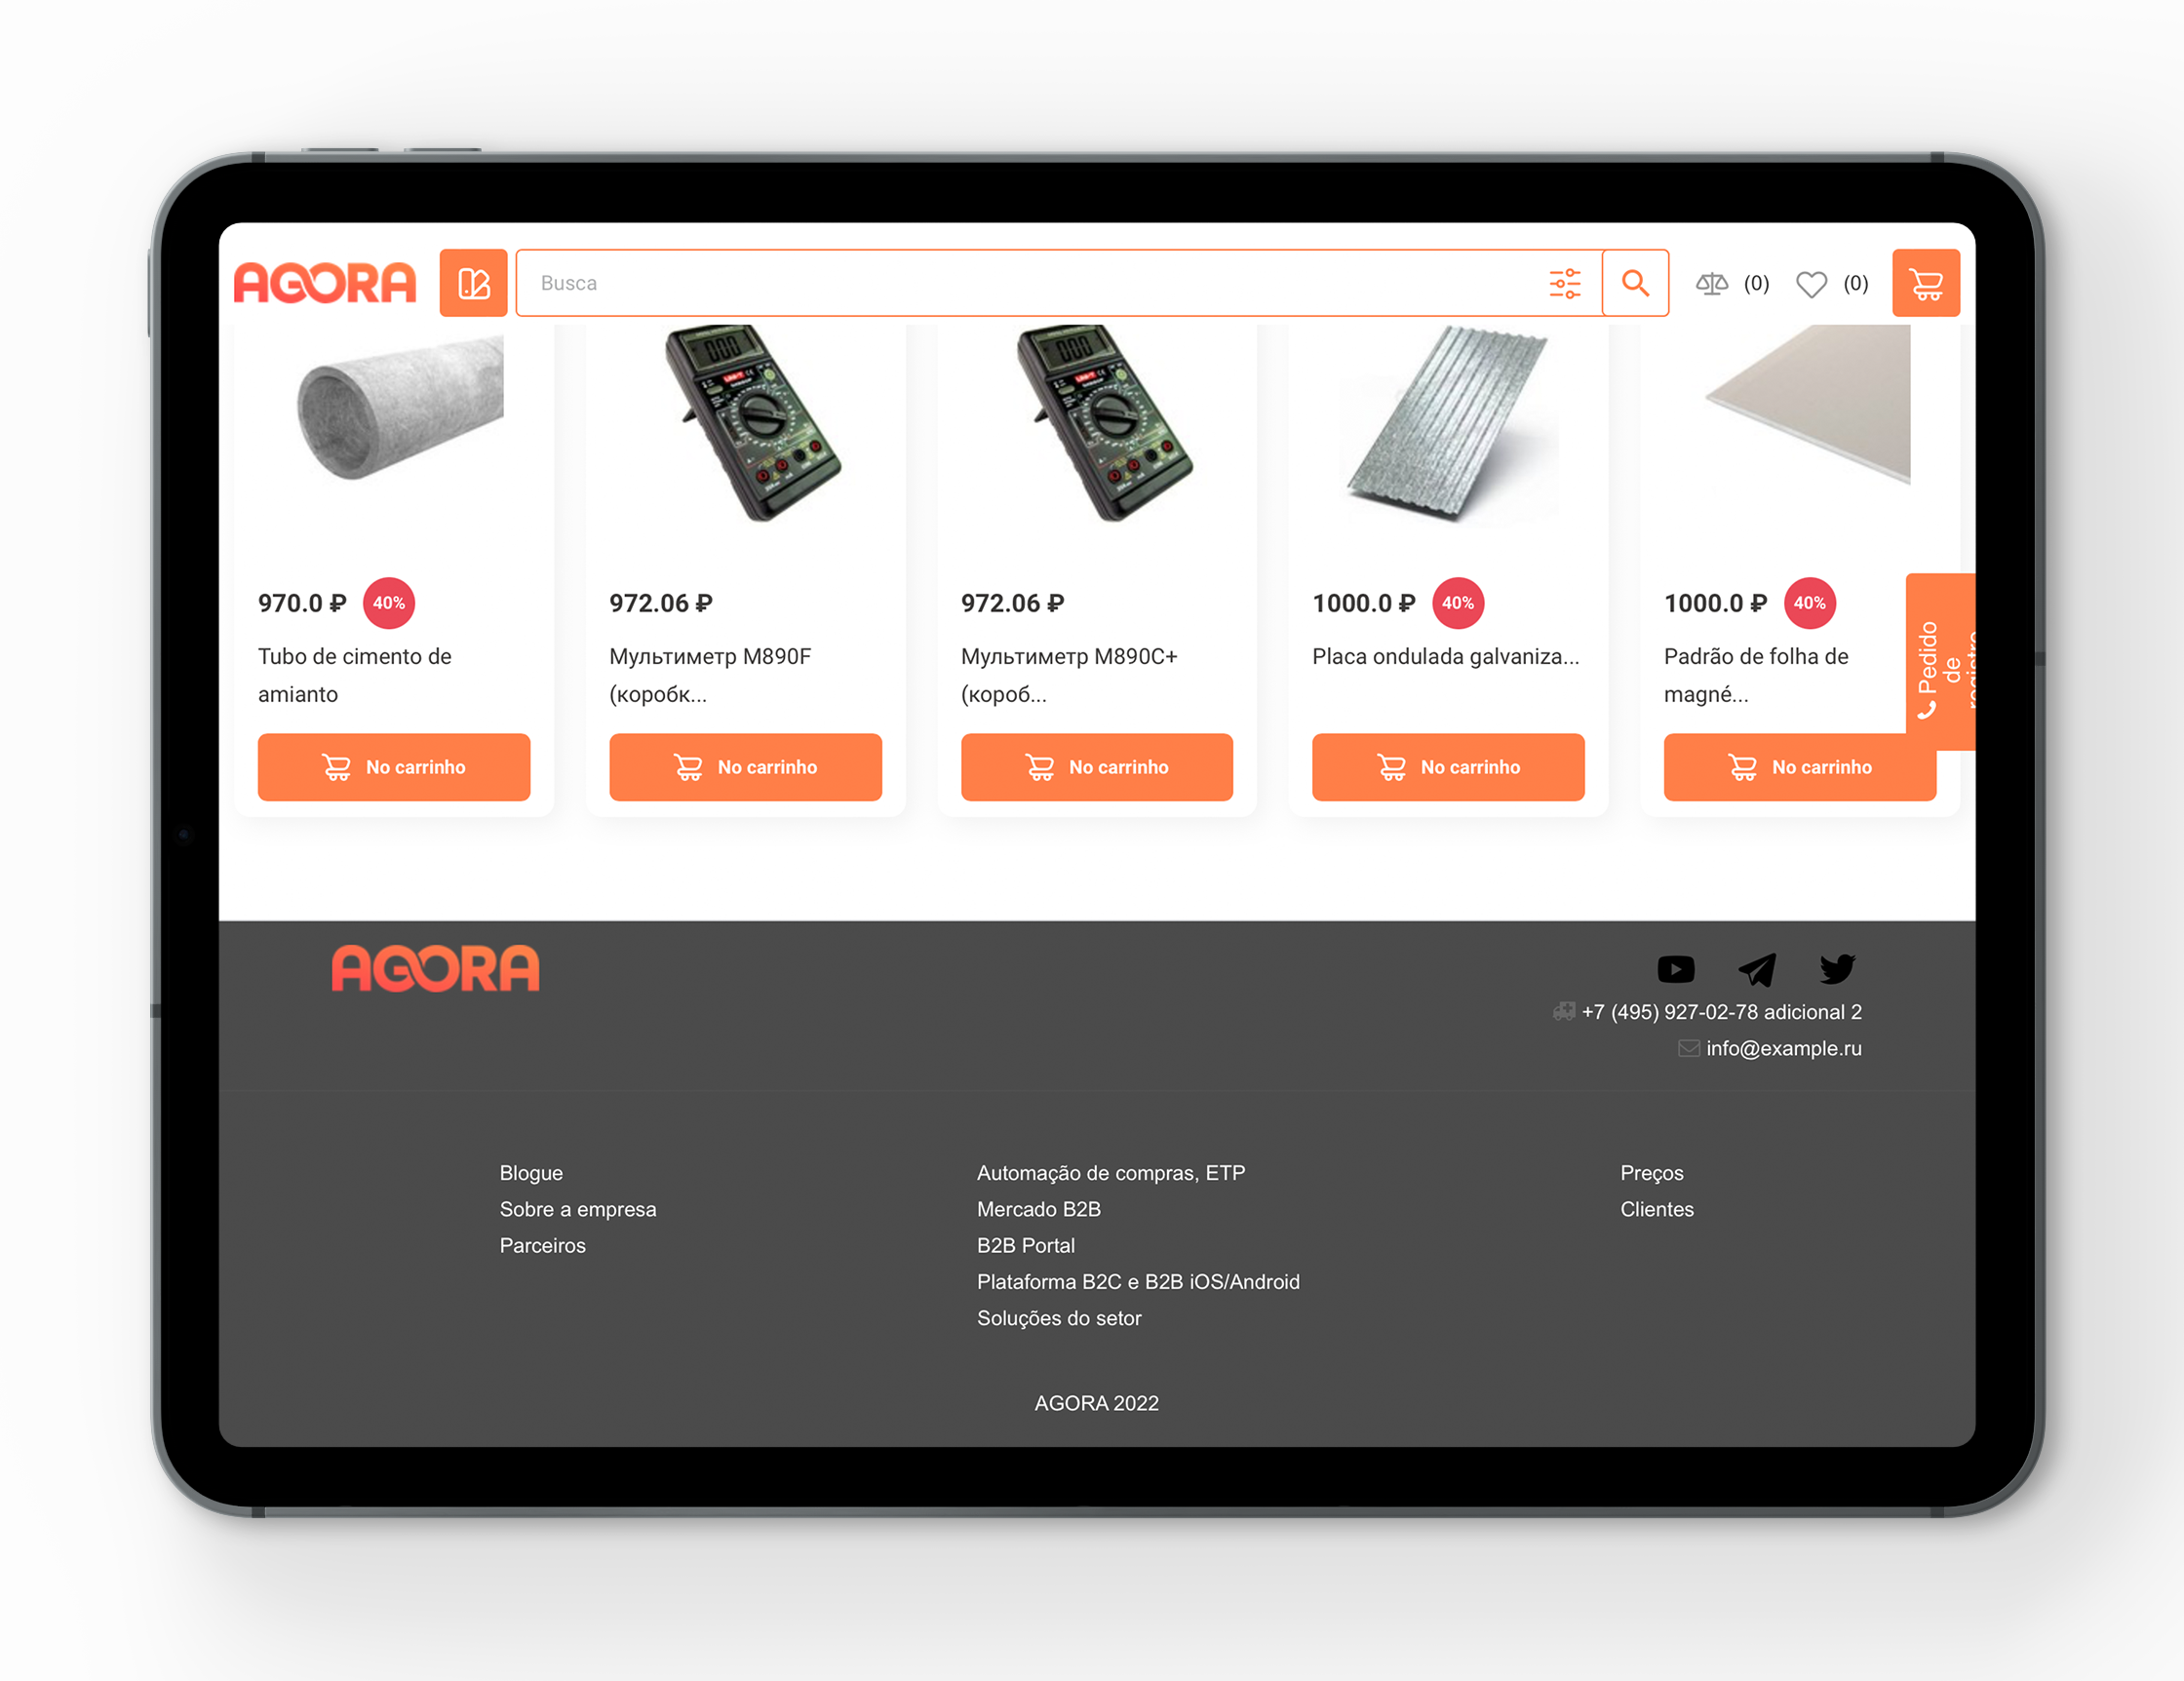
Адаптивная верстка футераОтображение футера на страницах проекта полностью адаптировано под вывод на любом устройстве. Он успешно отображается на компьютере:
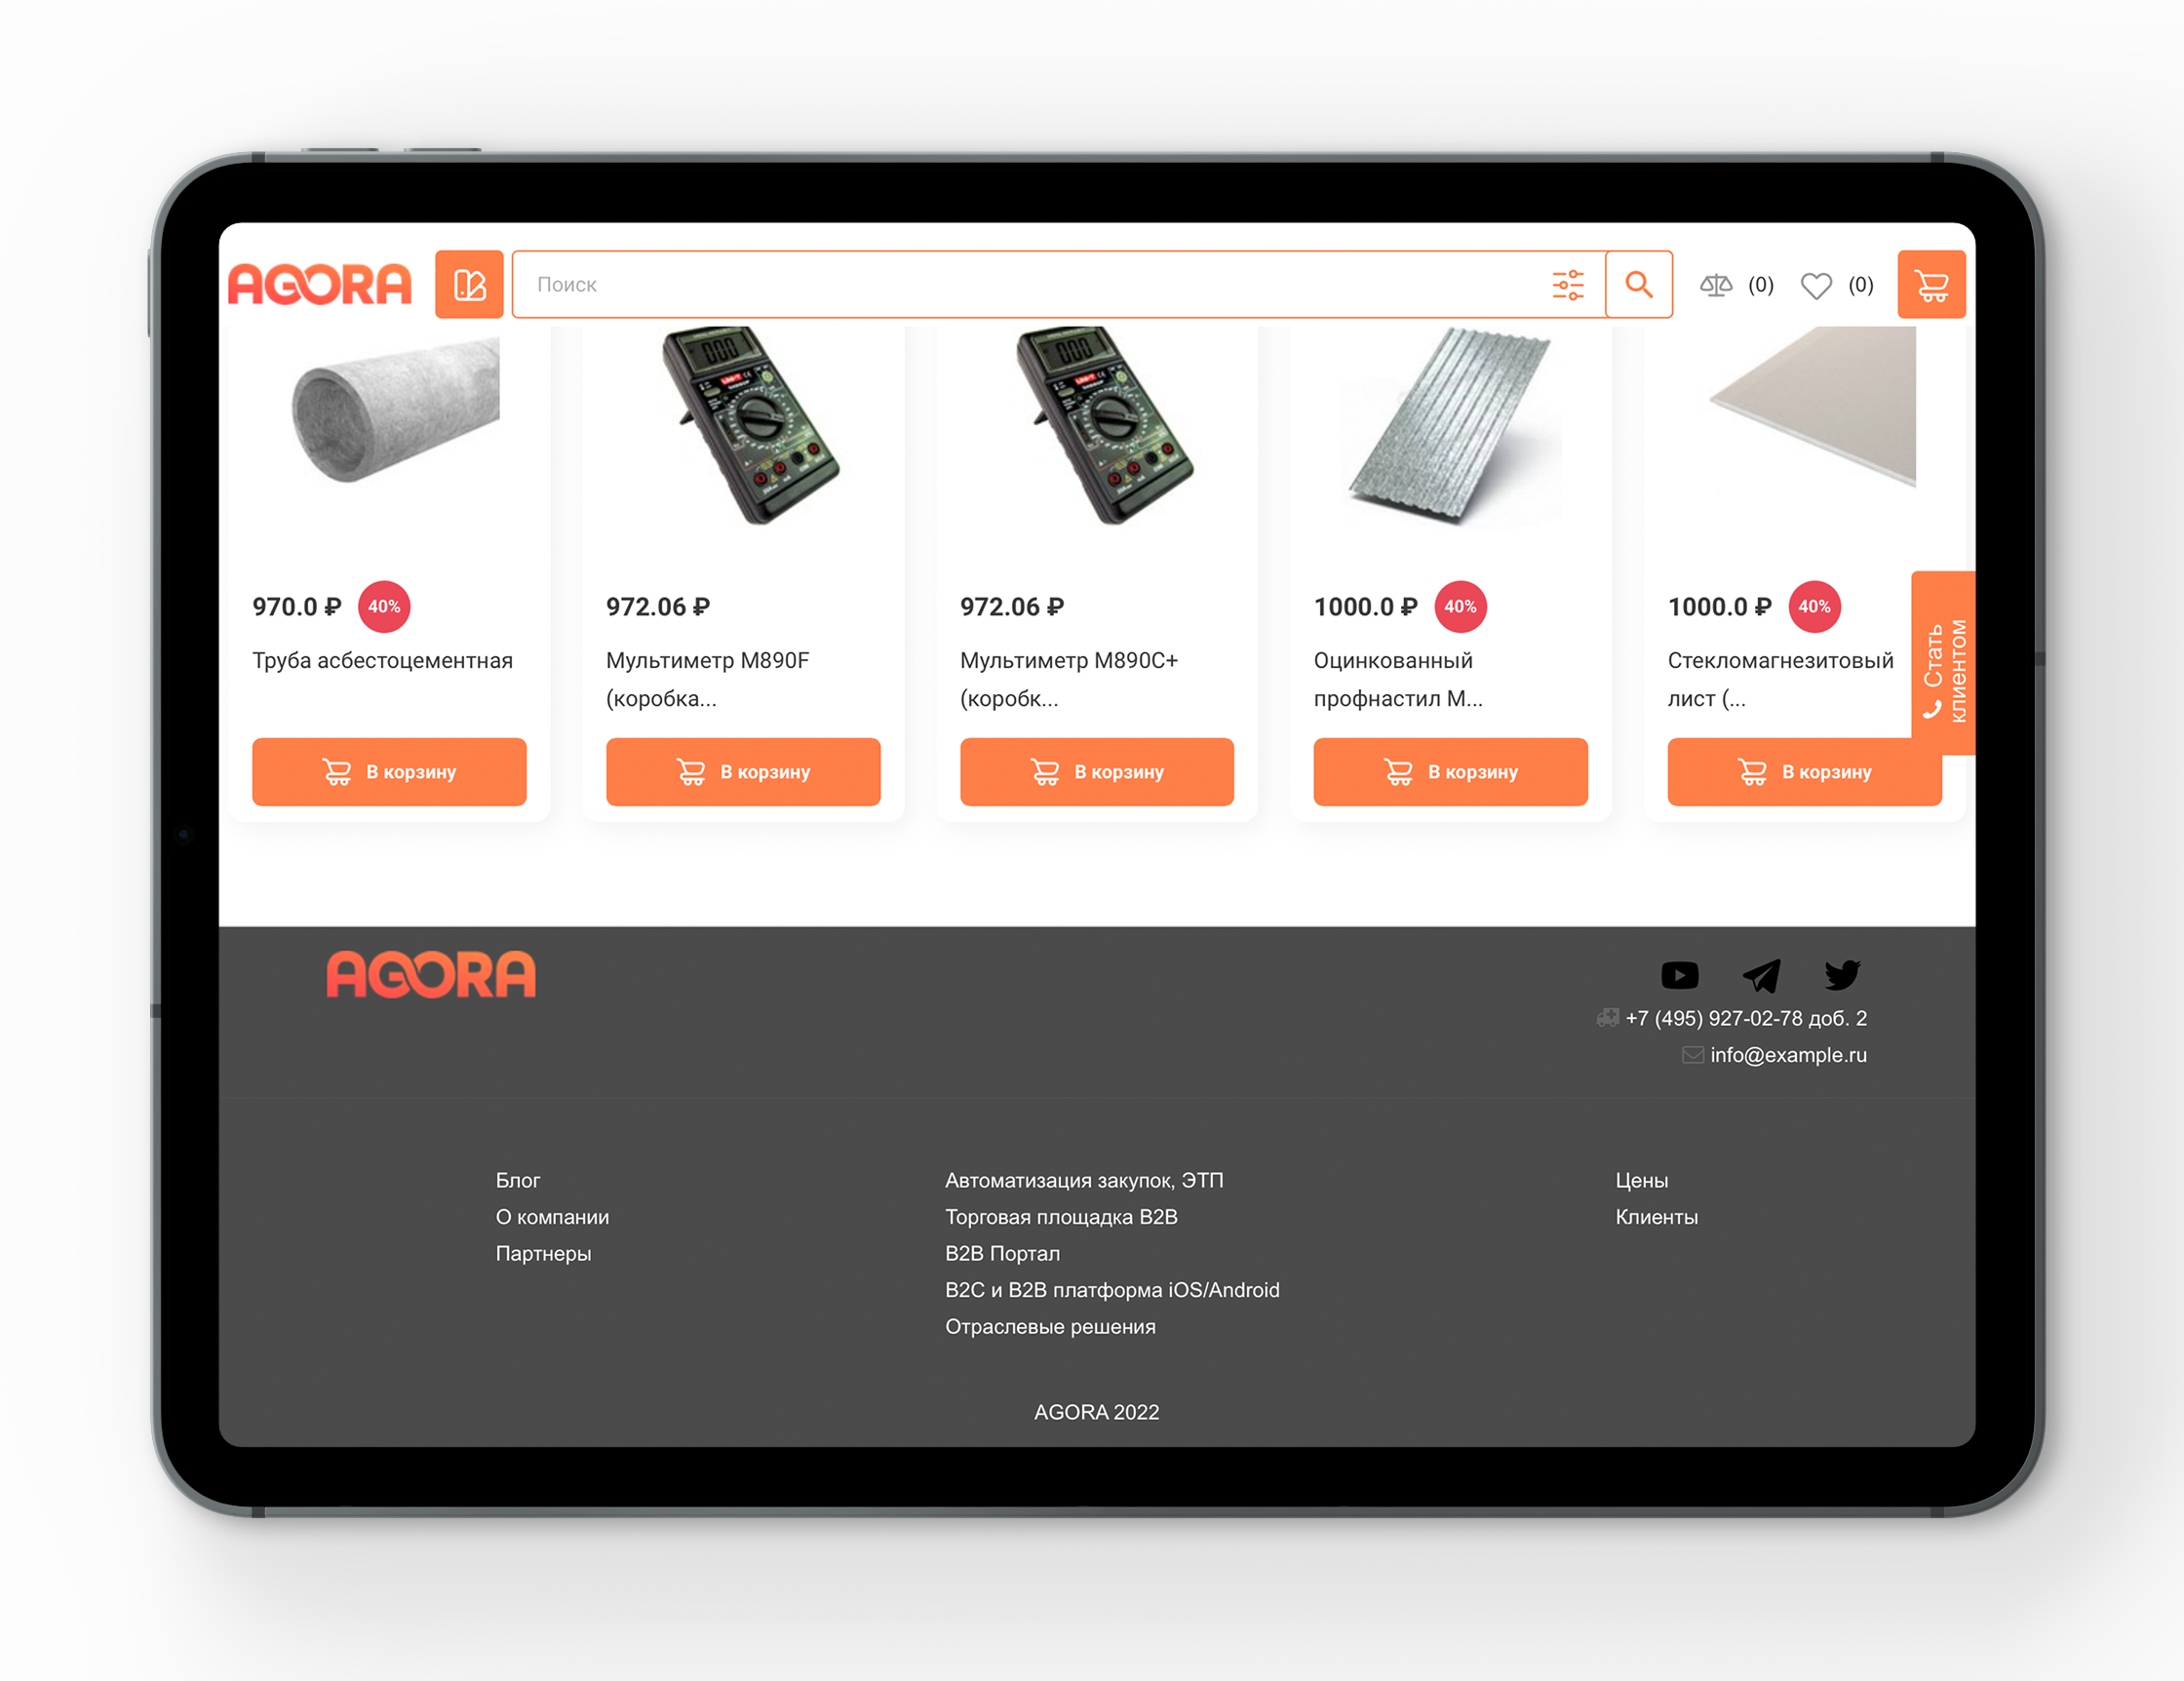
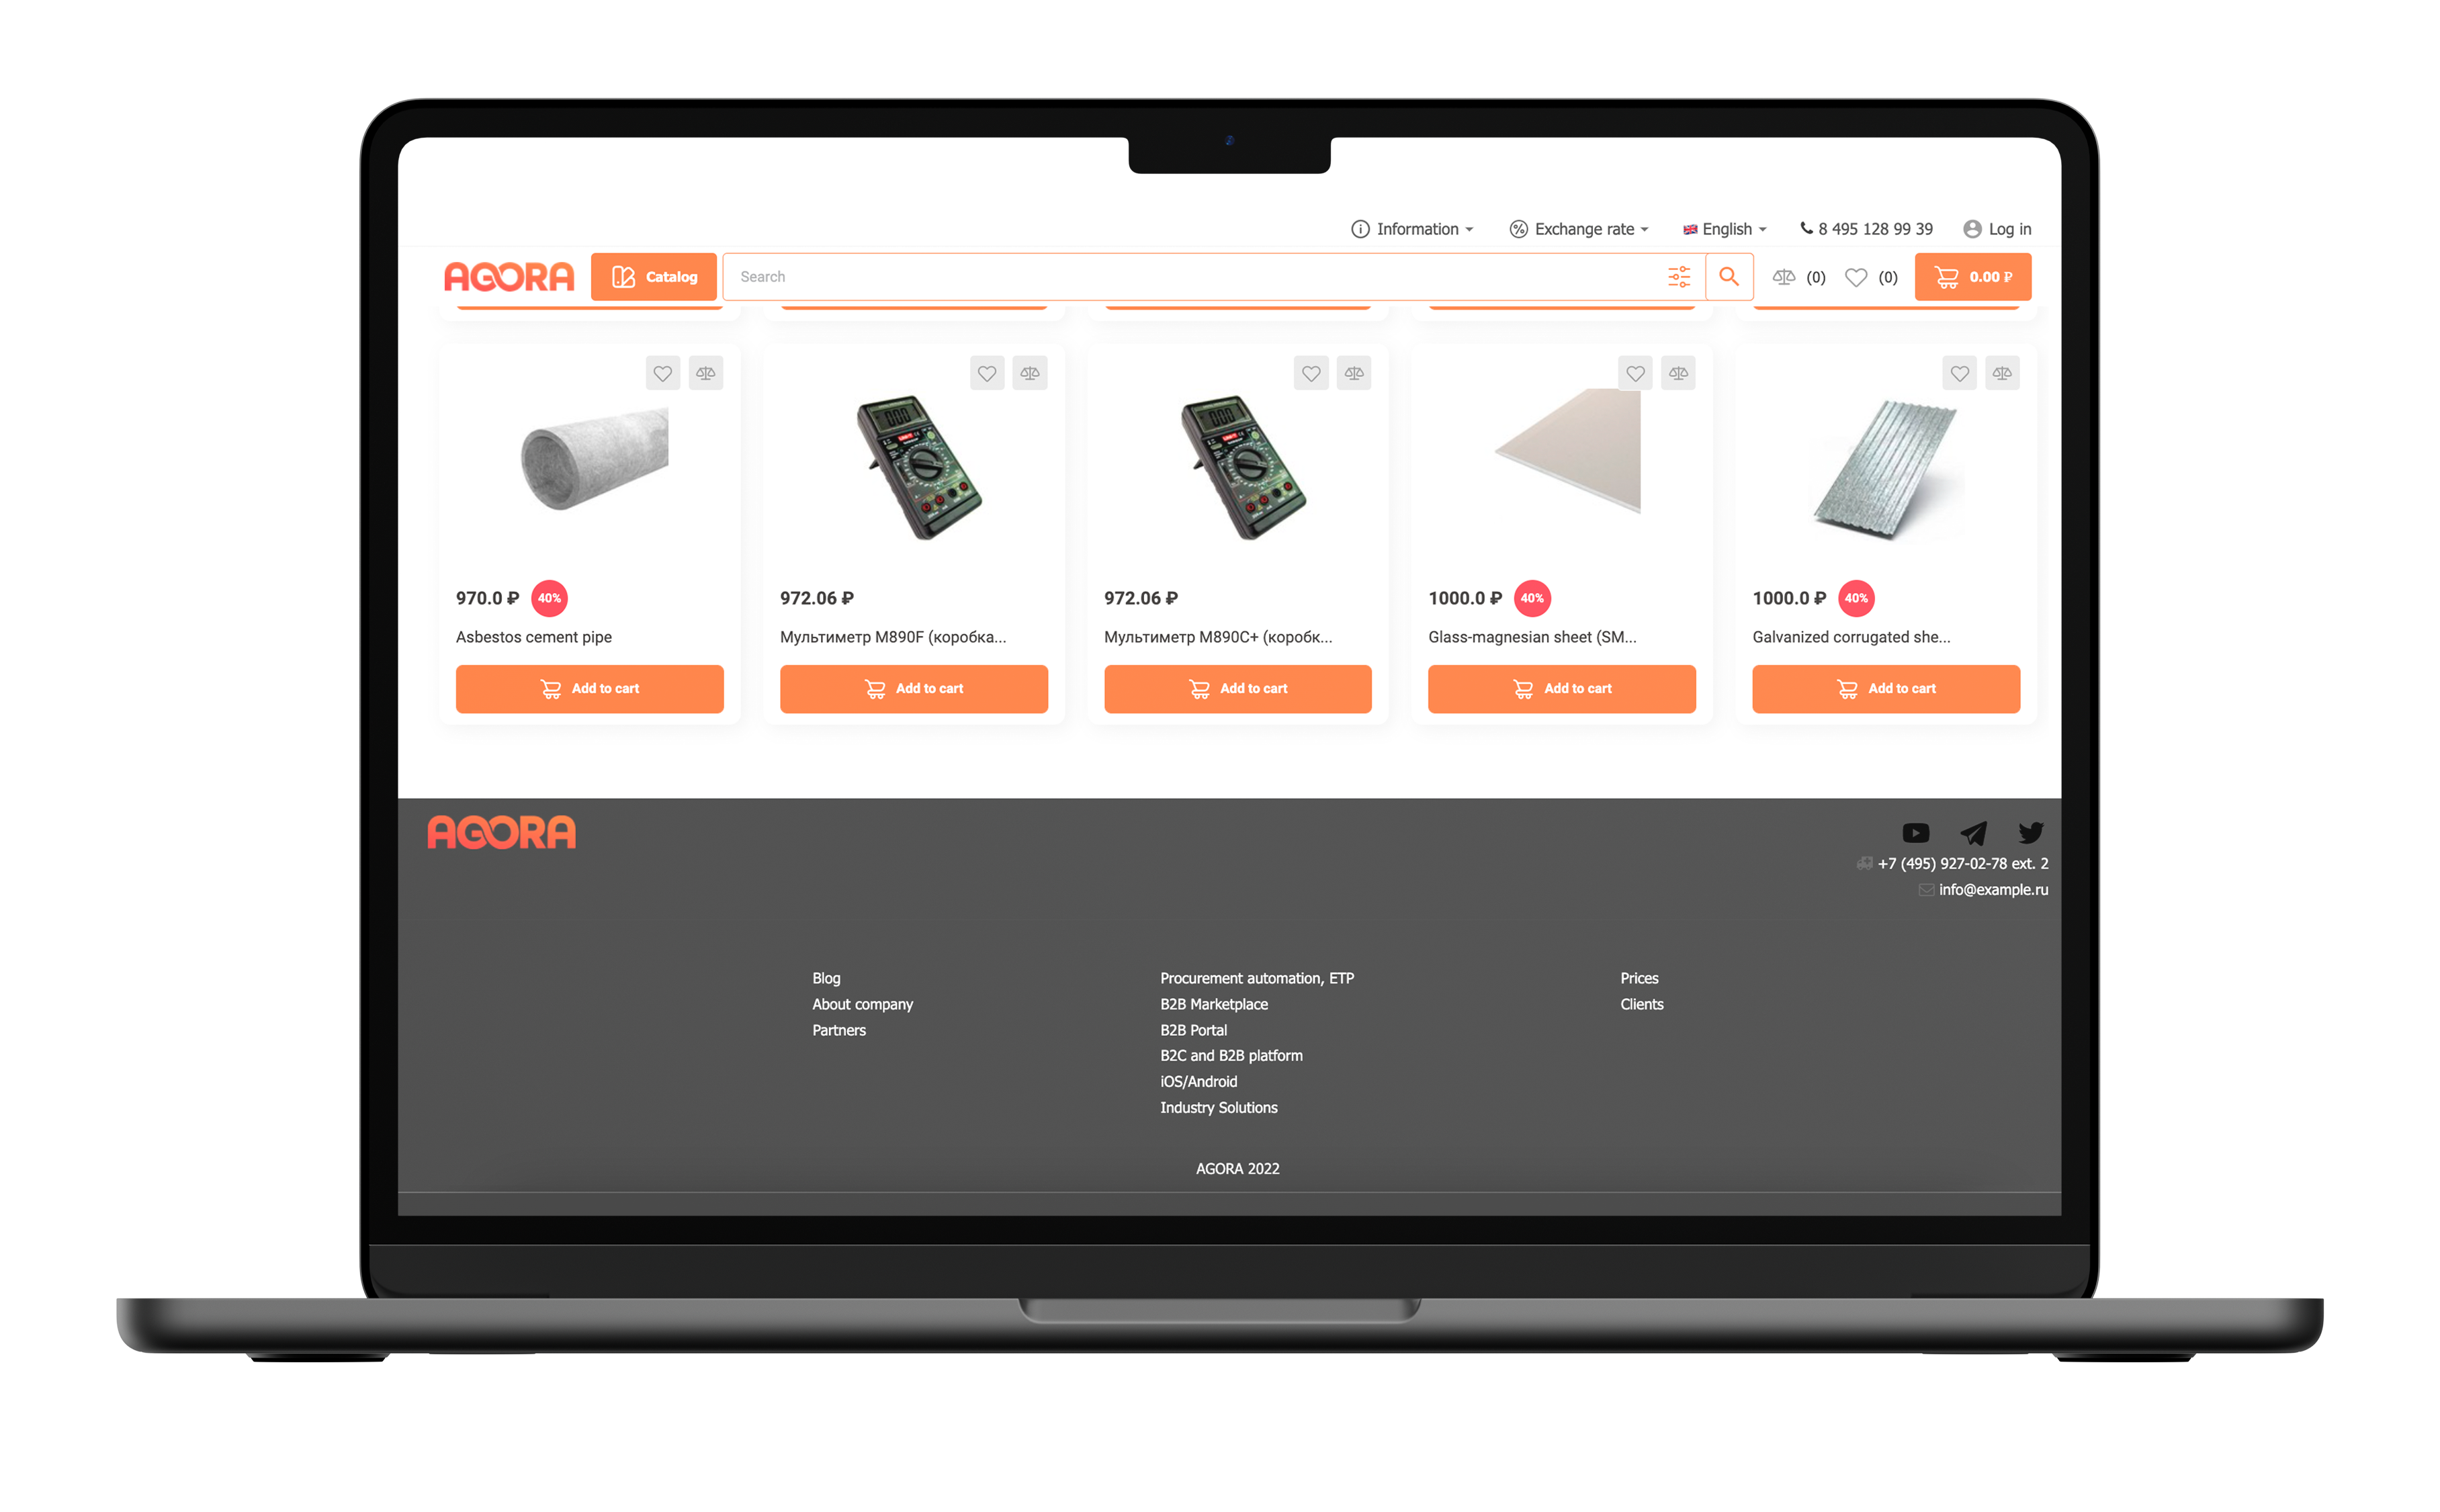
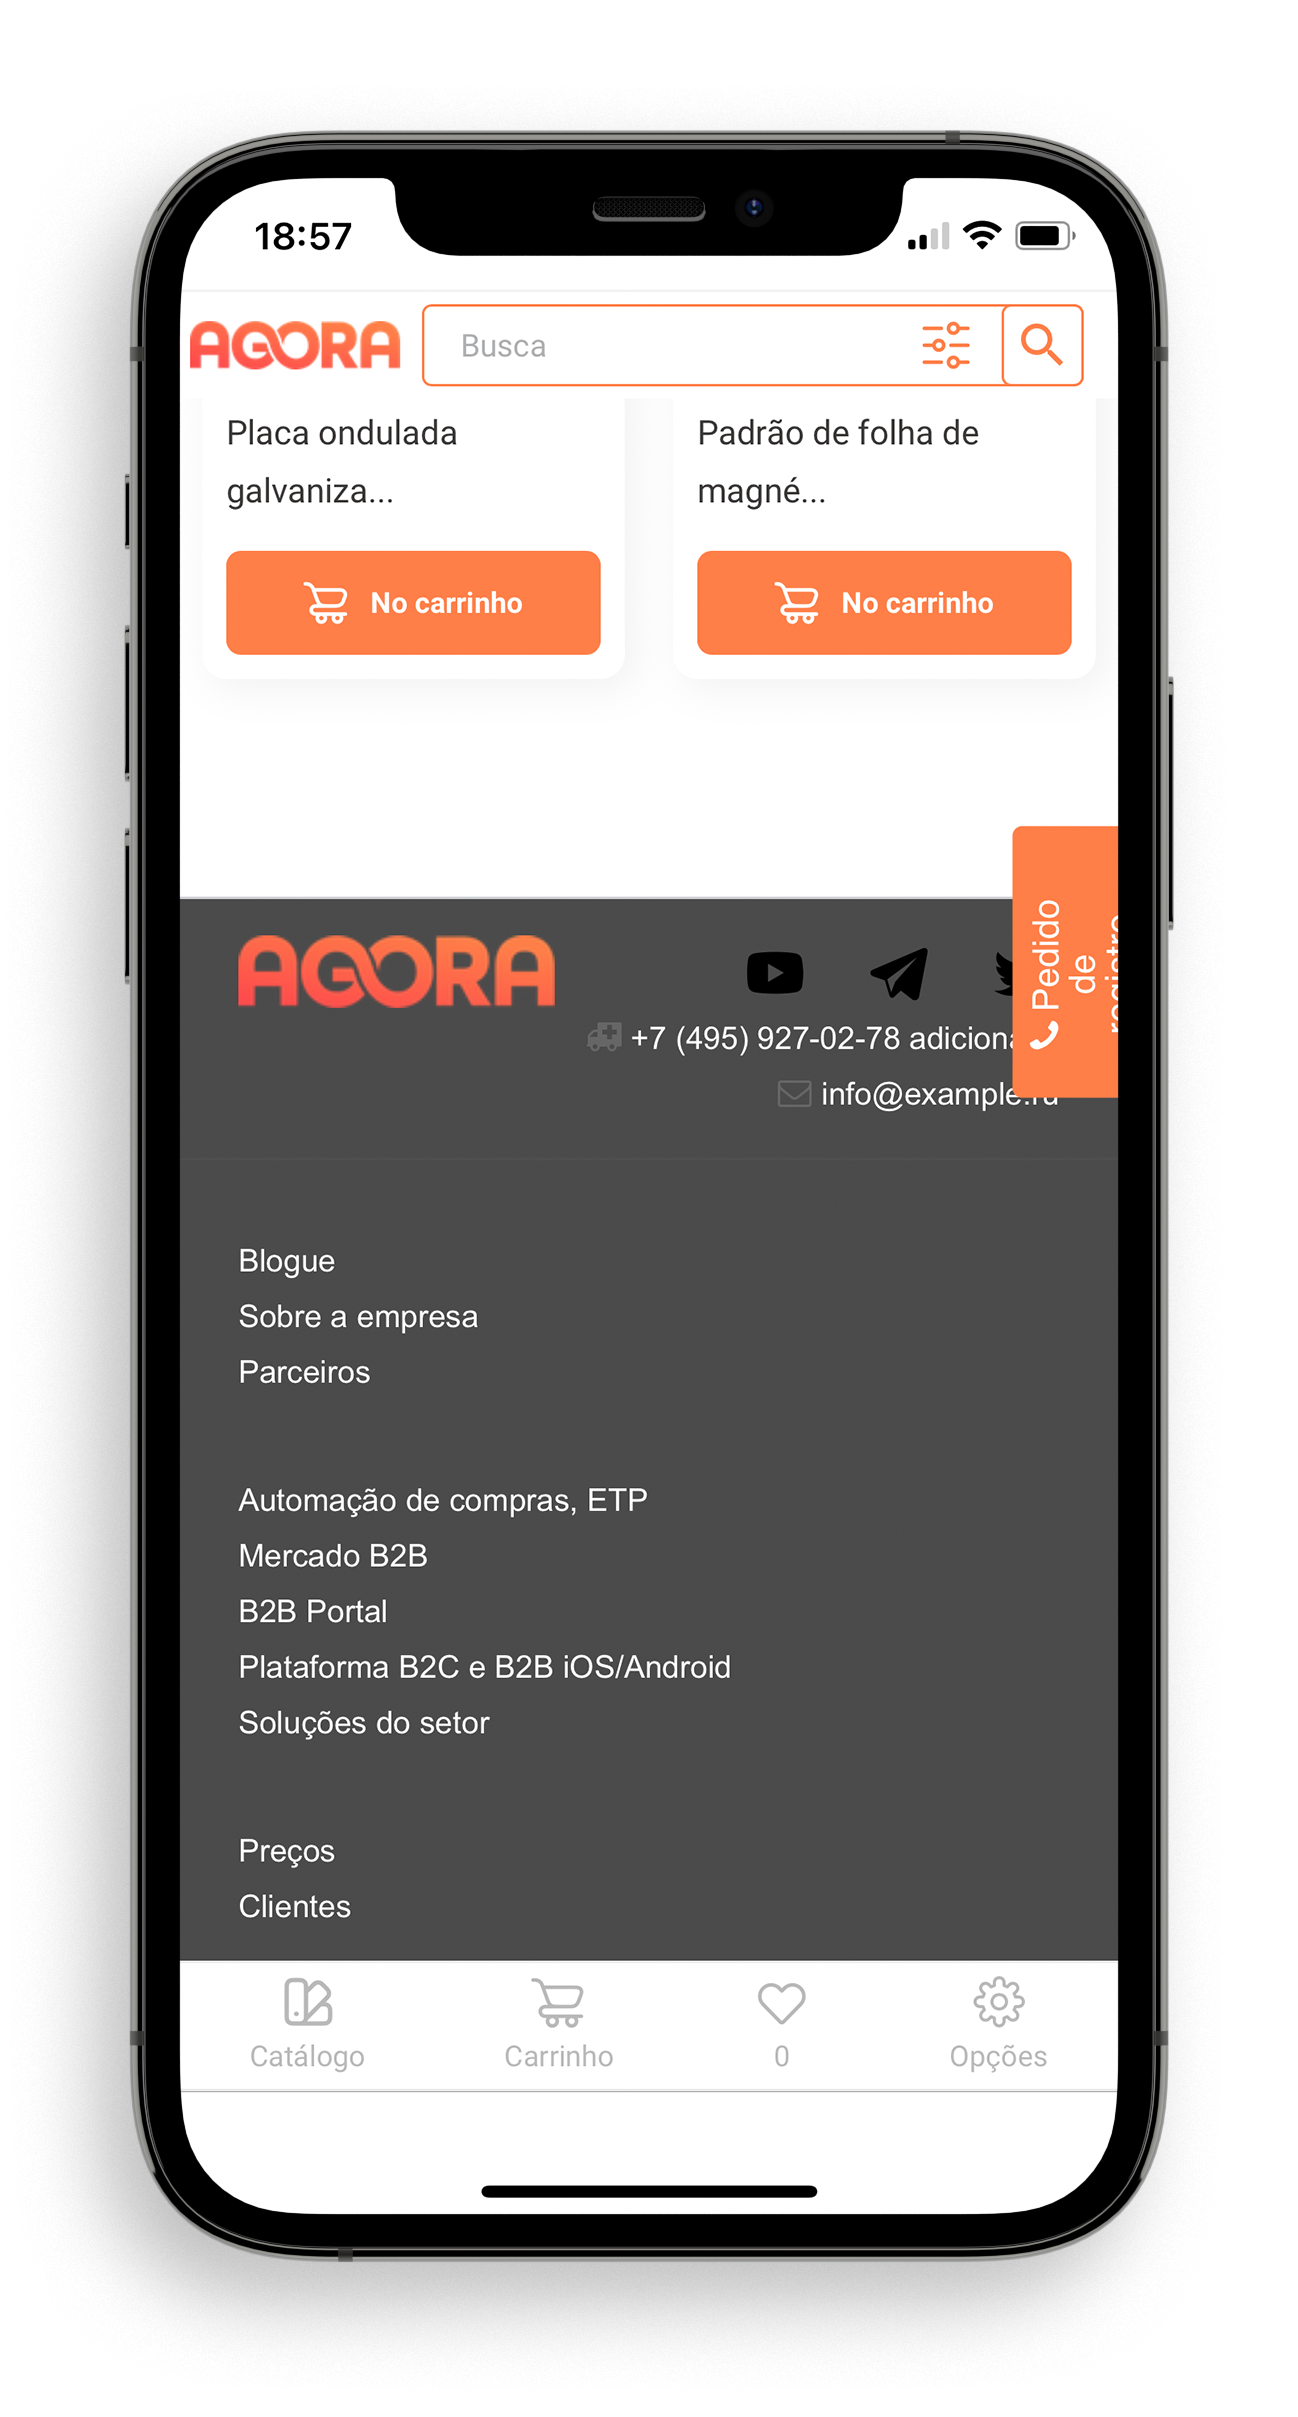
На планшете:
На мобильном телефоне:
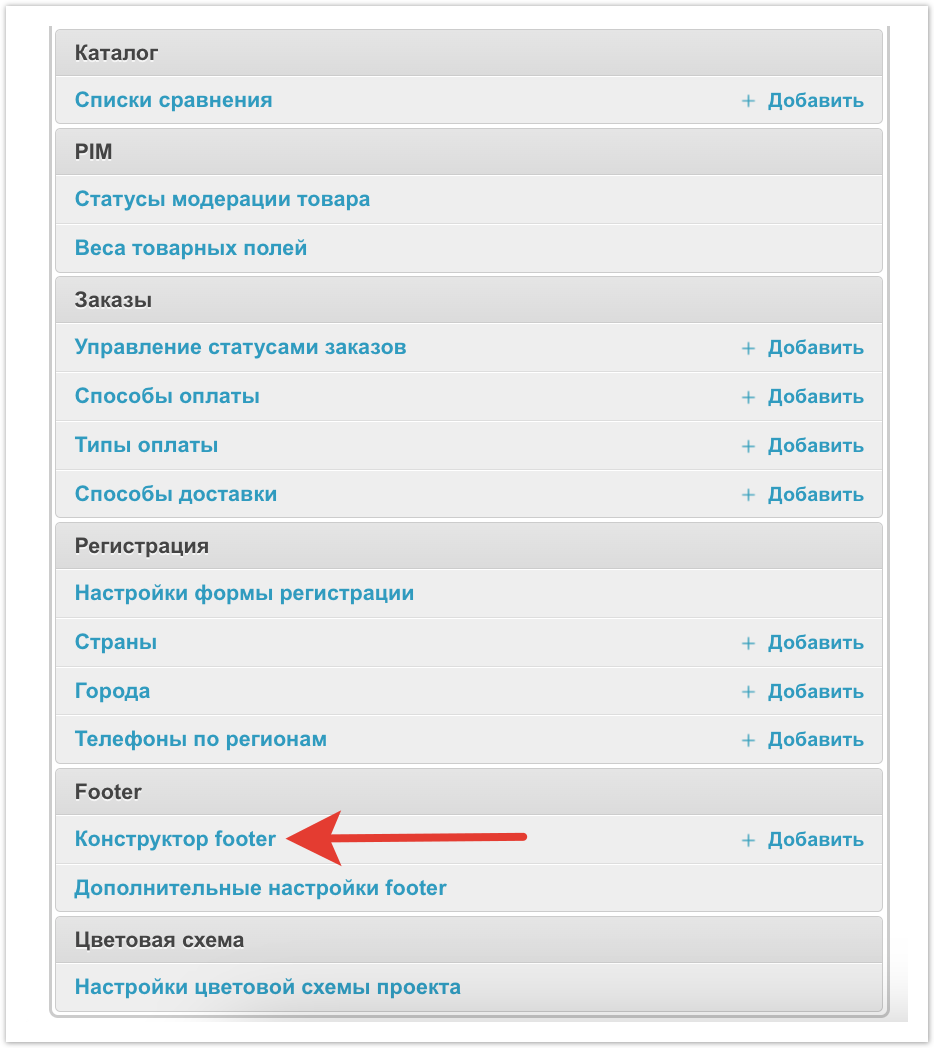
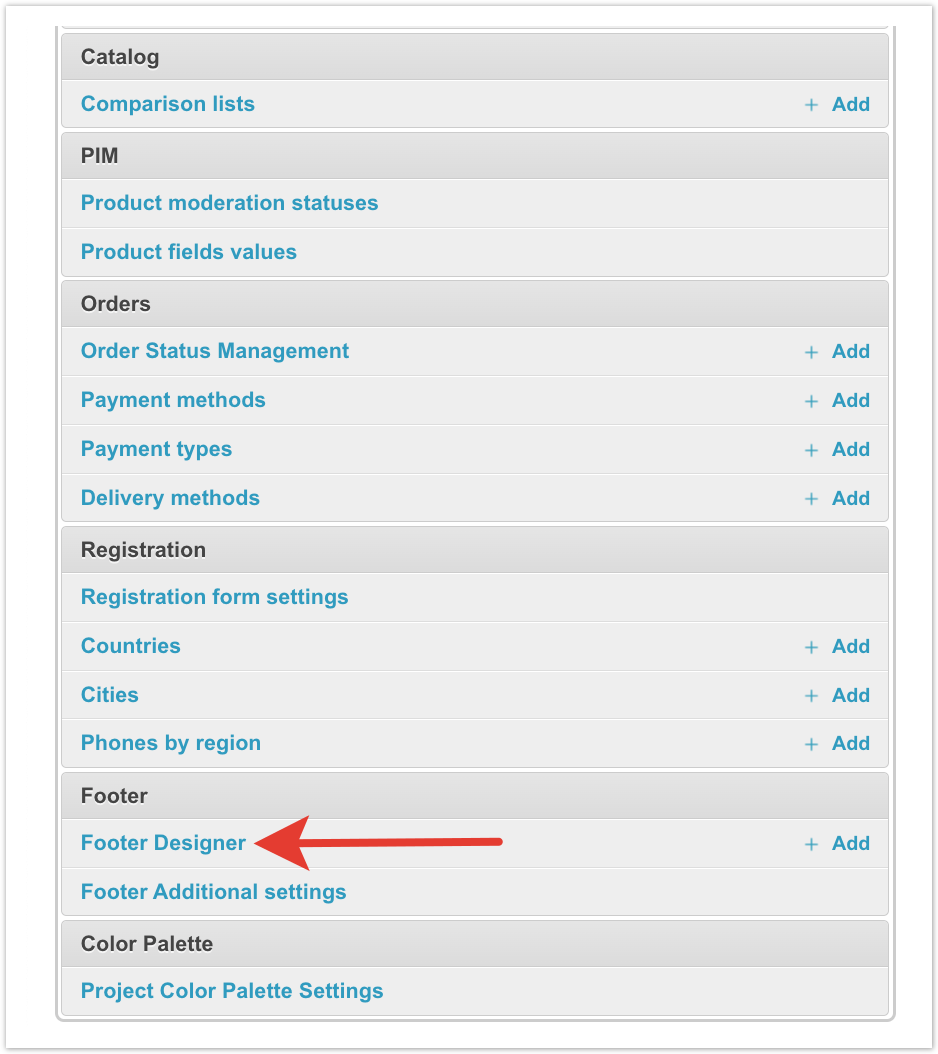
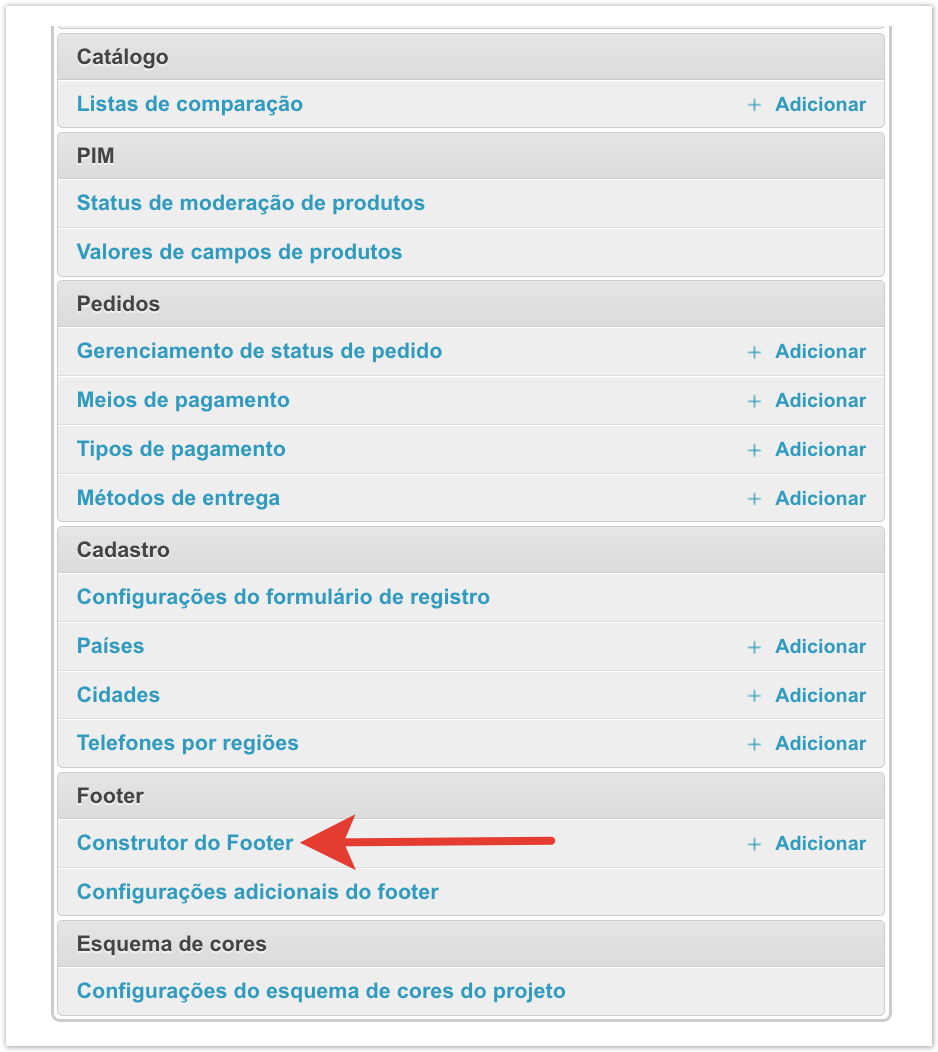
Конструктор футераНастроить содержимое футера можно через панель администратора. Для этого нужно перейти в раздел Конструктор footer.
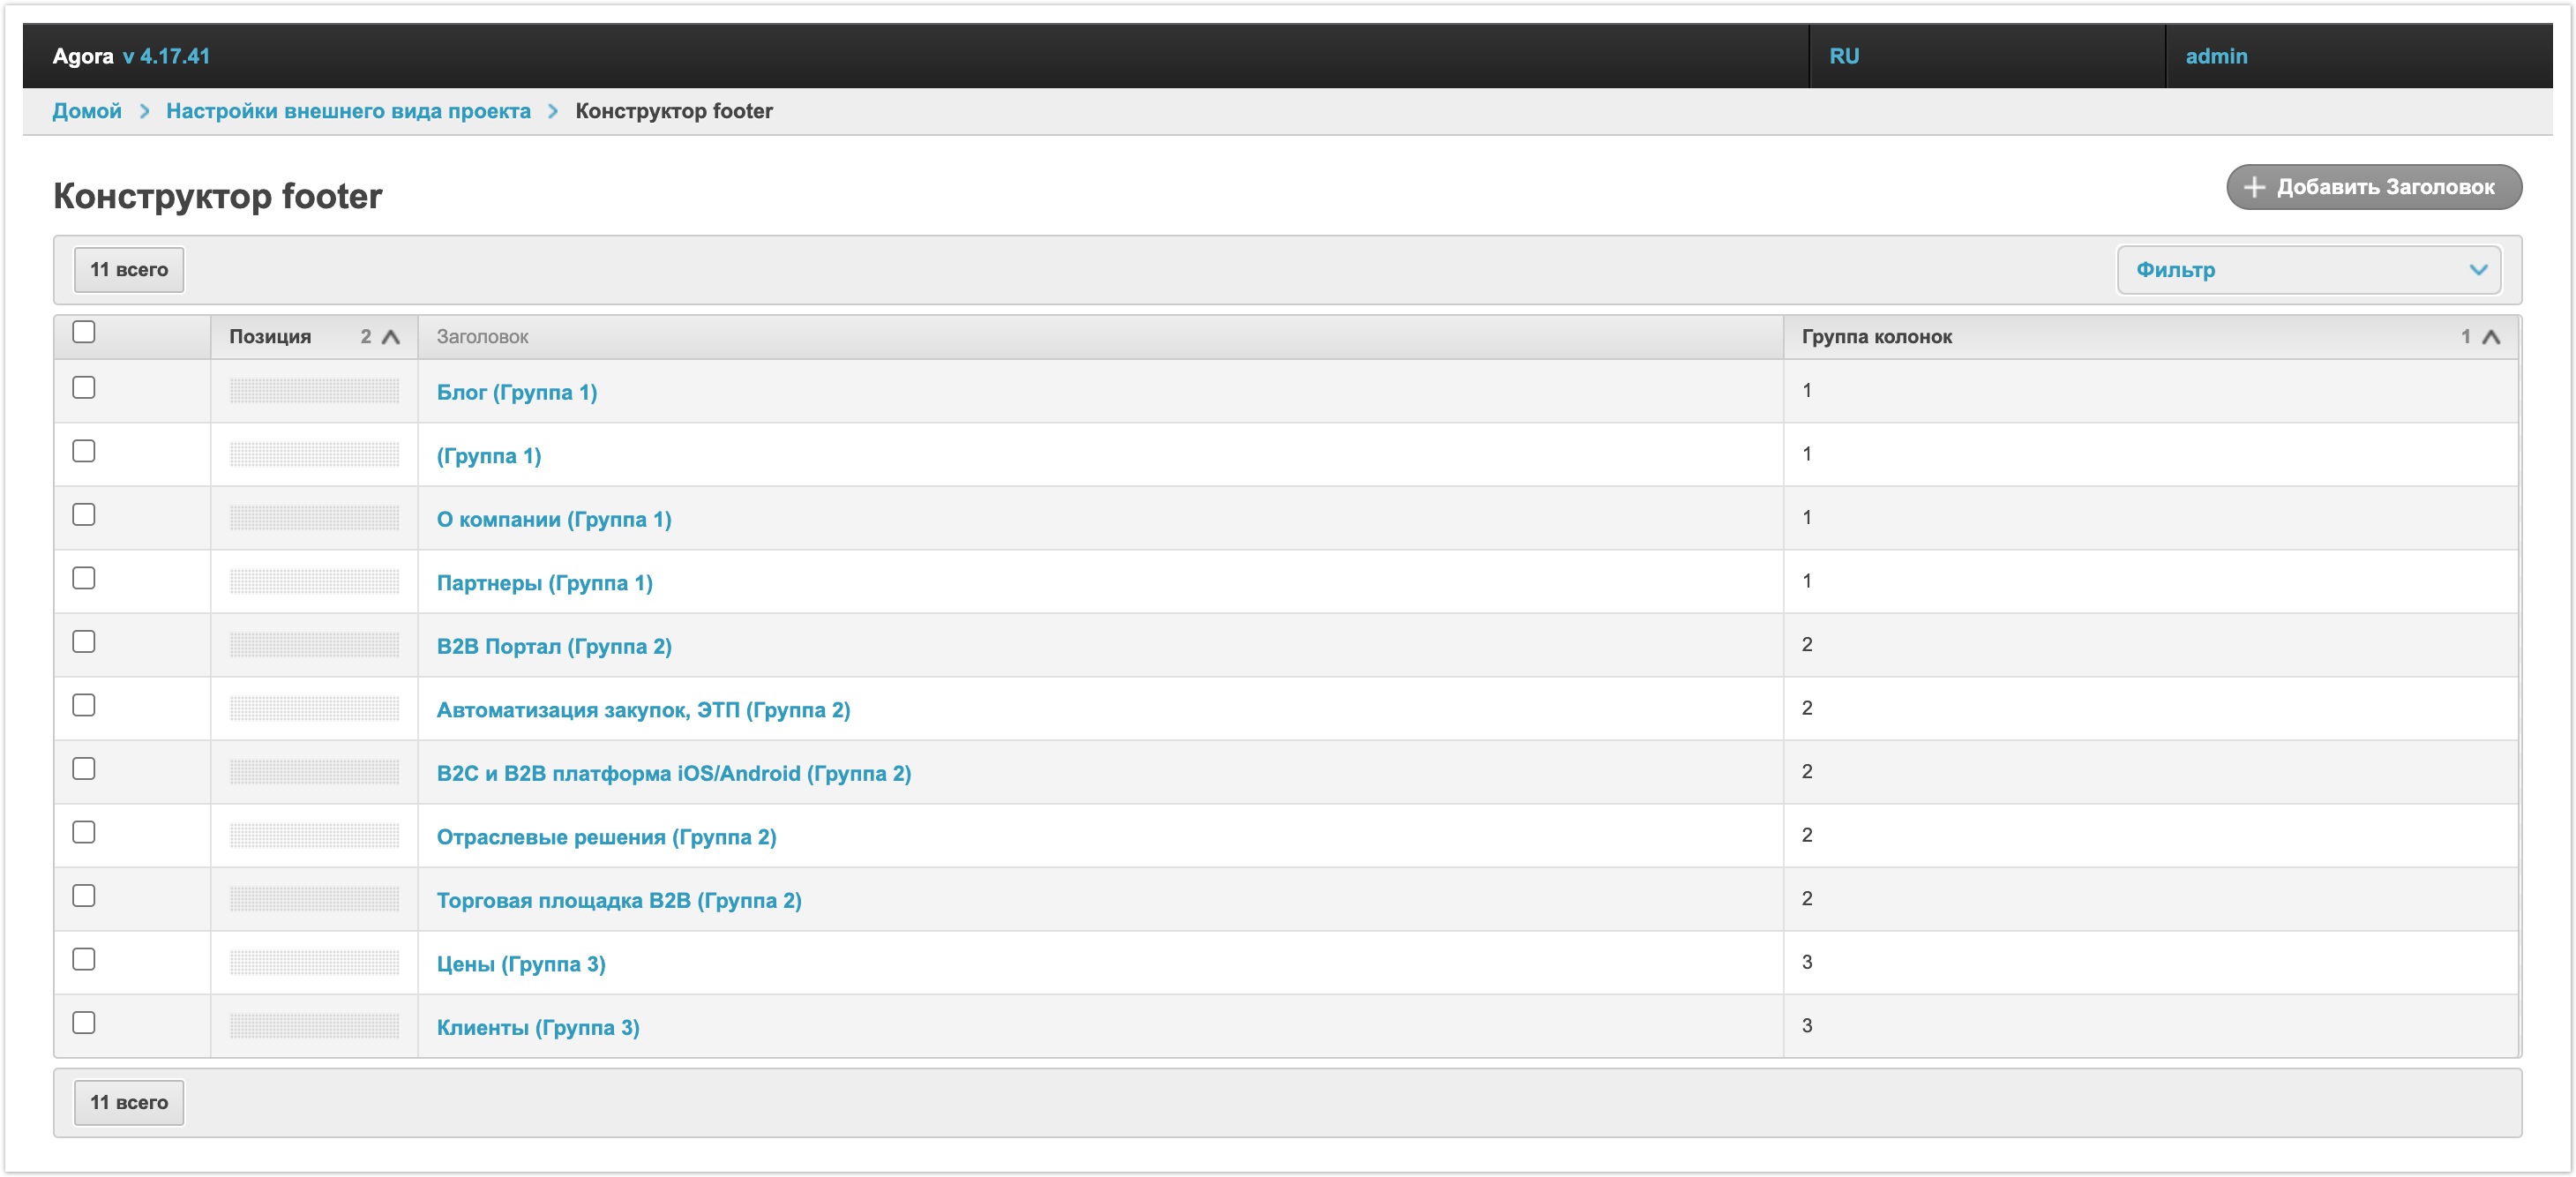
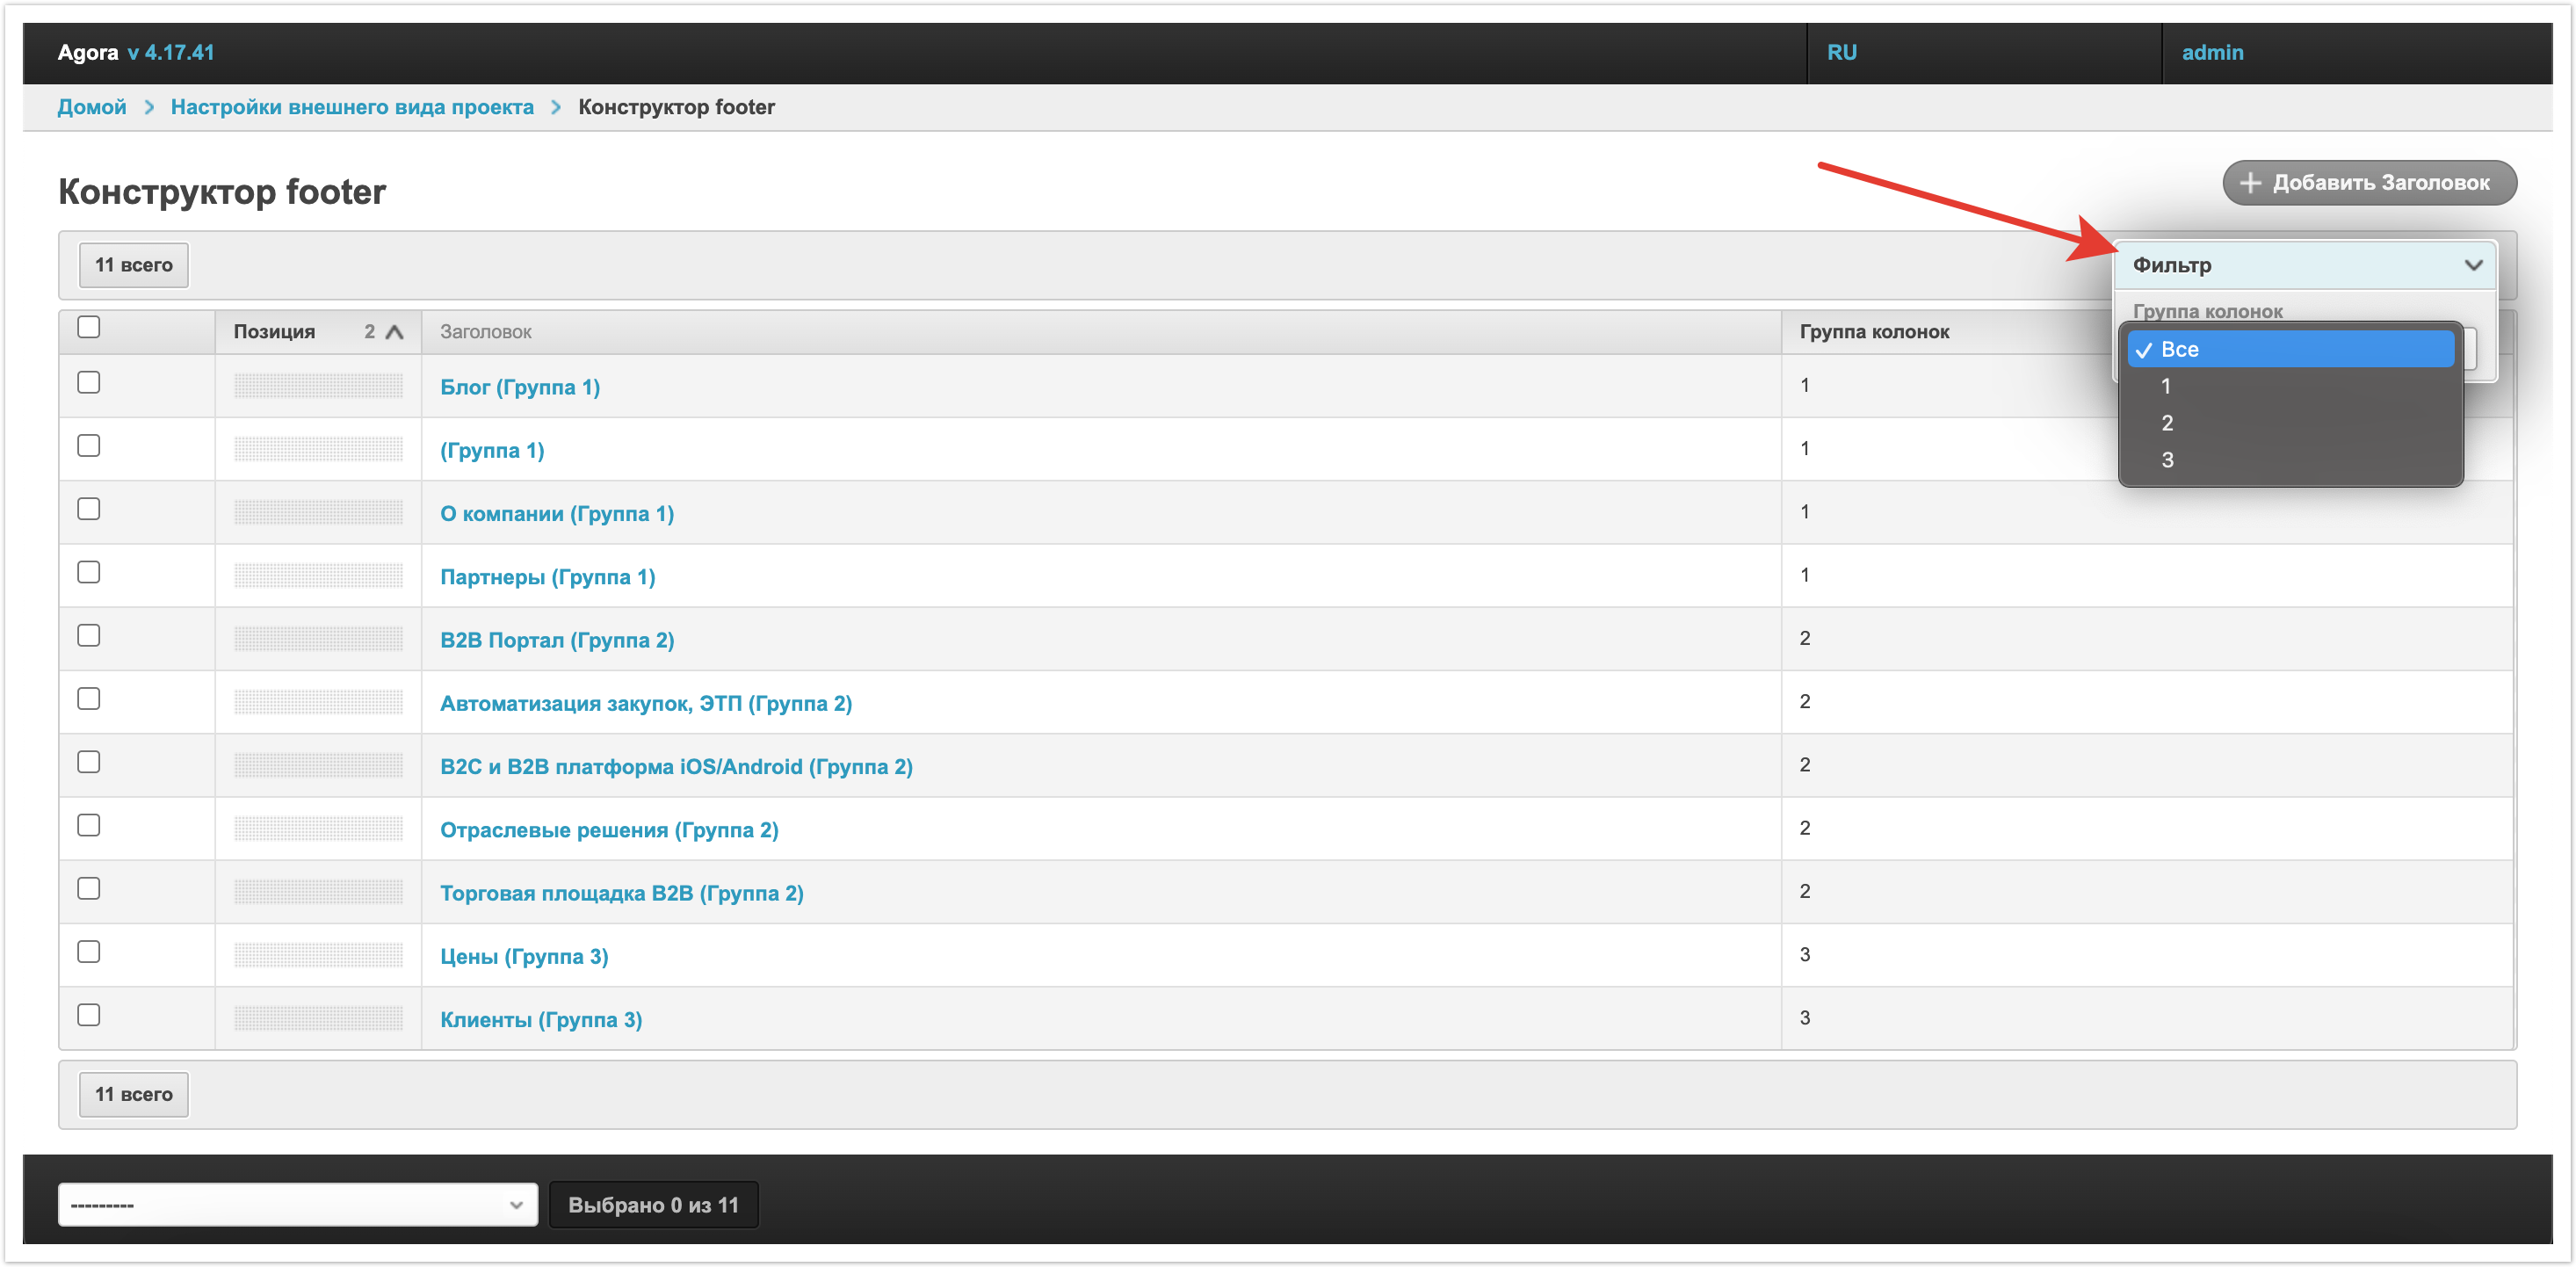
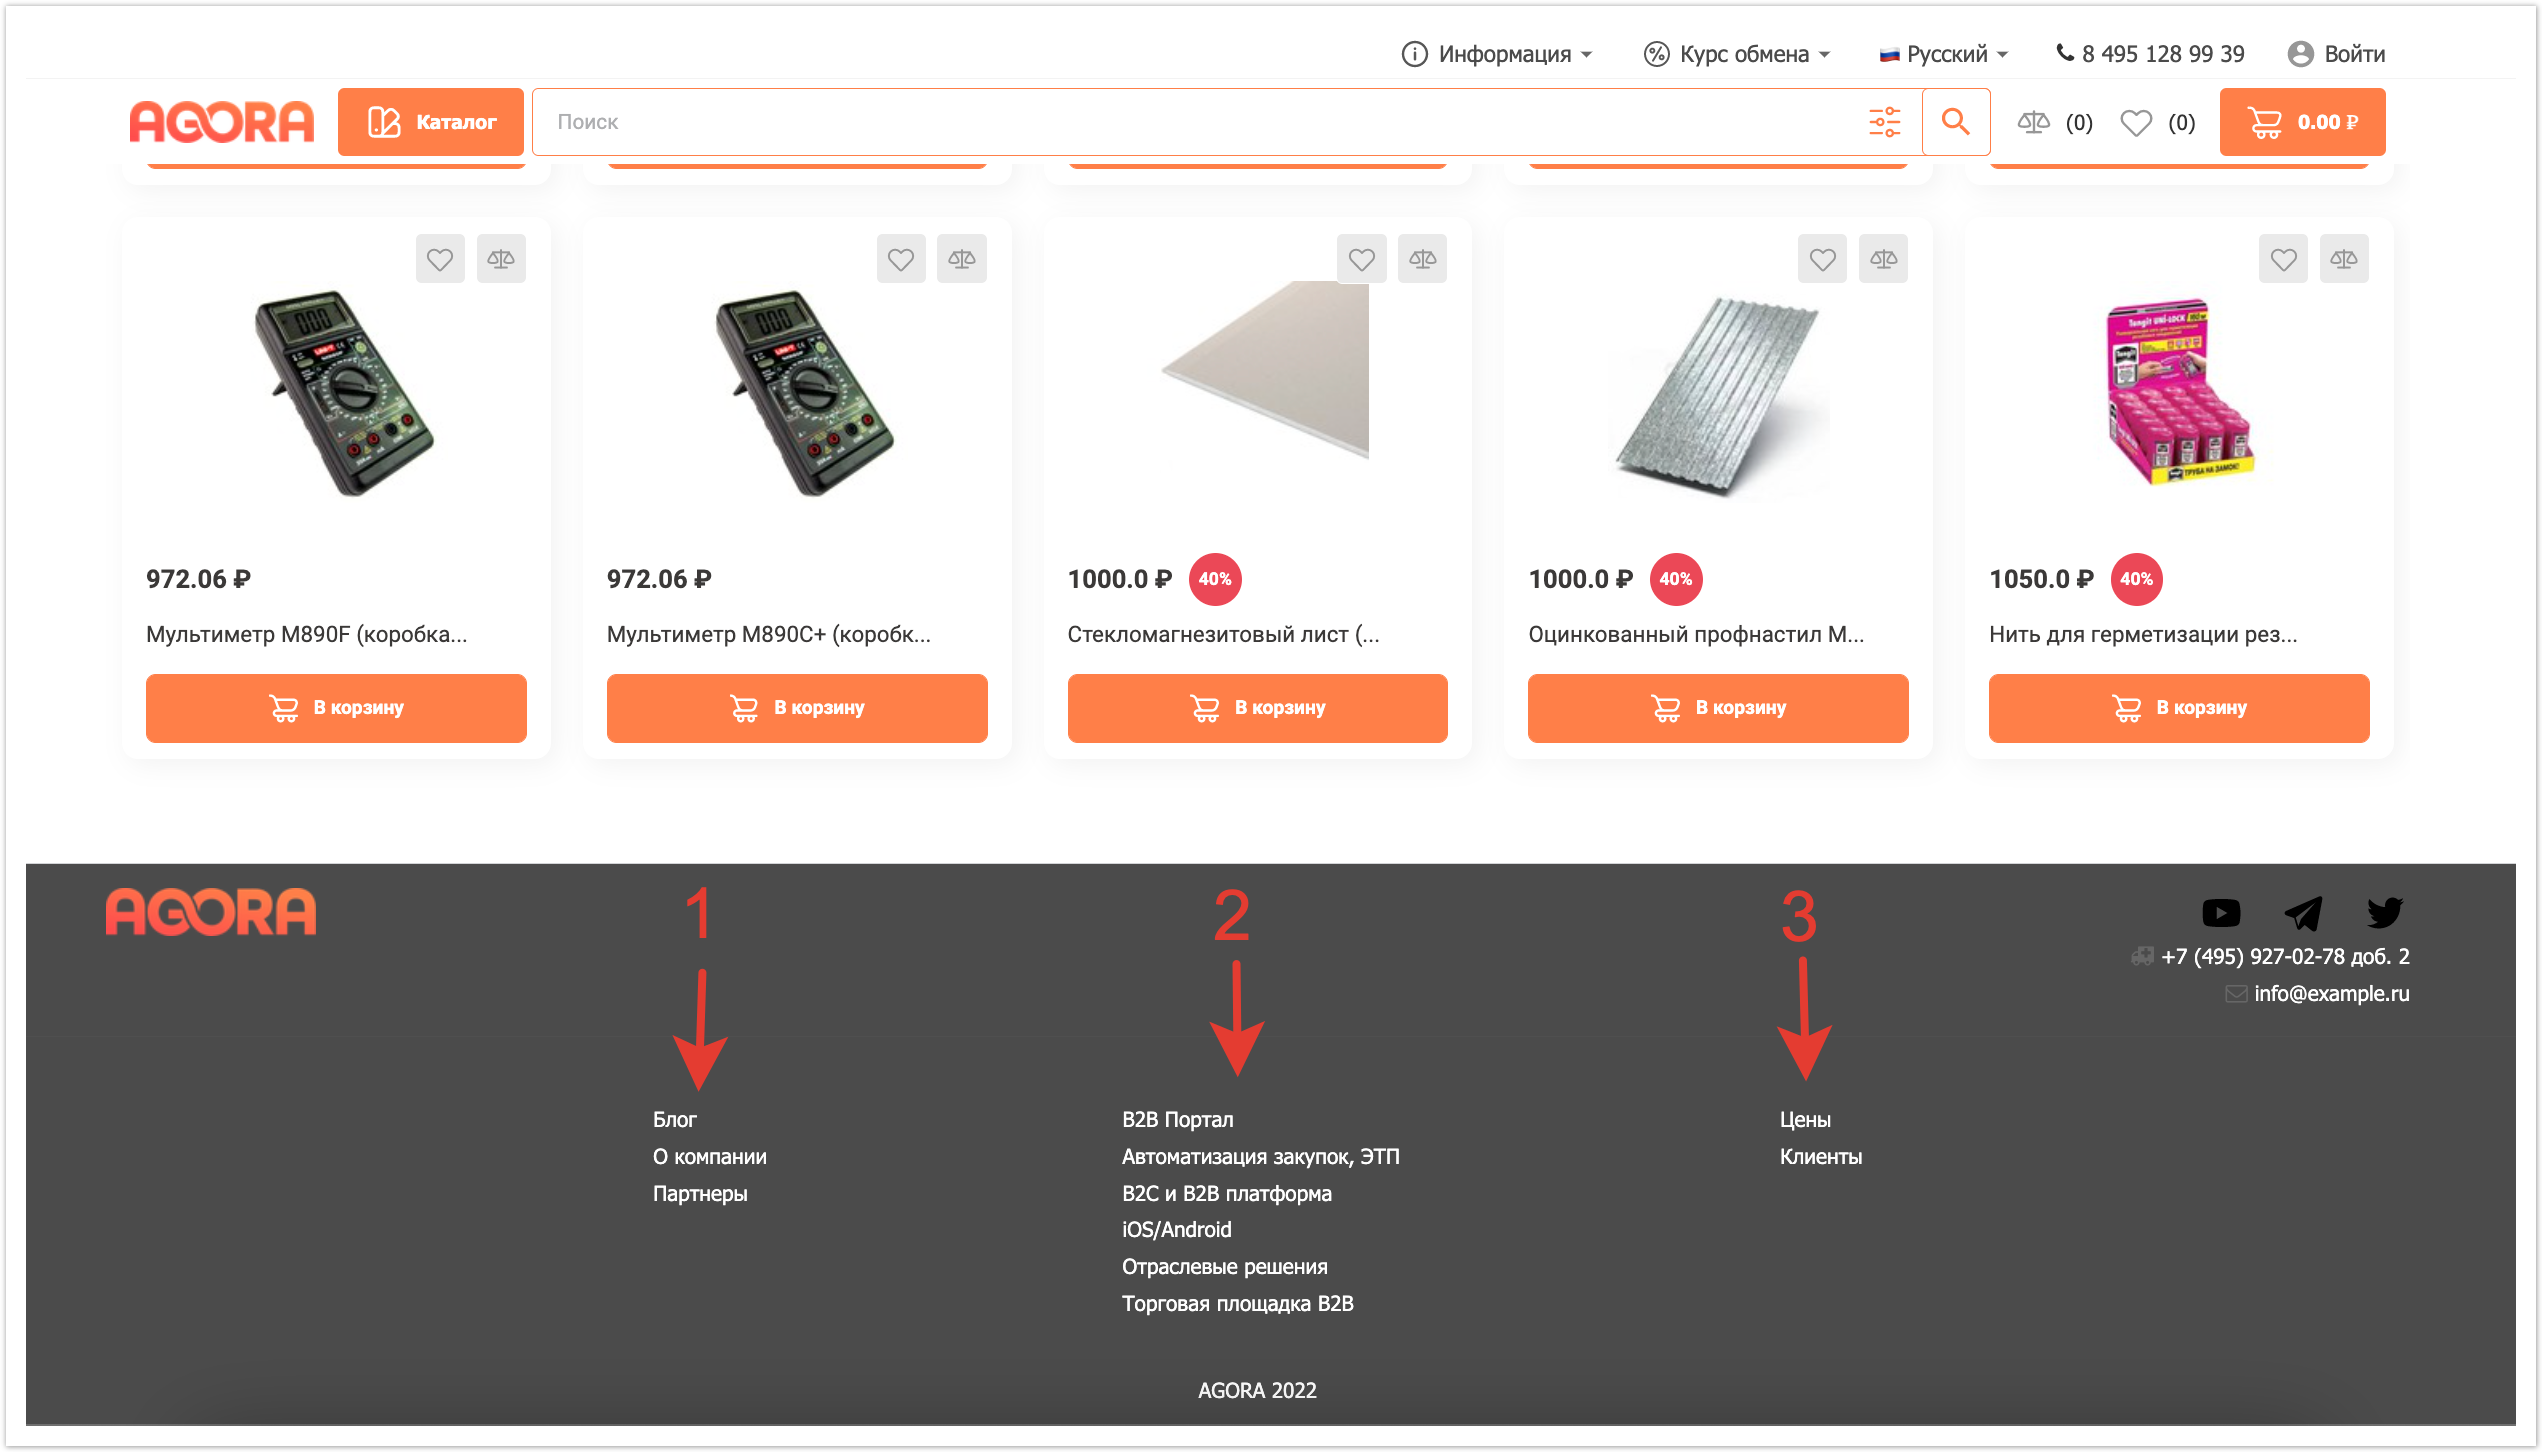
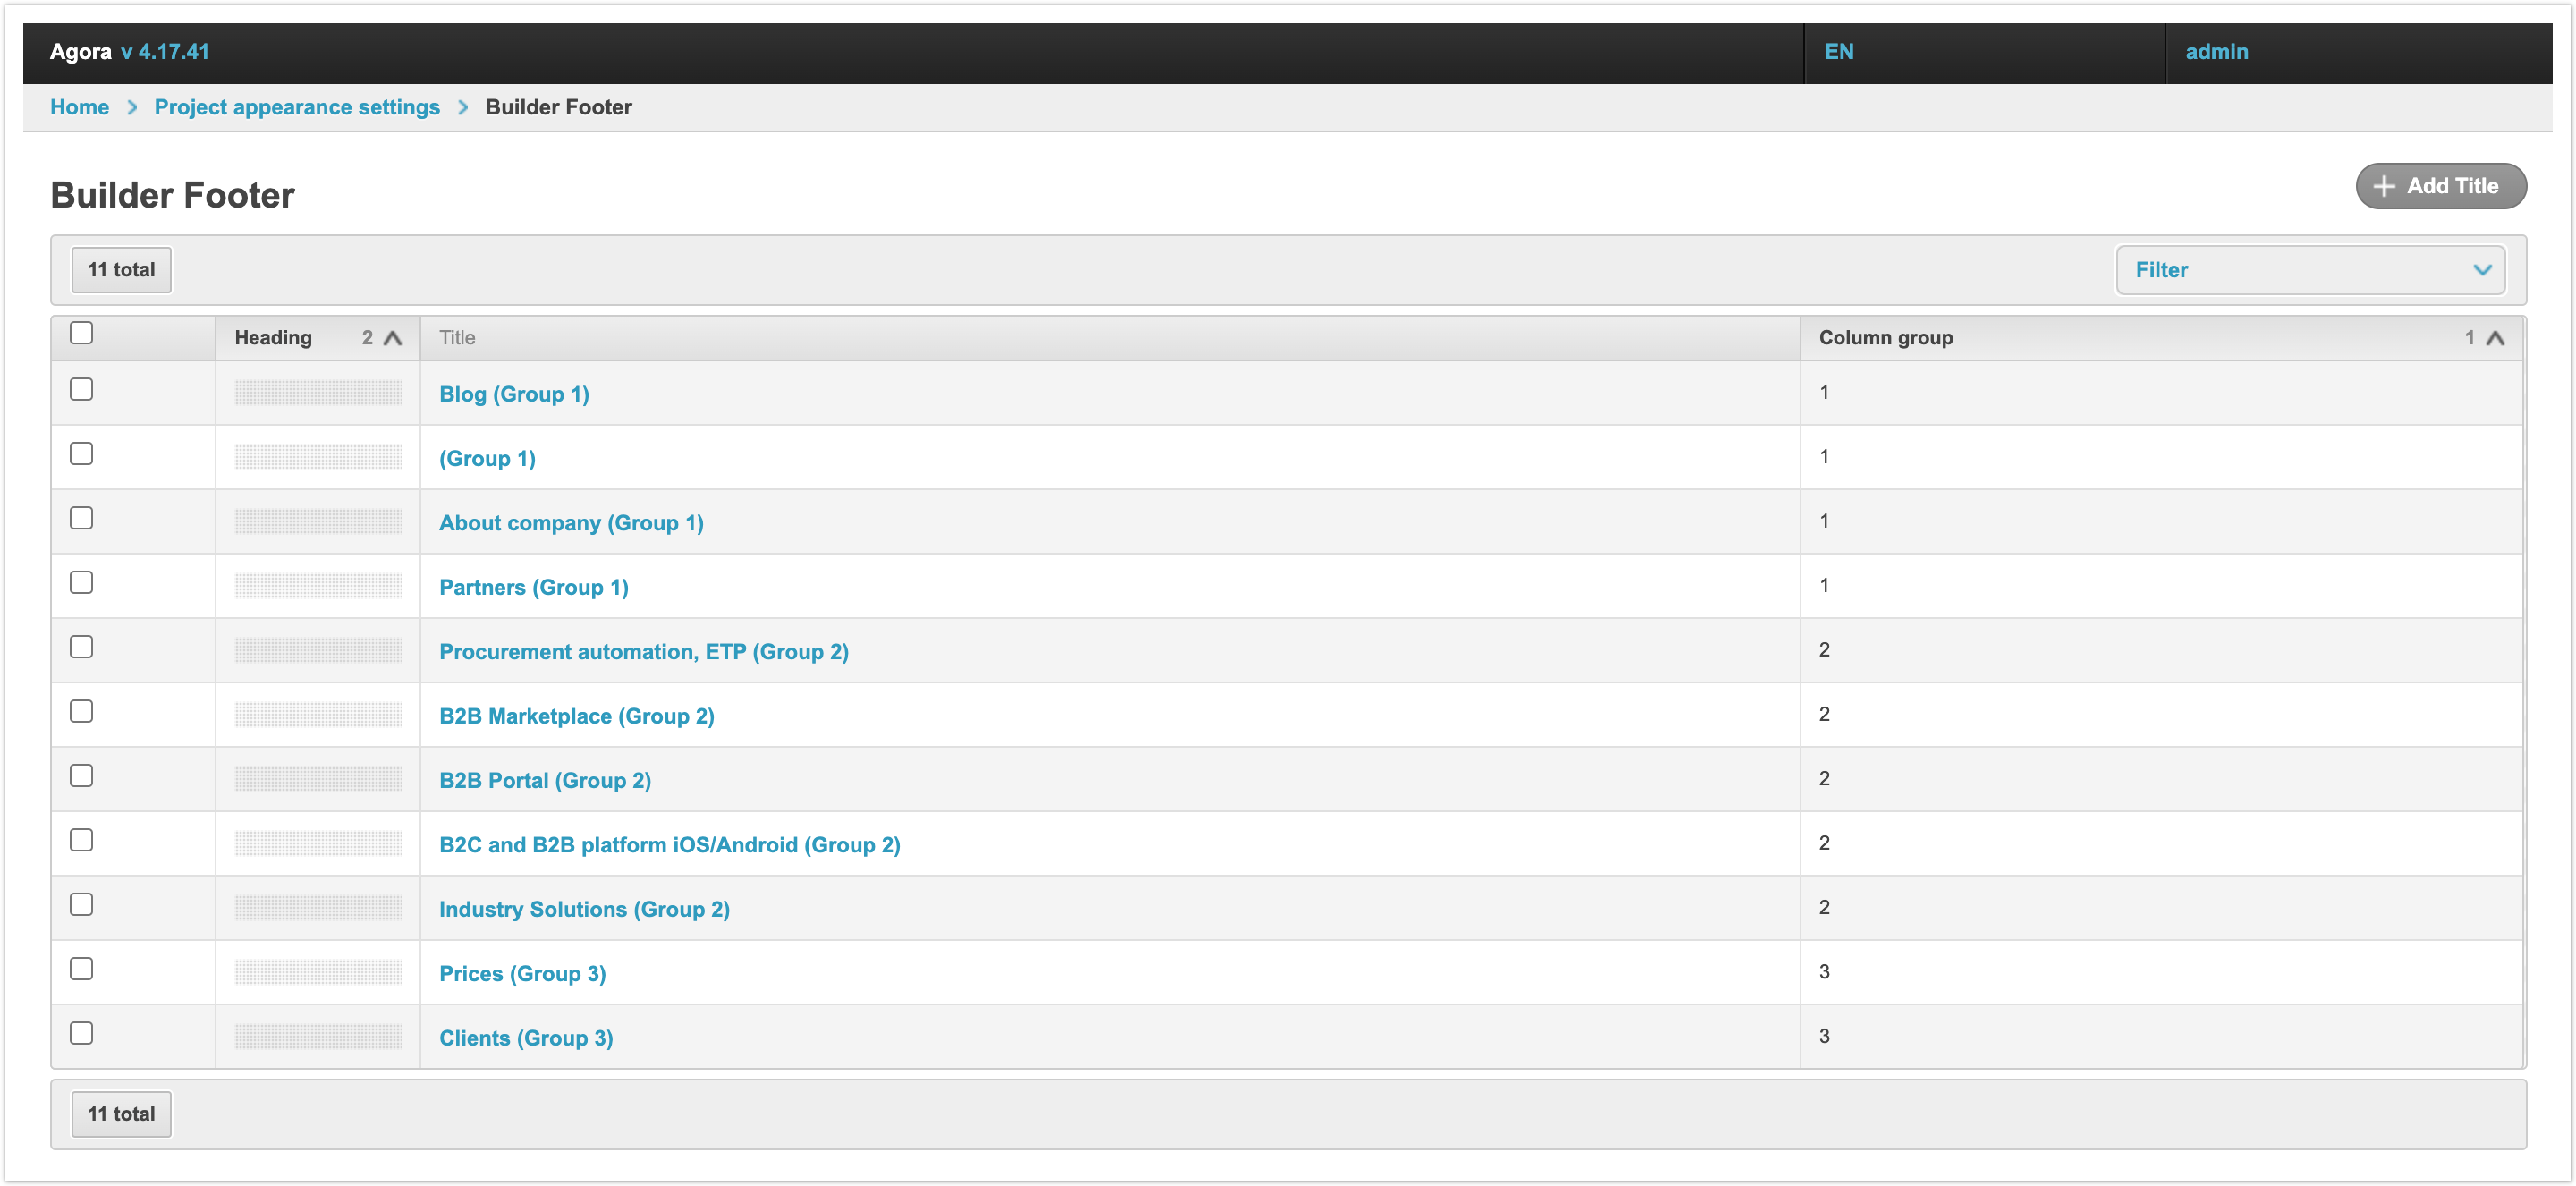
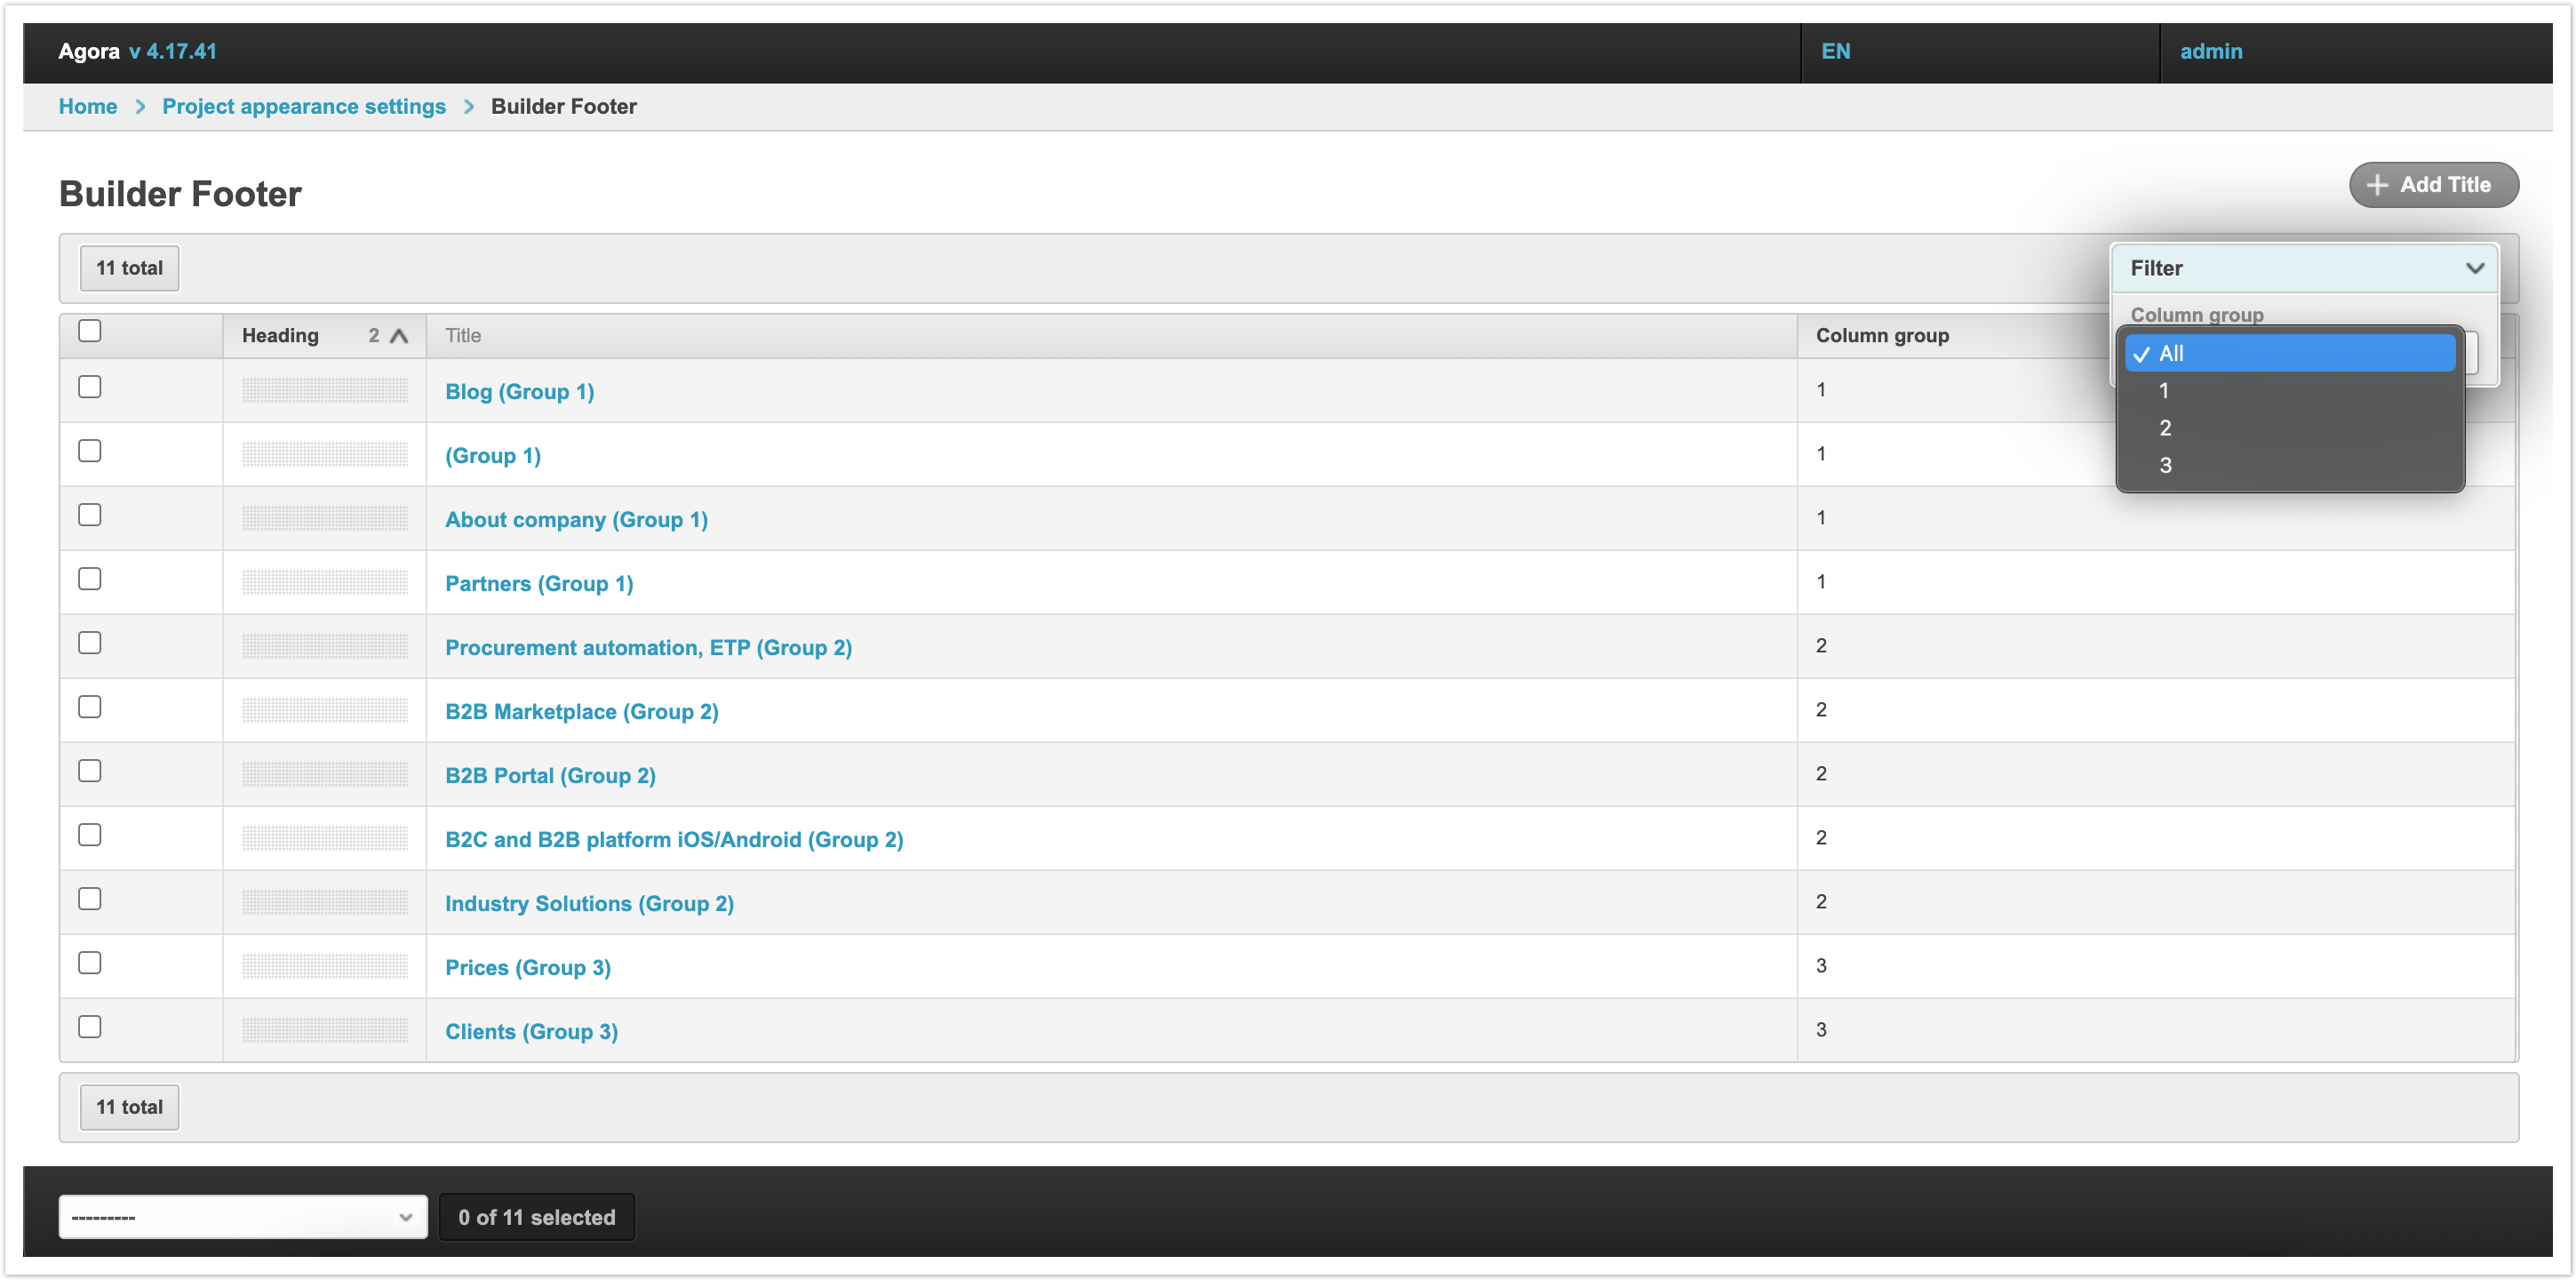
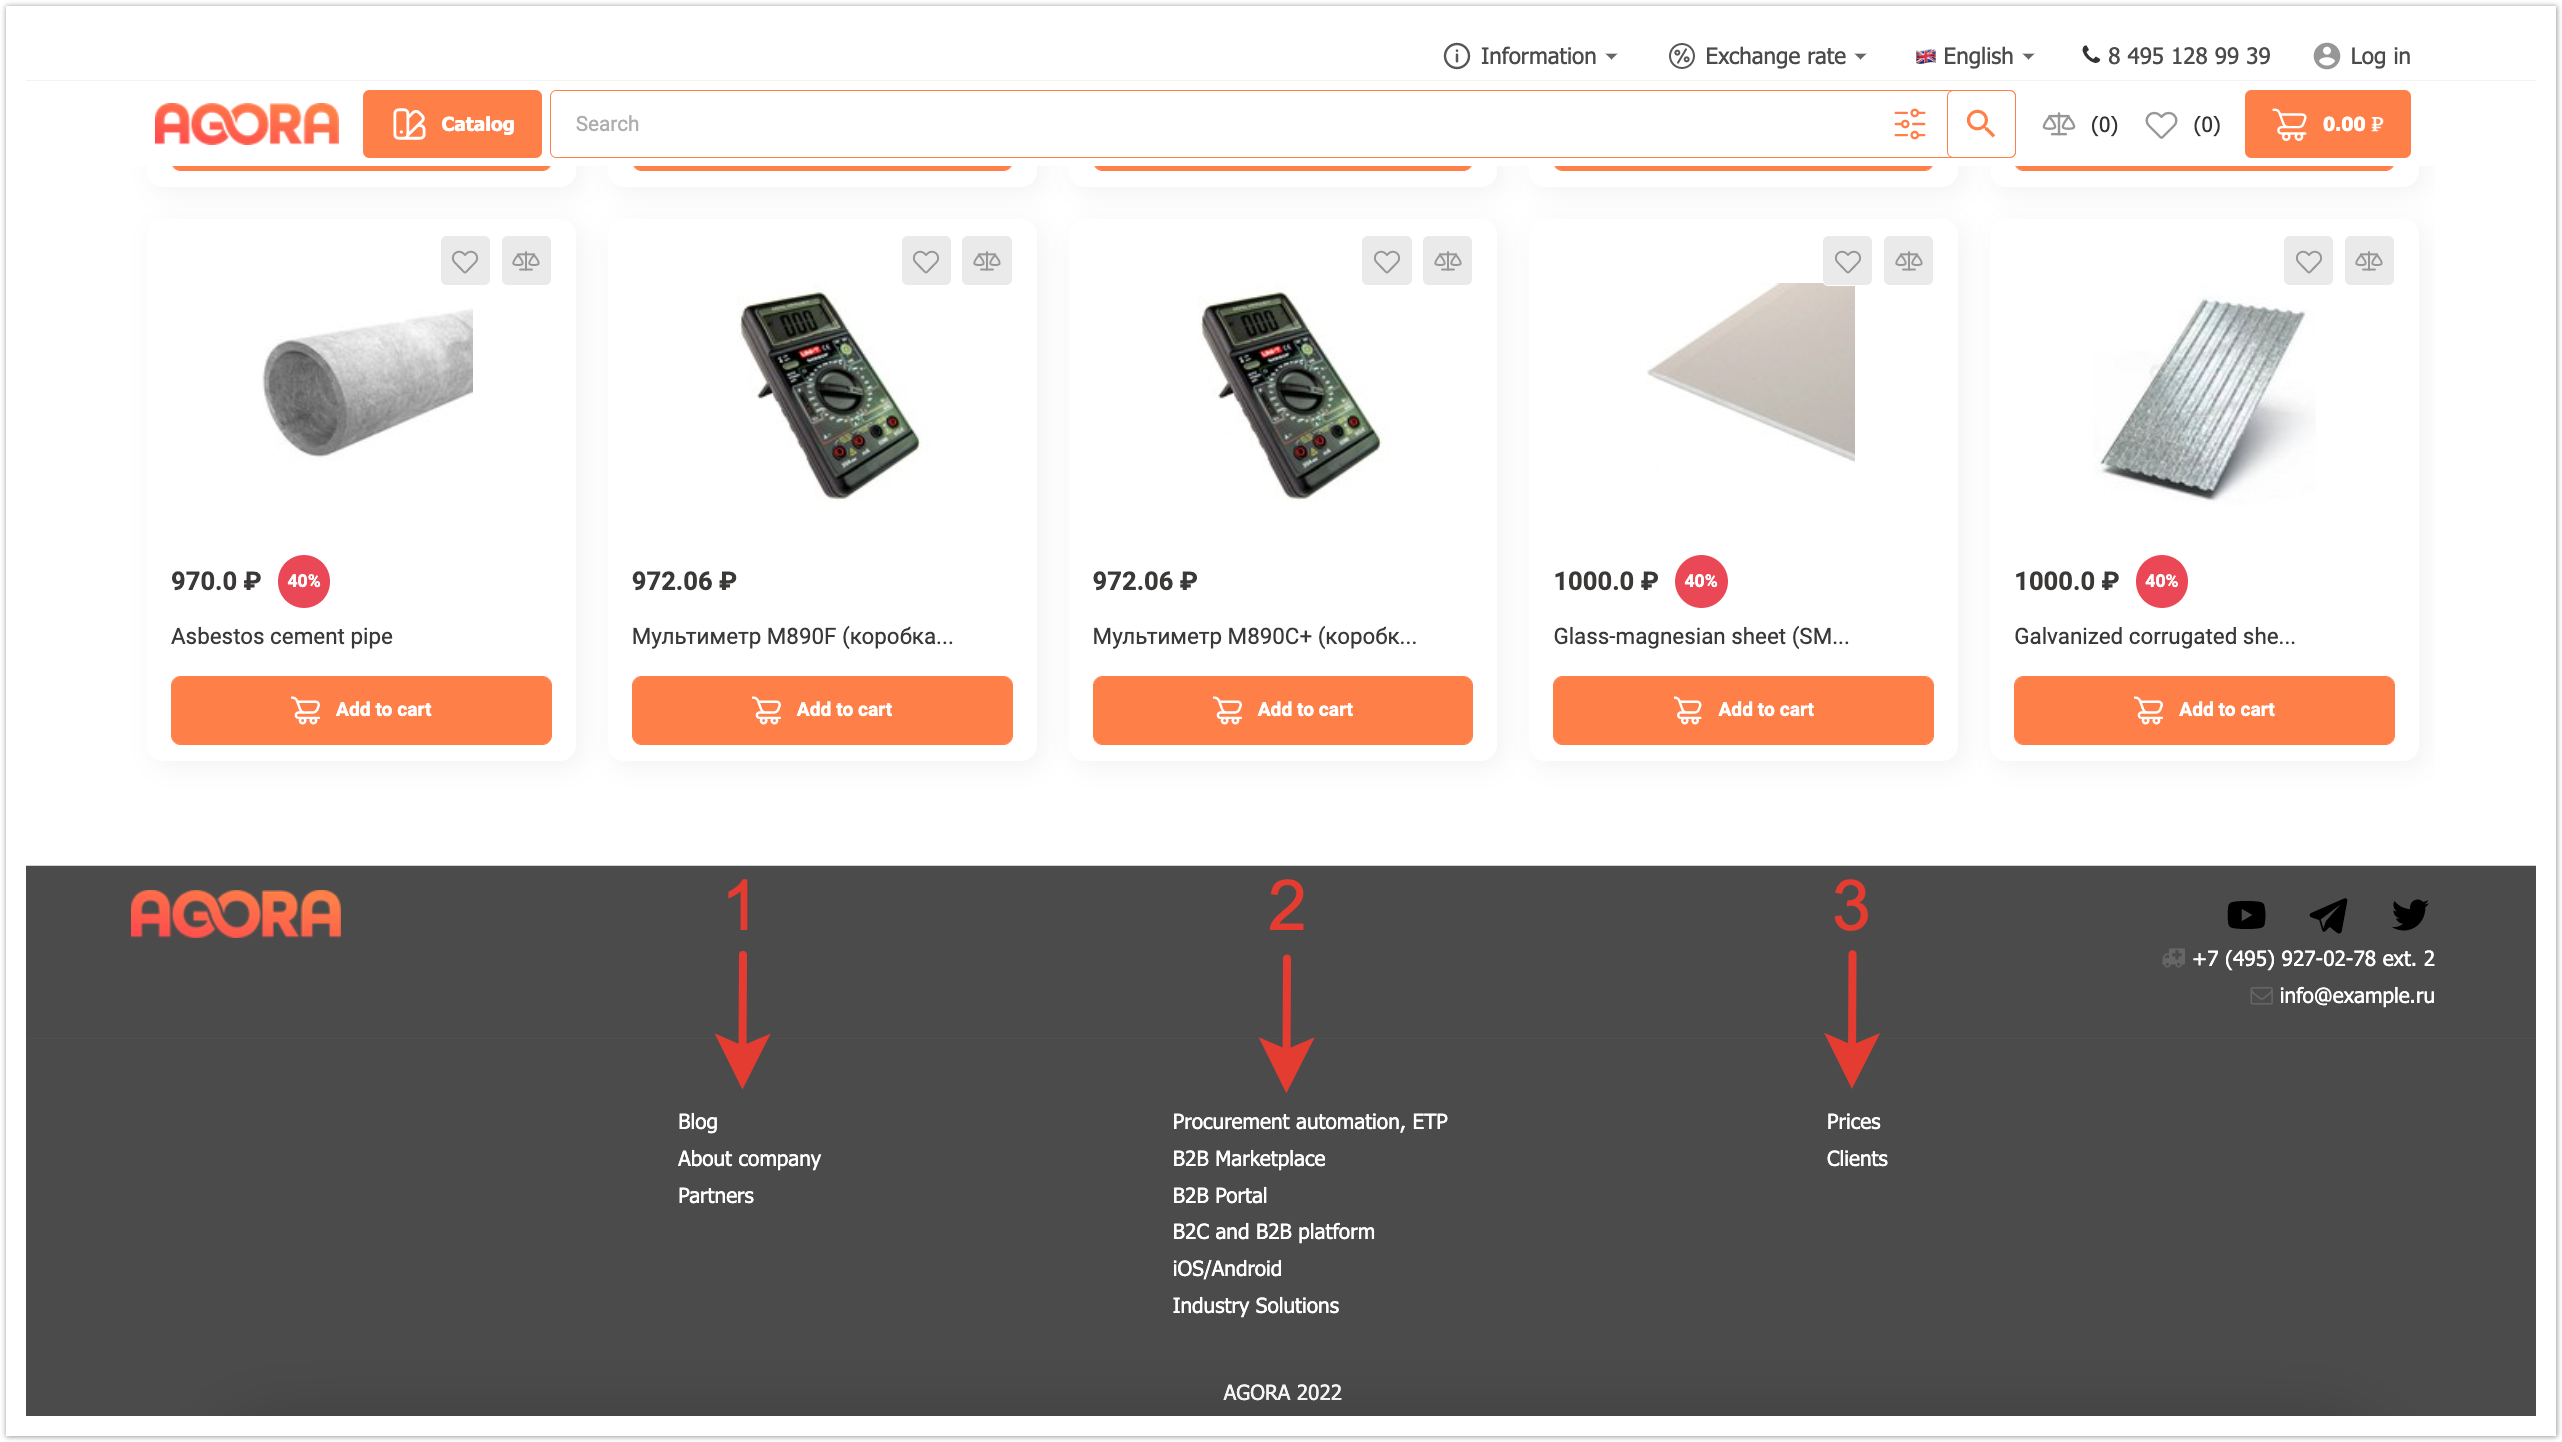
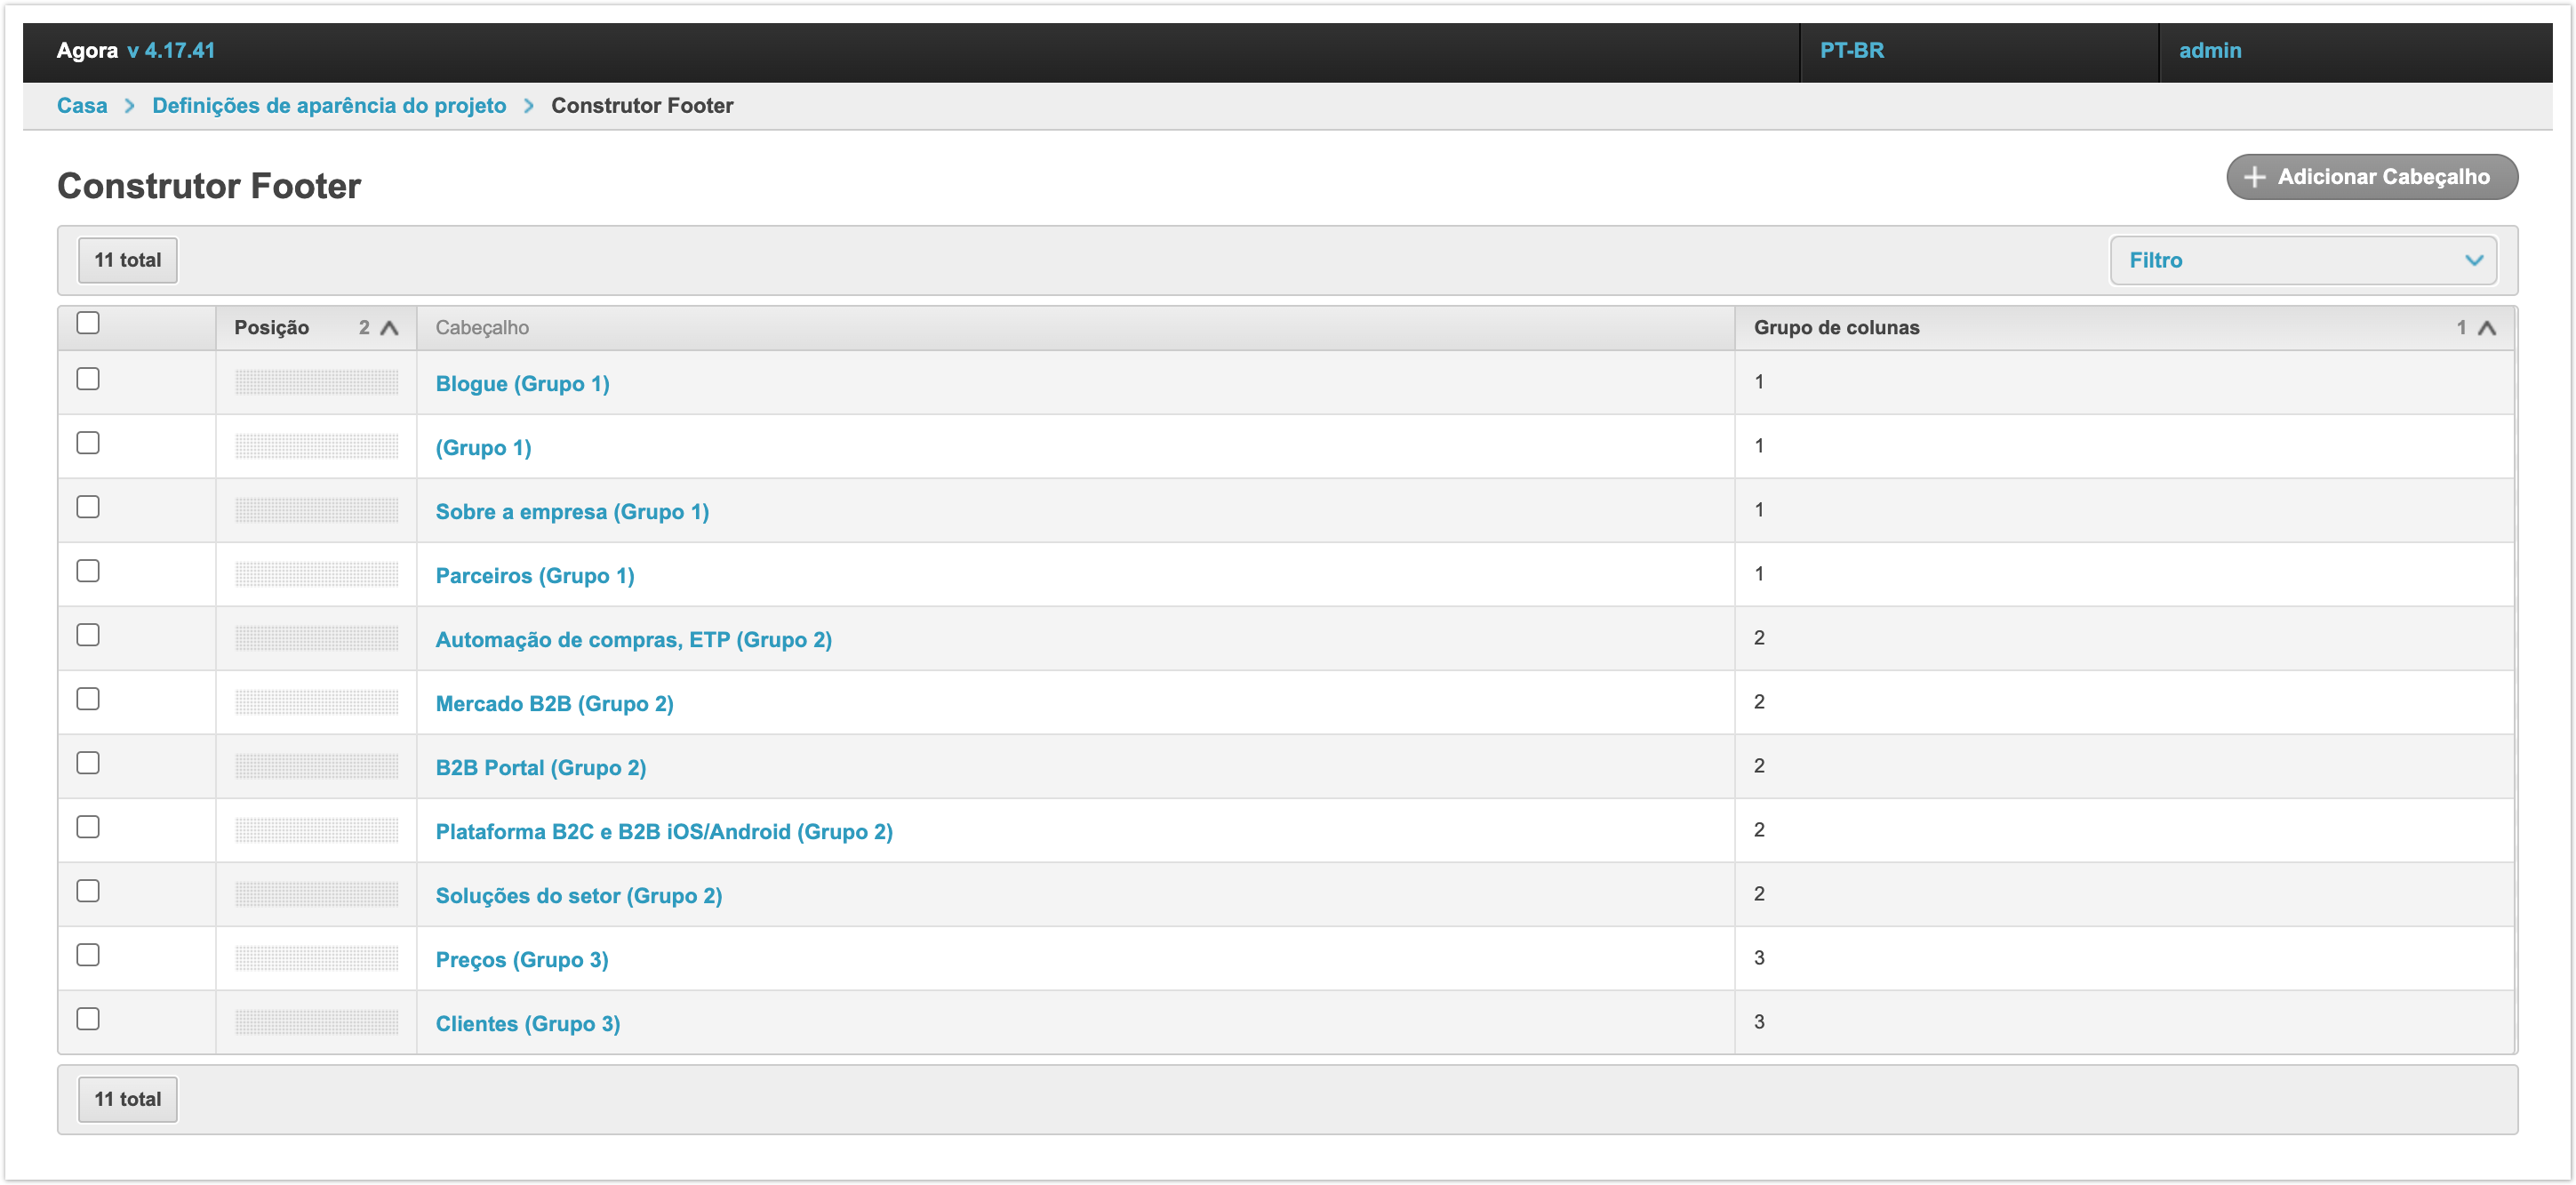
На открывшейся странице отображены разделы футера, которые ранее были созданы.
Позиция - этот столбец с помощью функционала Drag-and-drop позволяет изменять порядок вывода заголовков на странице. Достаточно потянуть за серый прямоугольник в нужной строке и перенести на то место, которое он должен занимать. Заголовок - в этом столбце указаны заголовки, которые помогают администратору платформы ориентироваться по списку. Группа колонок - этот столбец показывает, к какой группе относится каждый заголовок. По умолчанию строки сортируются именно по этому значению, то есть сначала выводятся все заголовки, которые относятся к первой группе, потом ко второй и потом к третьей. На странице также доступна фильтрация по группе колонок. С ее помощью можно вывести только те заголовки, которые относятся к конкретной группе.
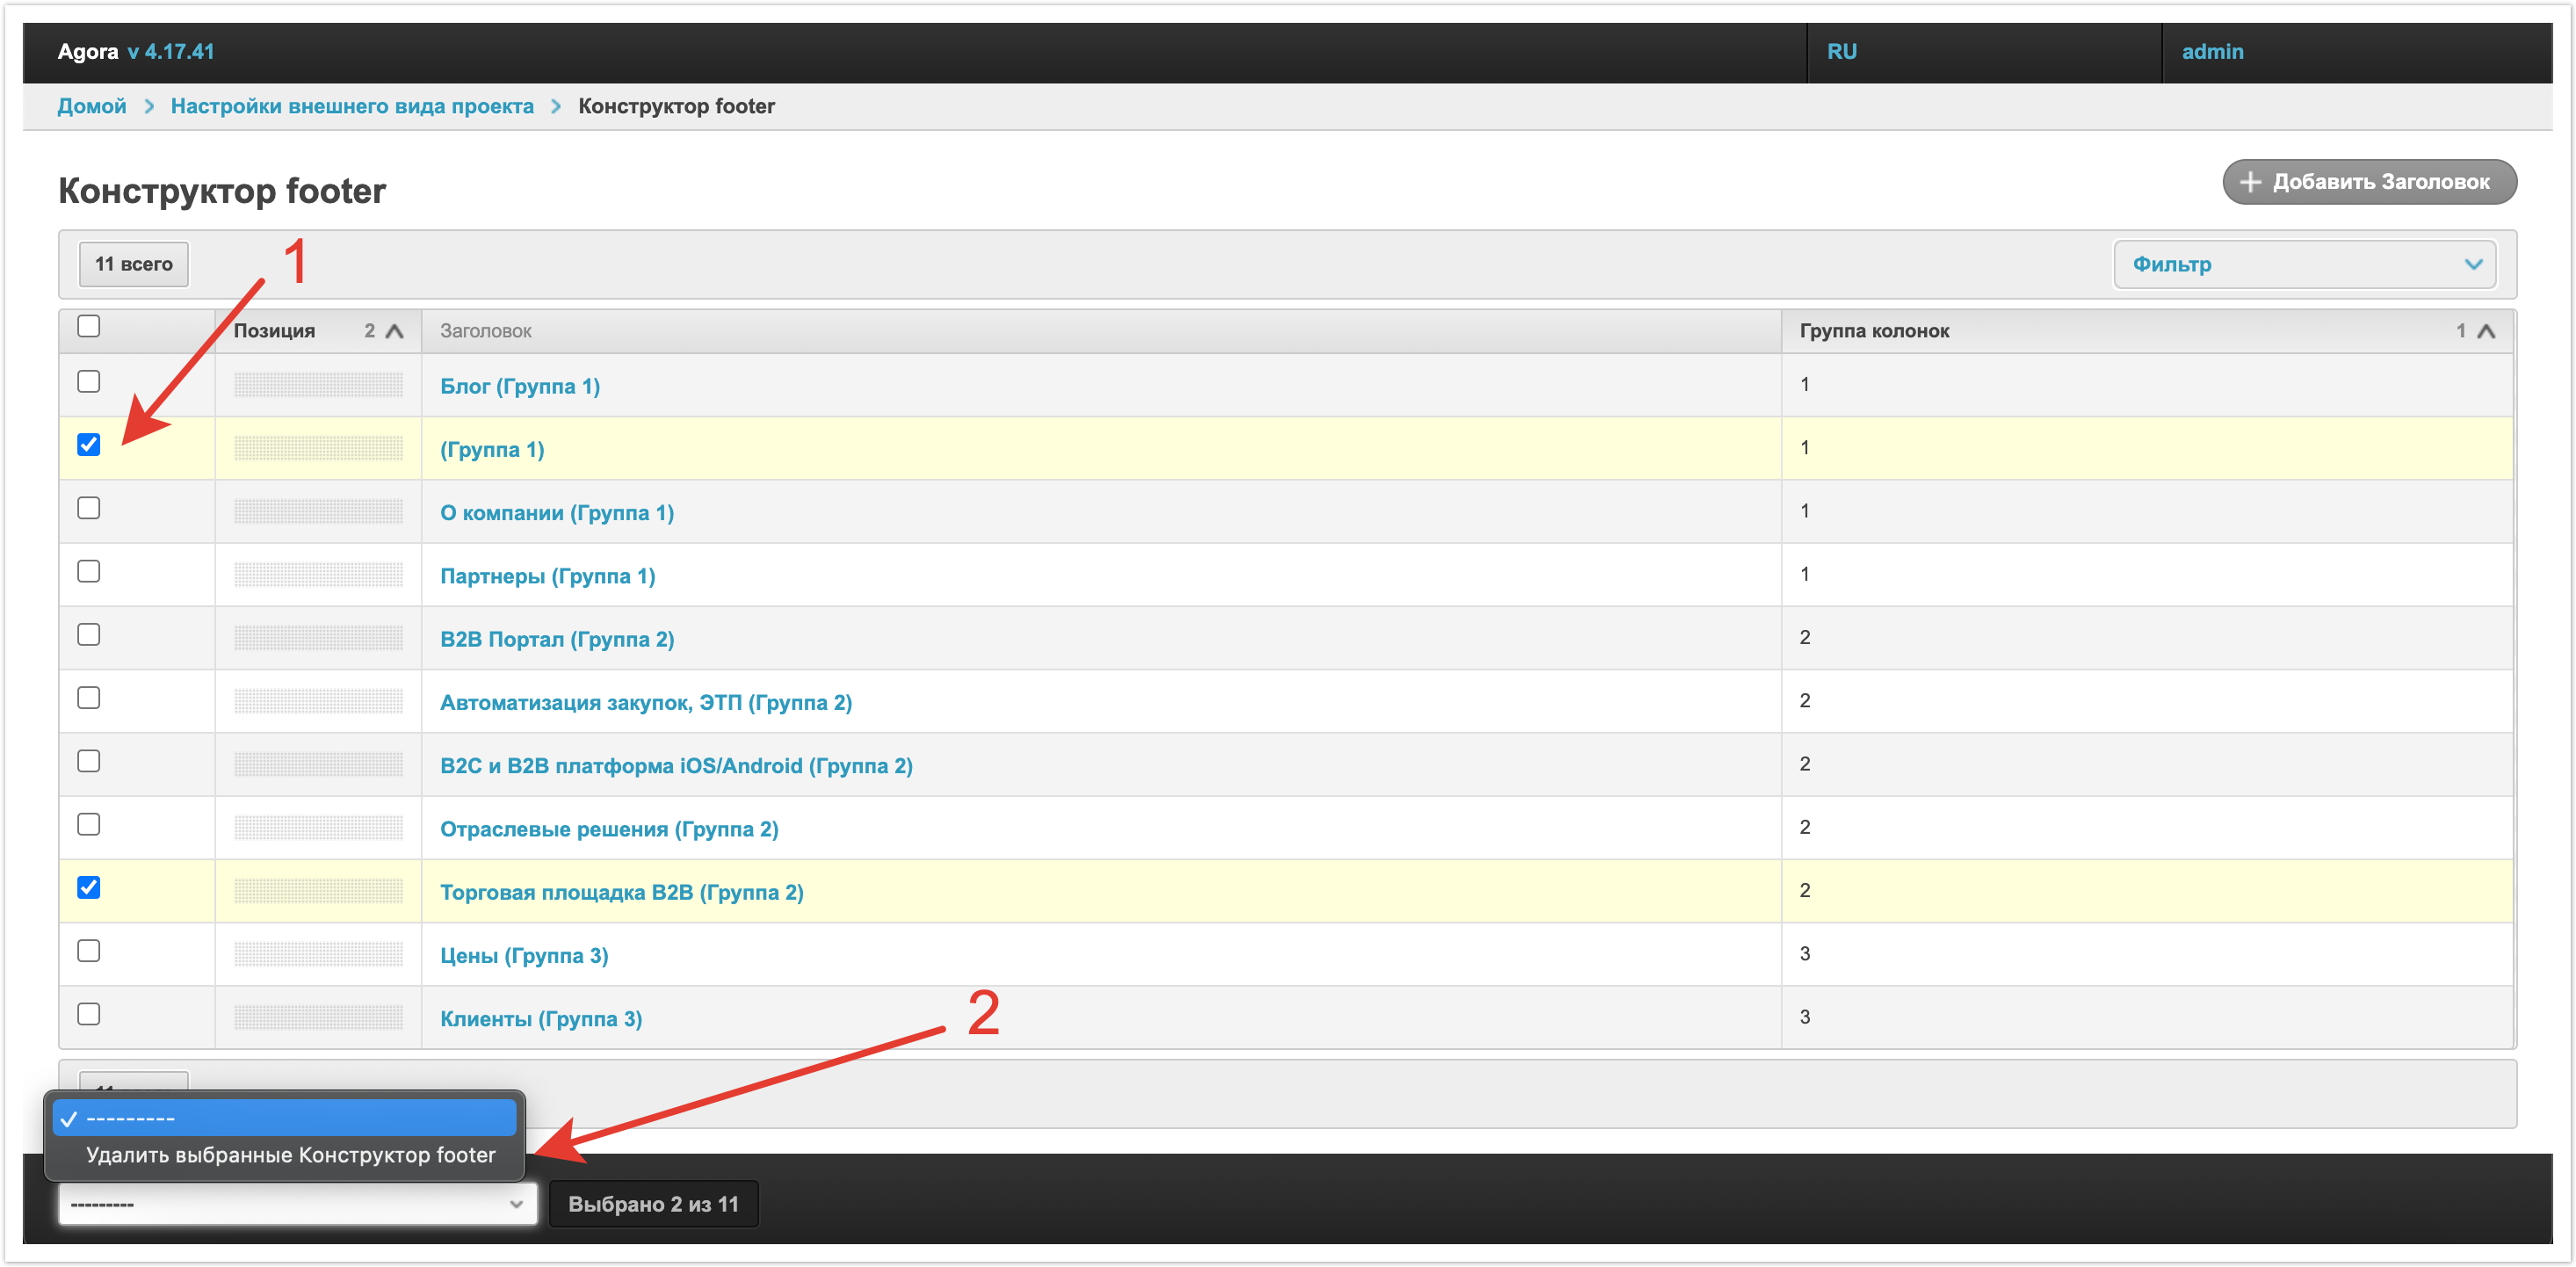
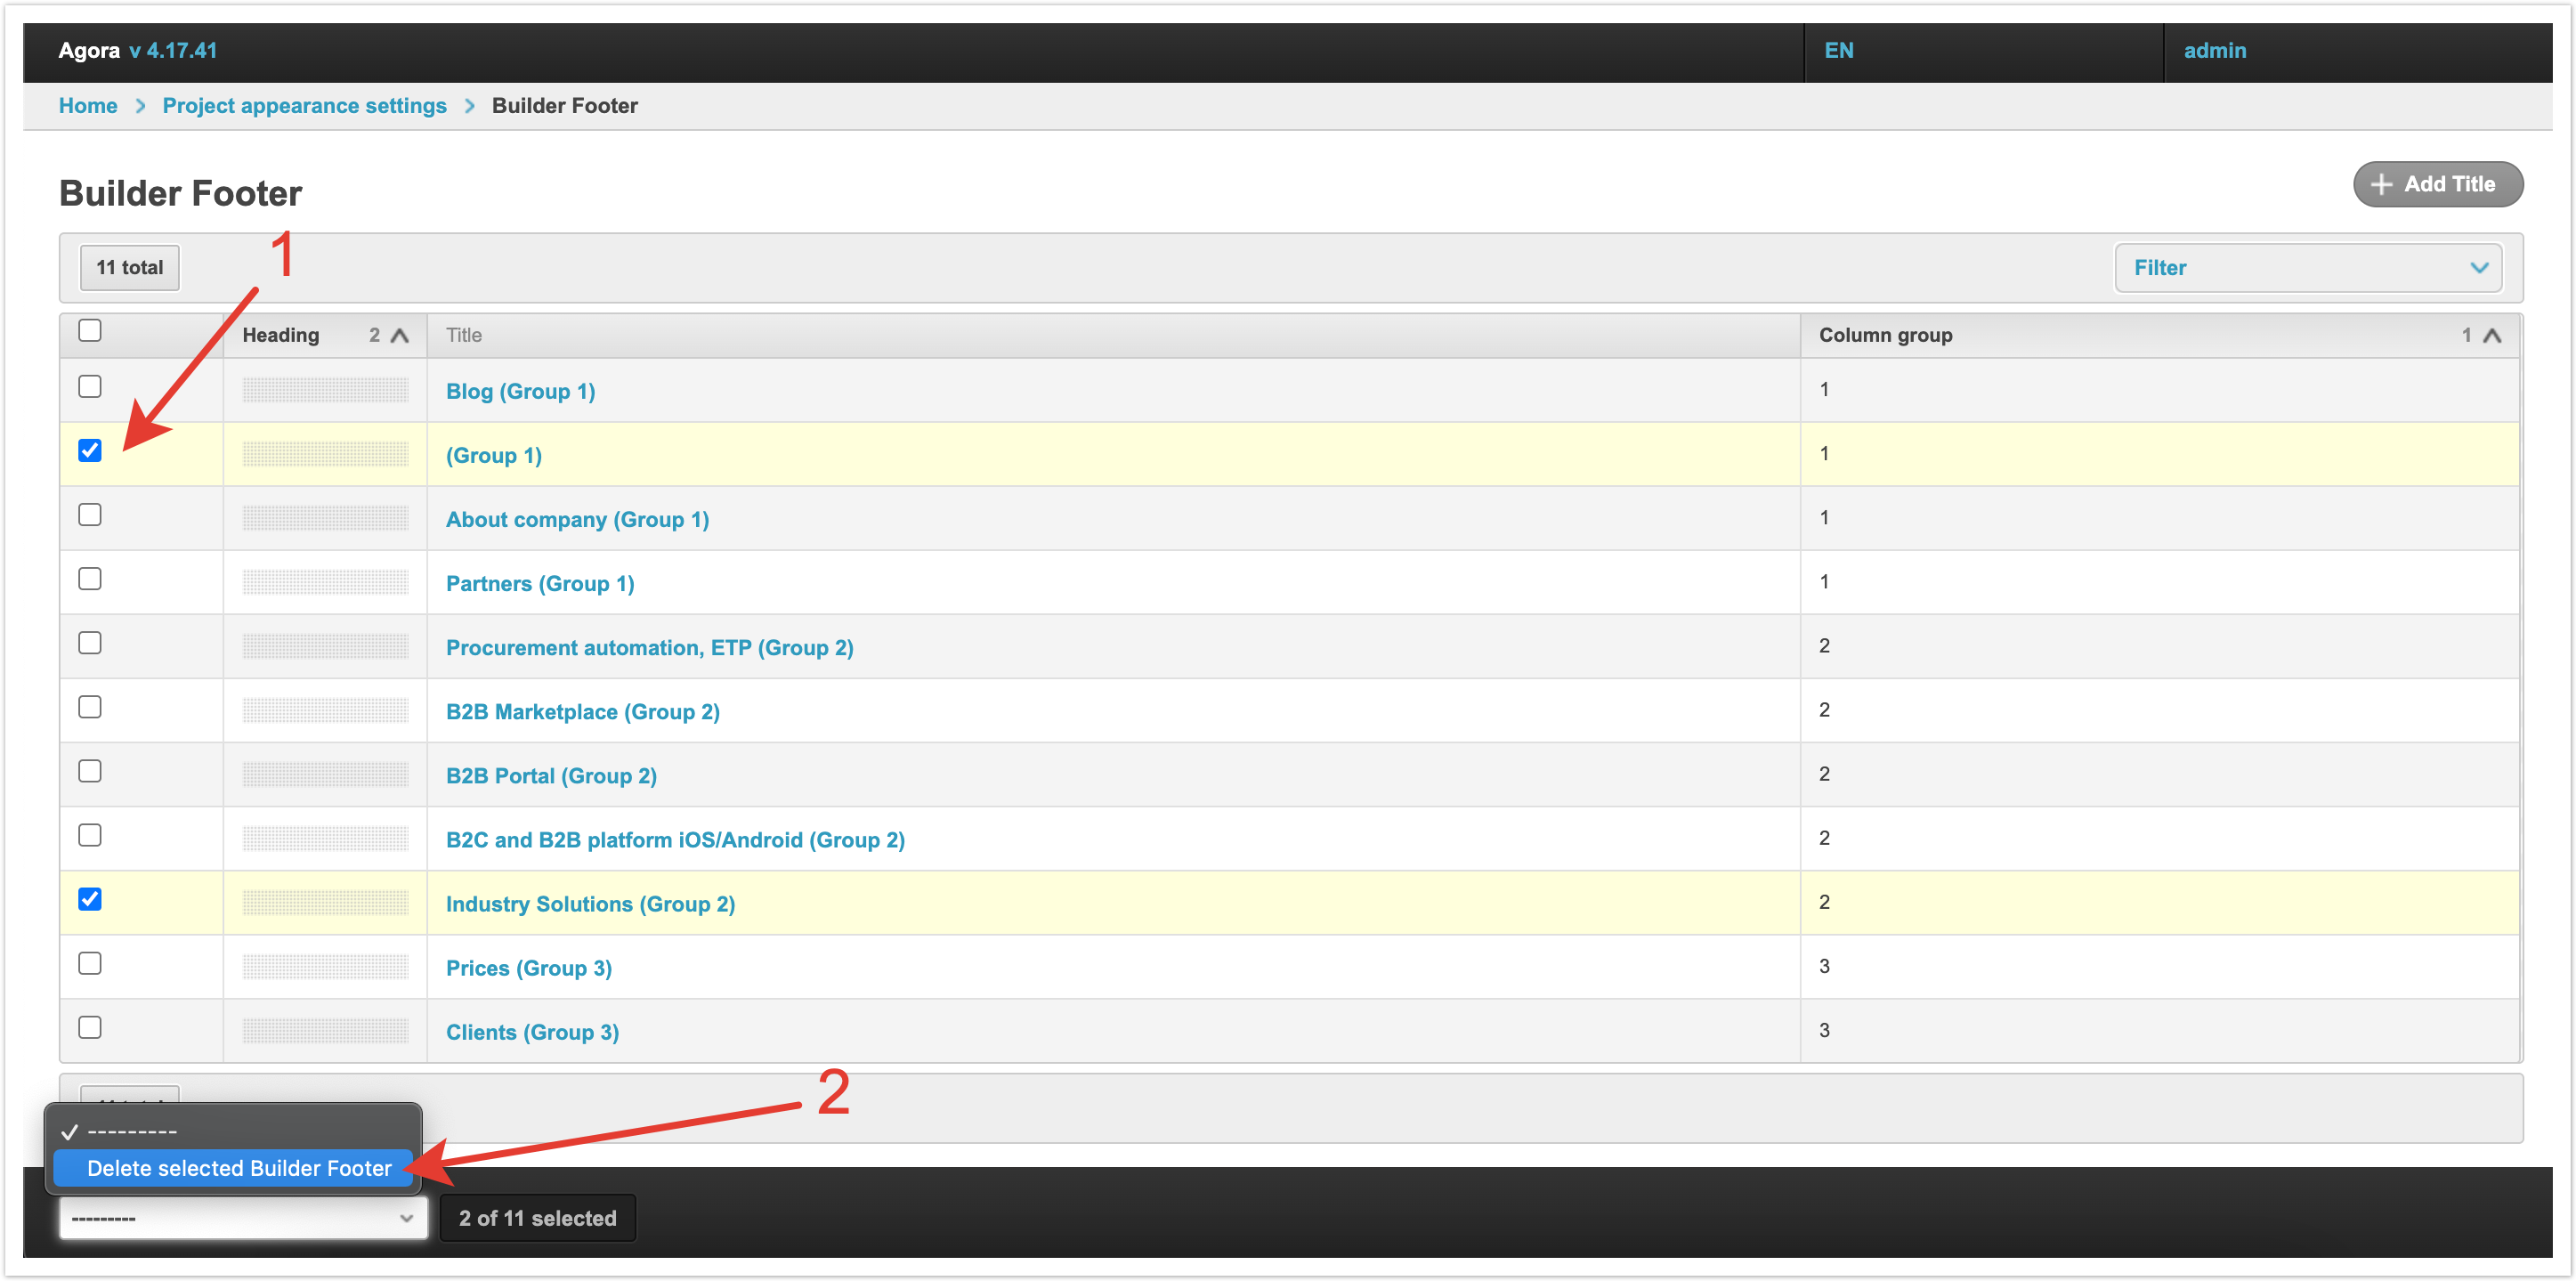
Удаление заголовков футераДля того, чтобы удалить какие-то из доступных заголовков футера, необходимо выделить их чек-боксами в первом столбце, а далее слева внизу в выпадающем списке выбрать Удалить выбранные Конструктор footer.
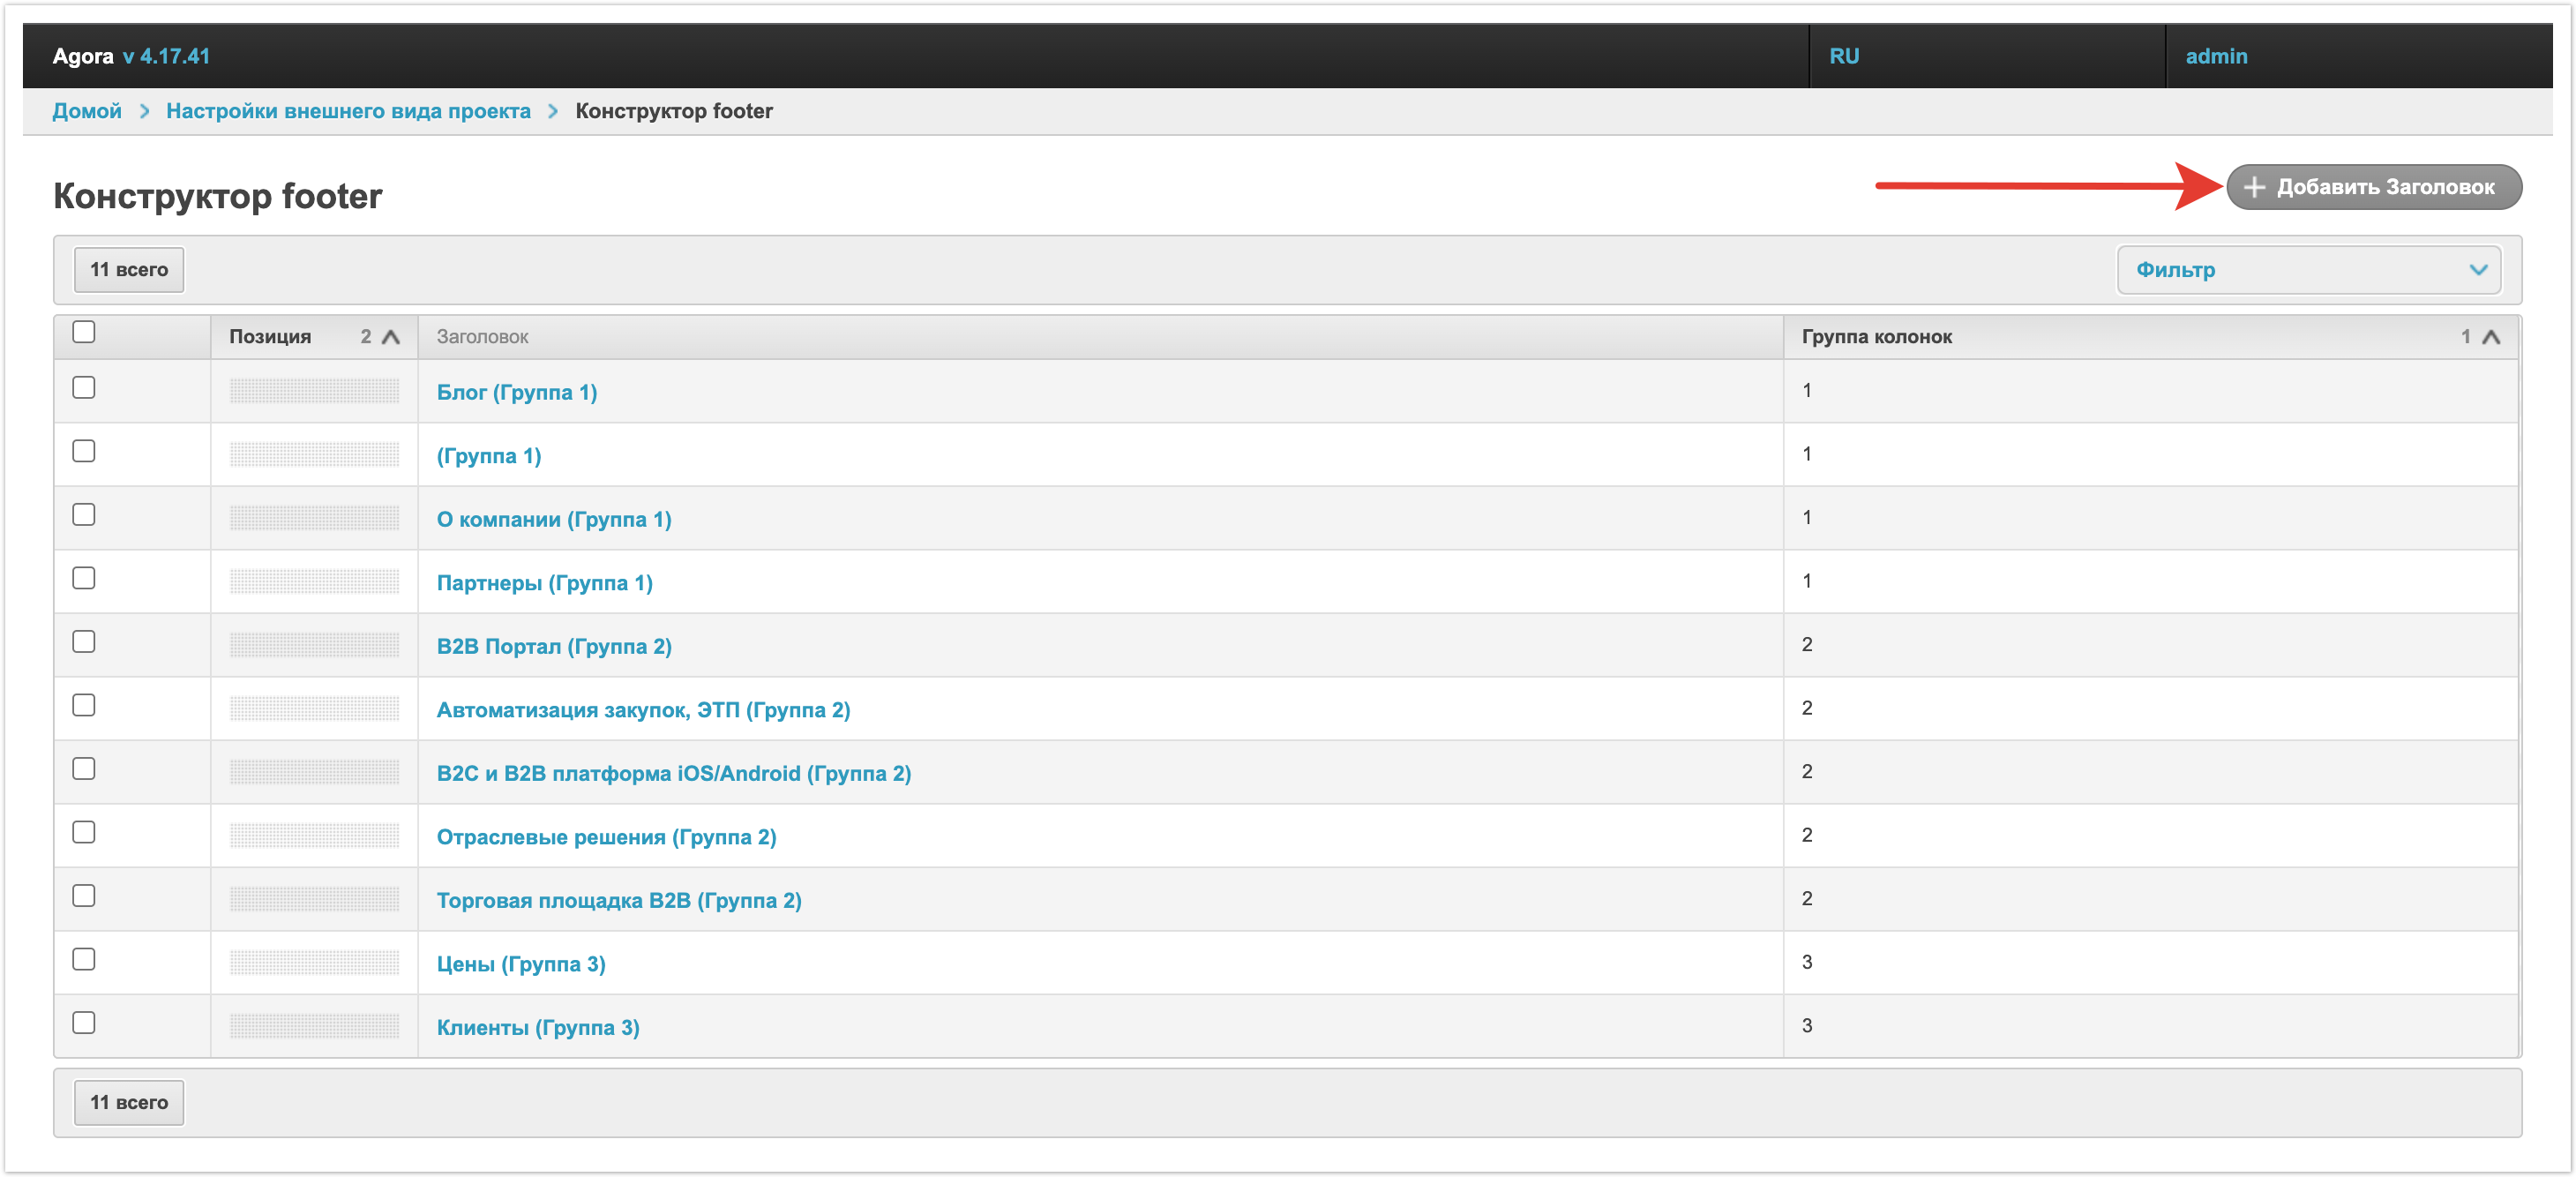
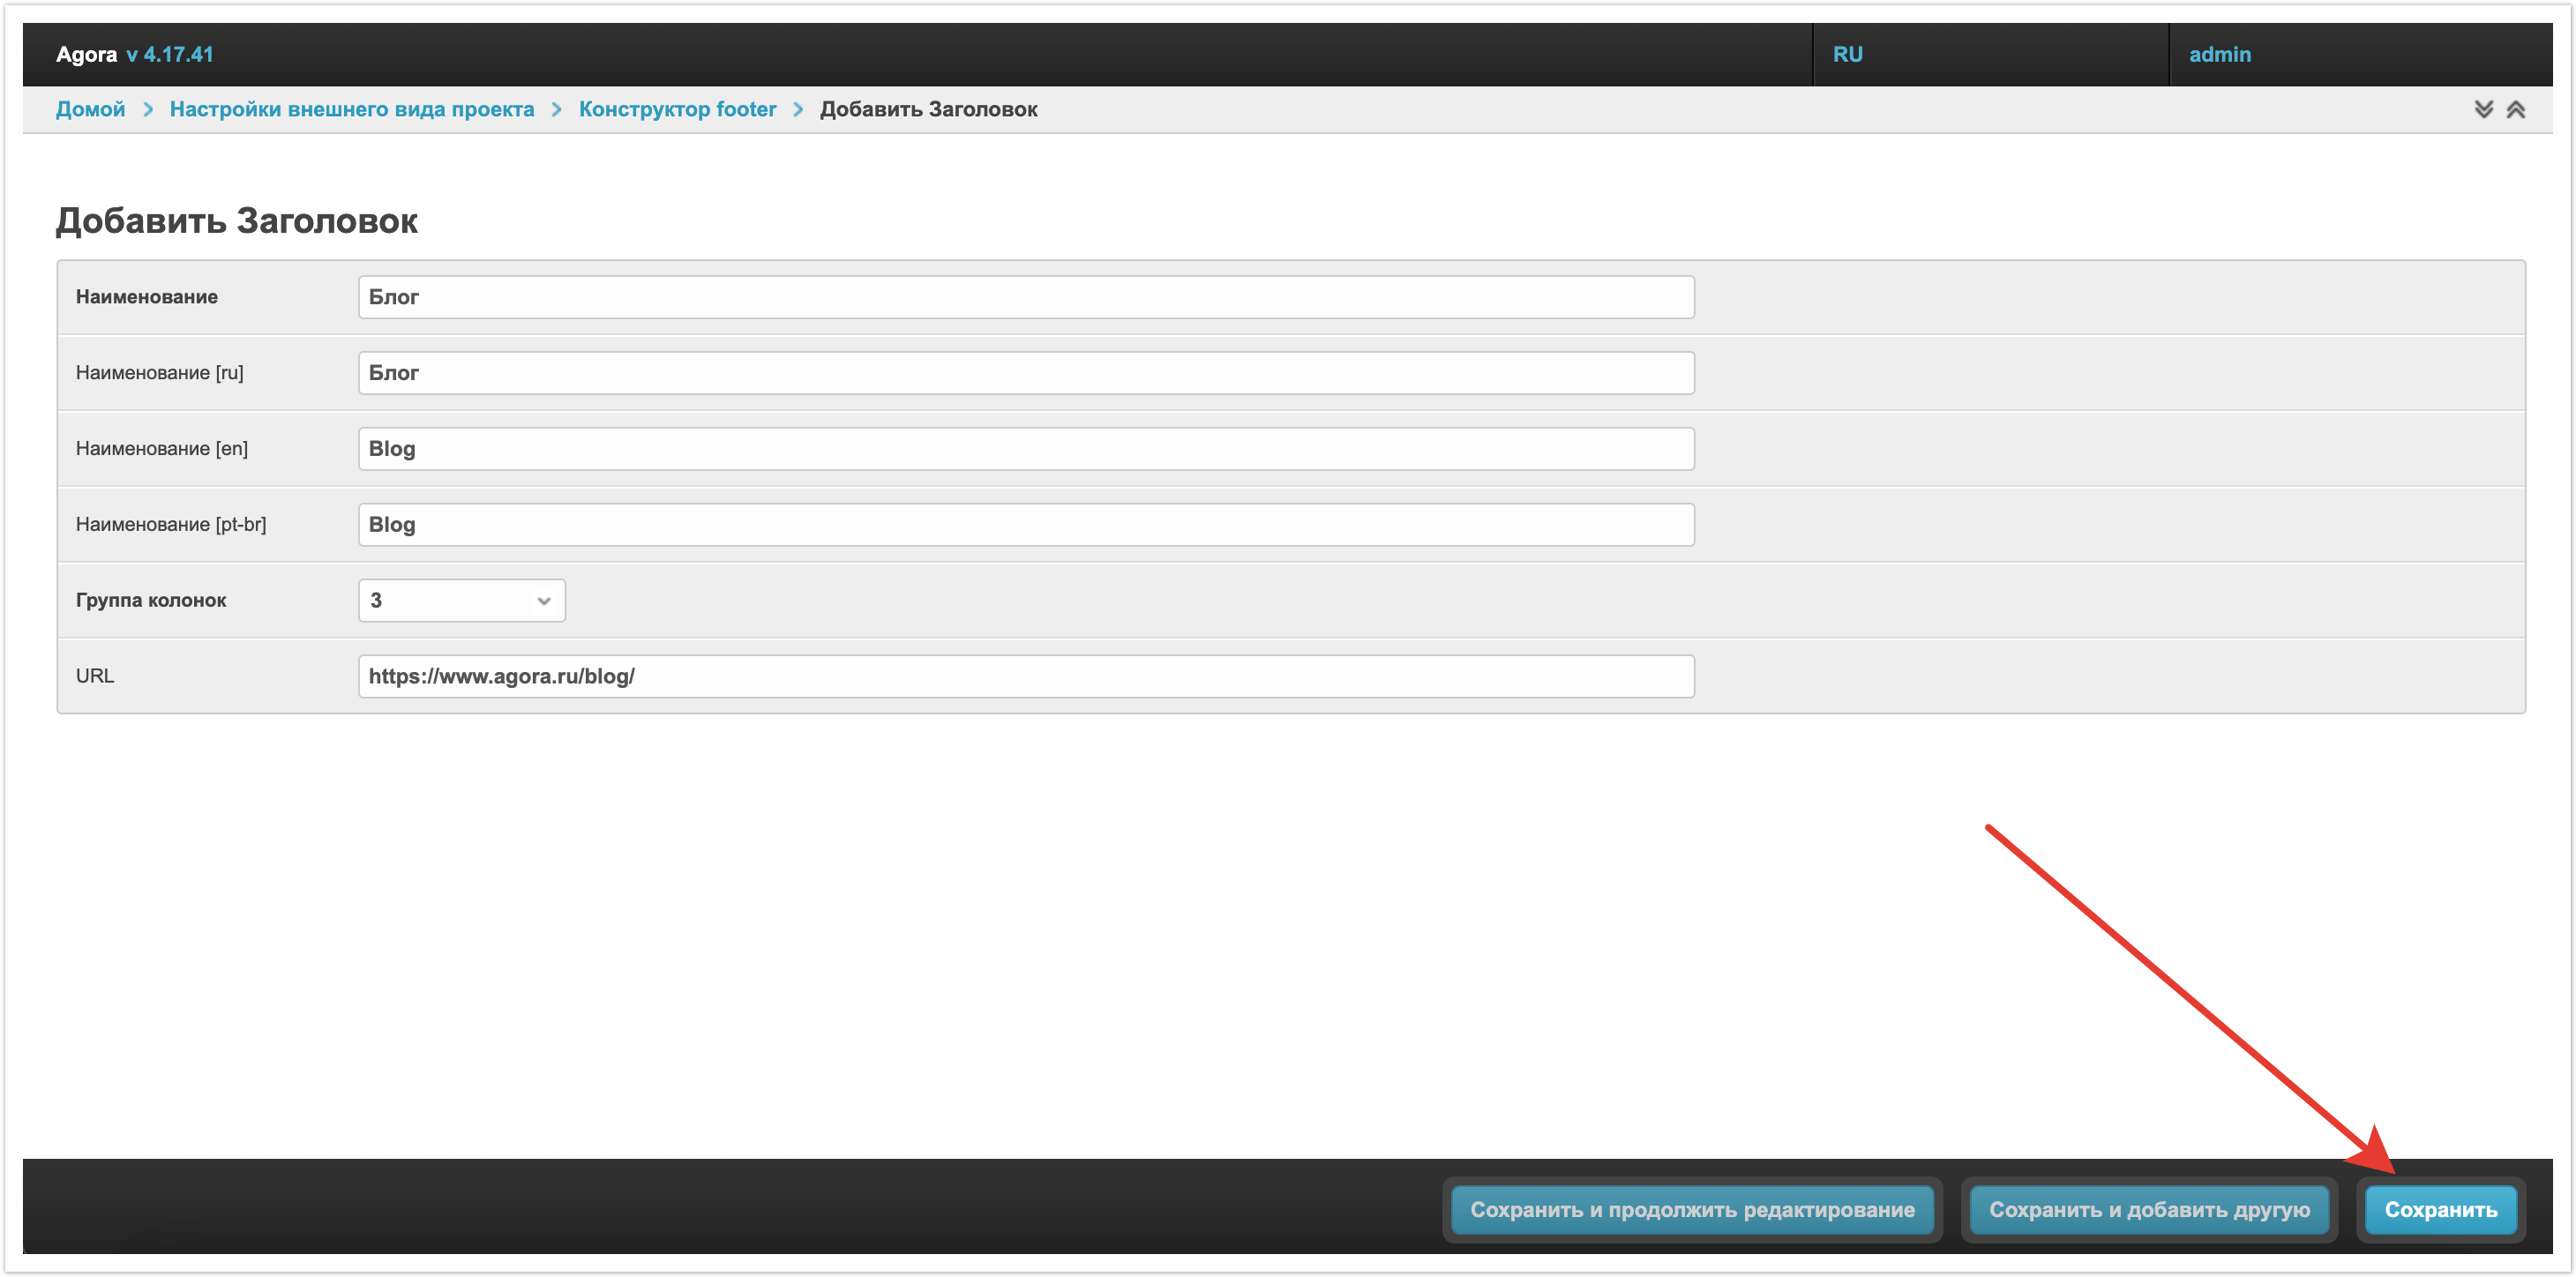
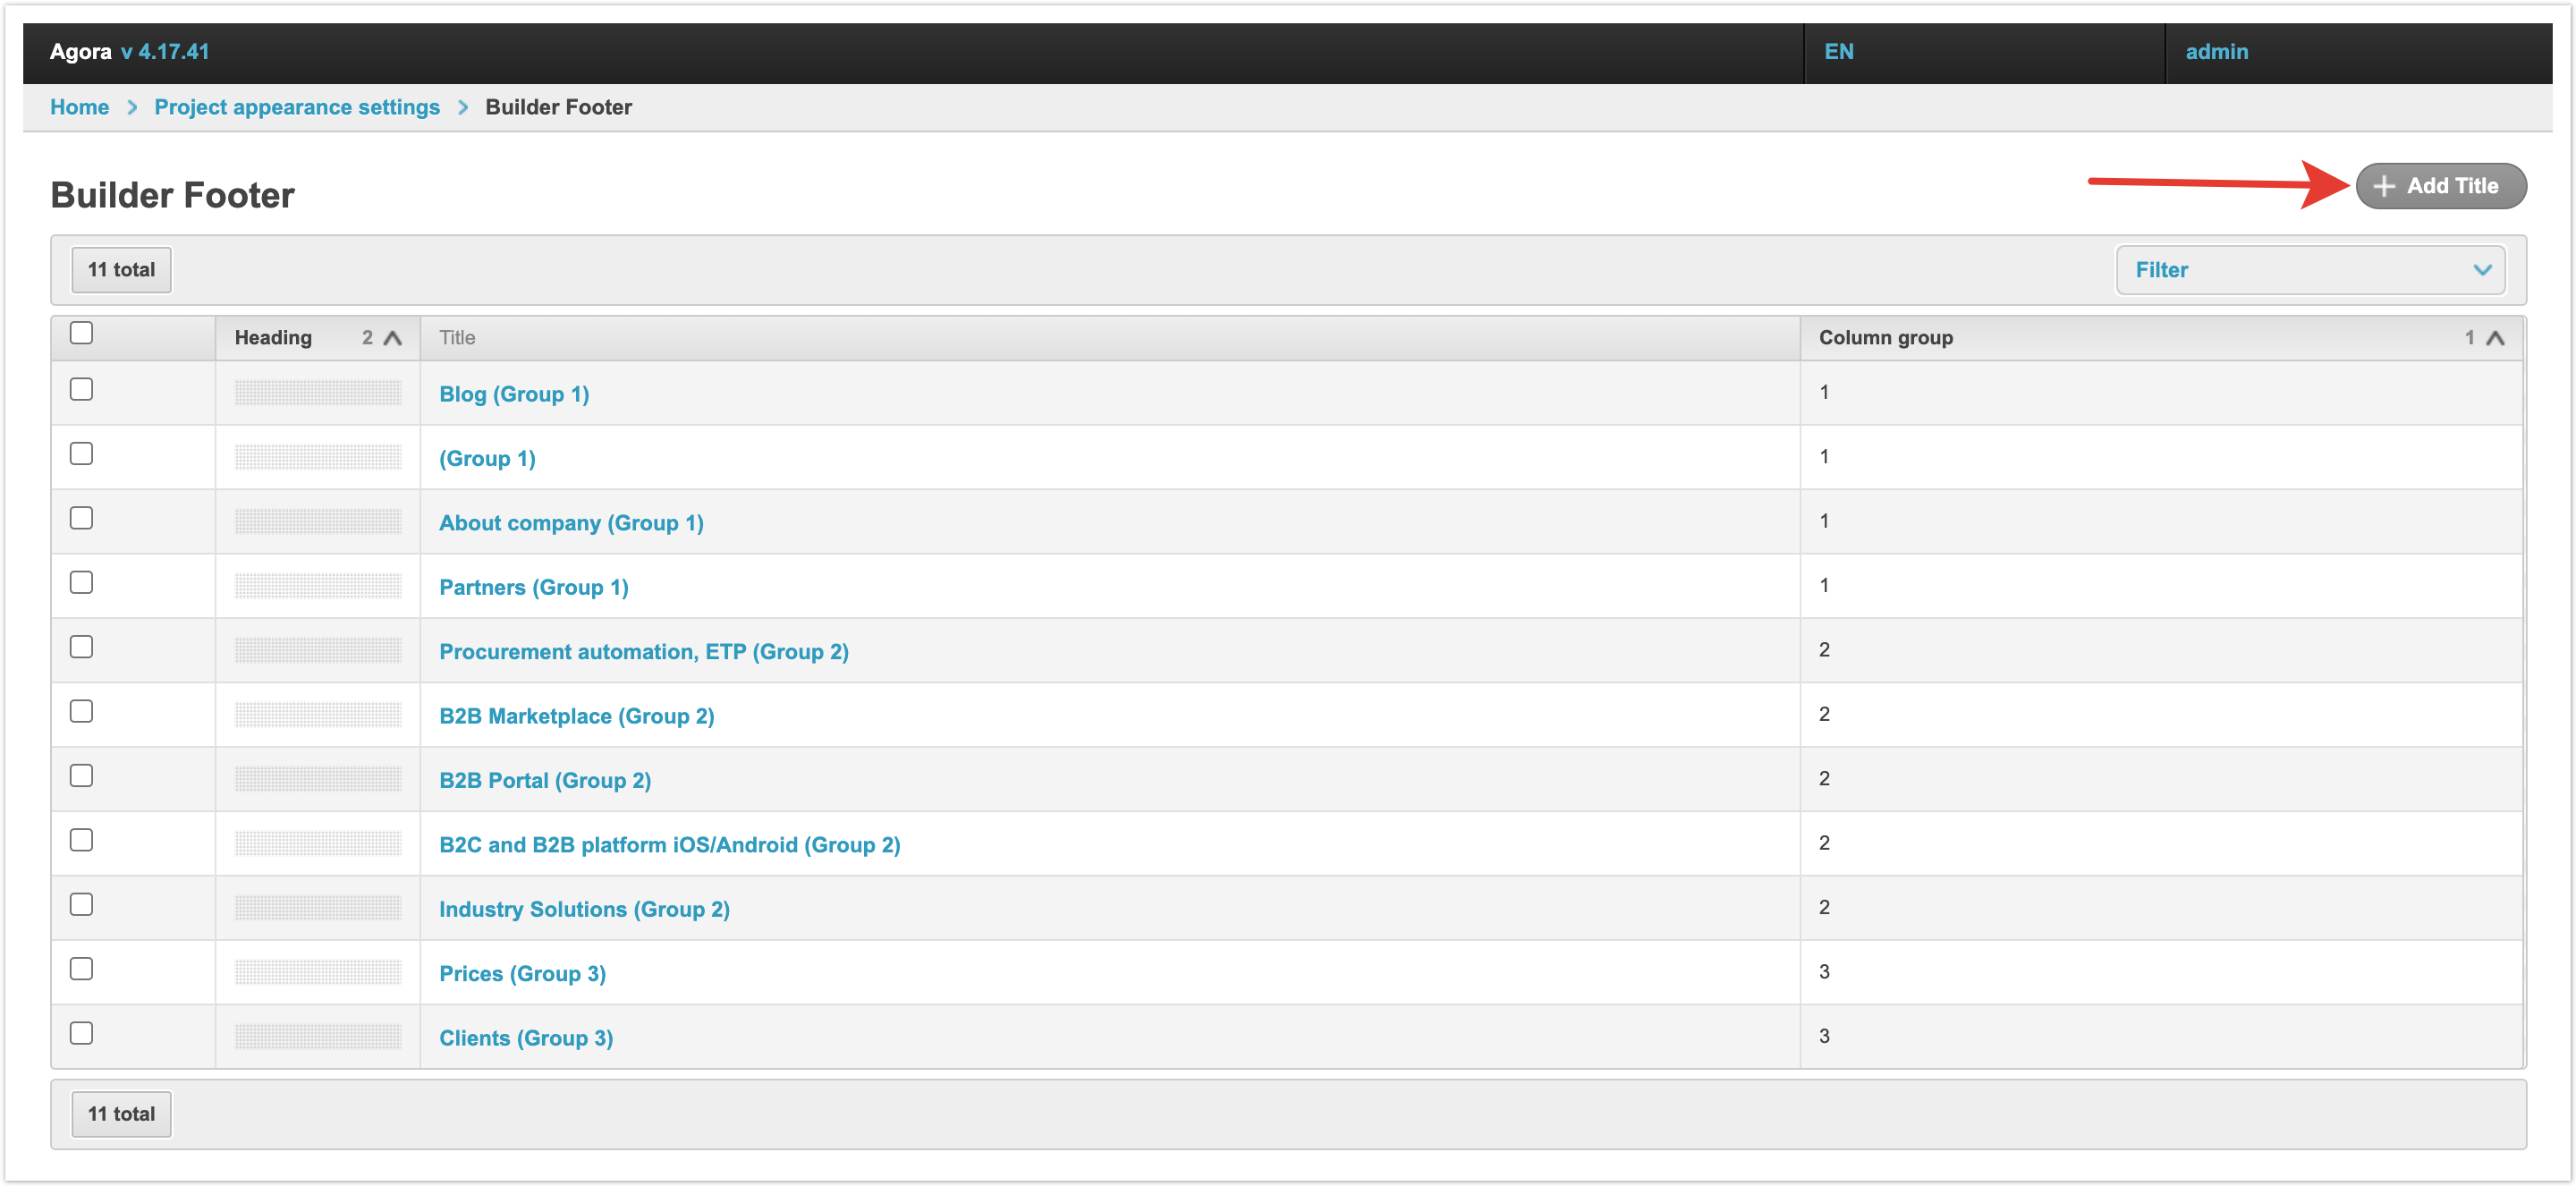
Добавление заголовка футераДля добавления нового заголовка футера необходимо нажать кнопку Добавить Заголовок в правом верхнем углу страницы.
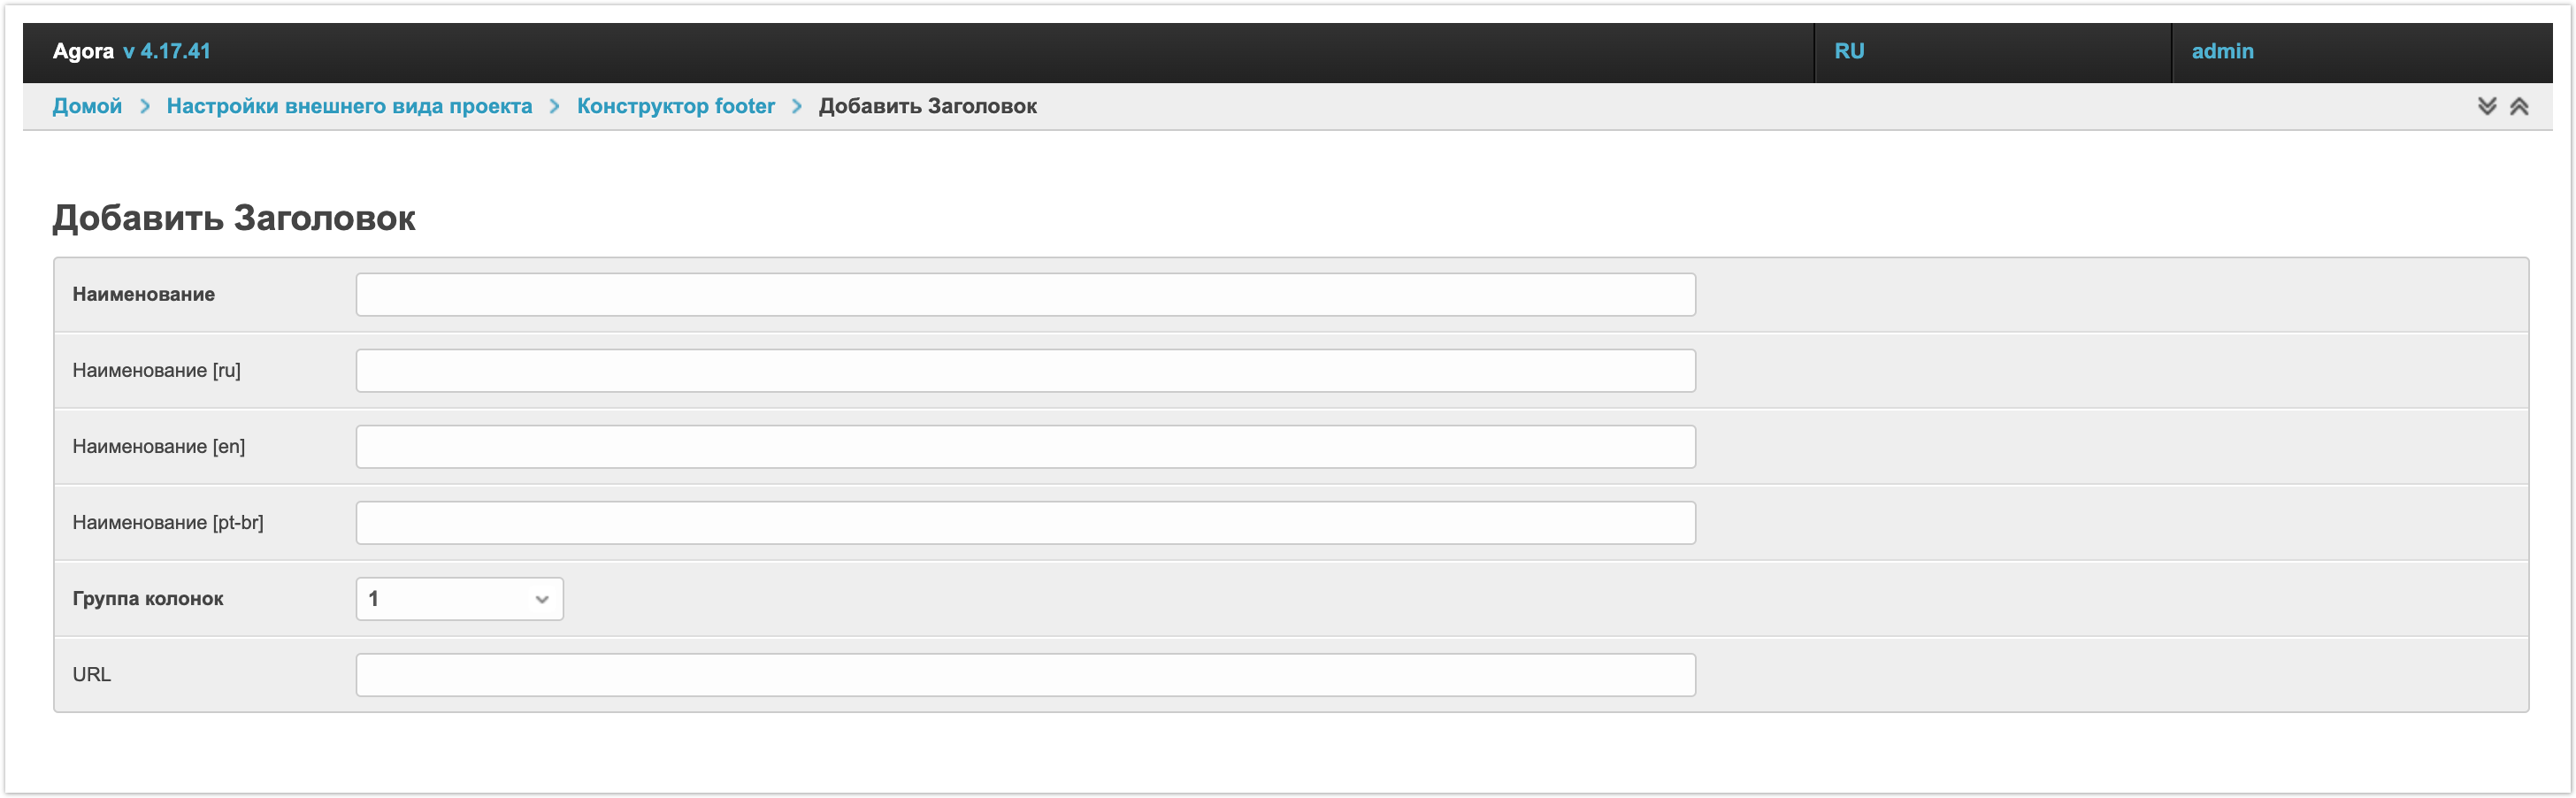
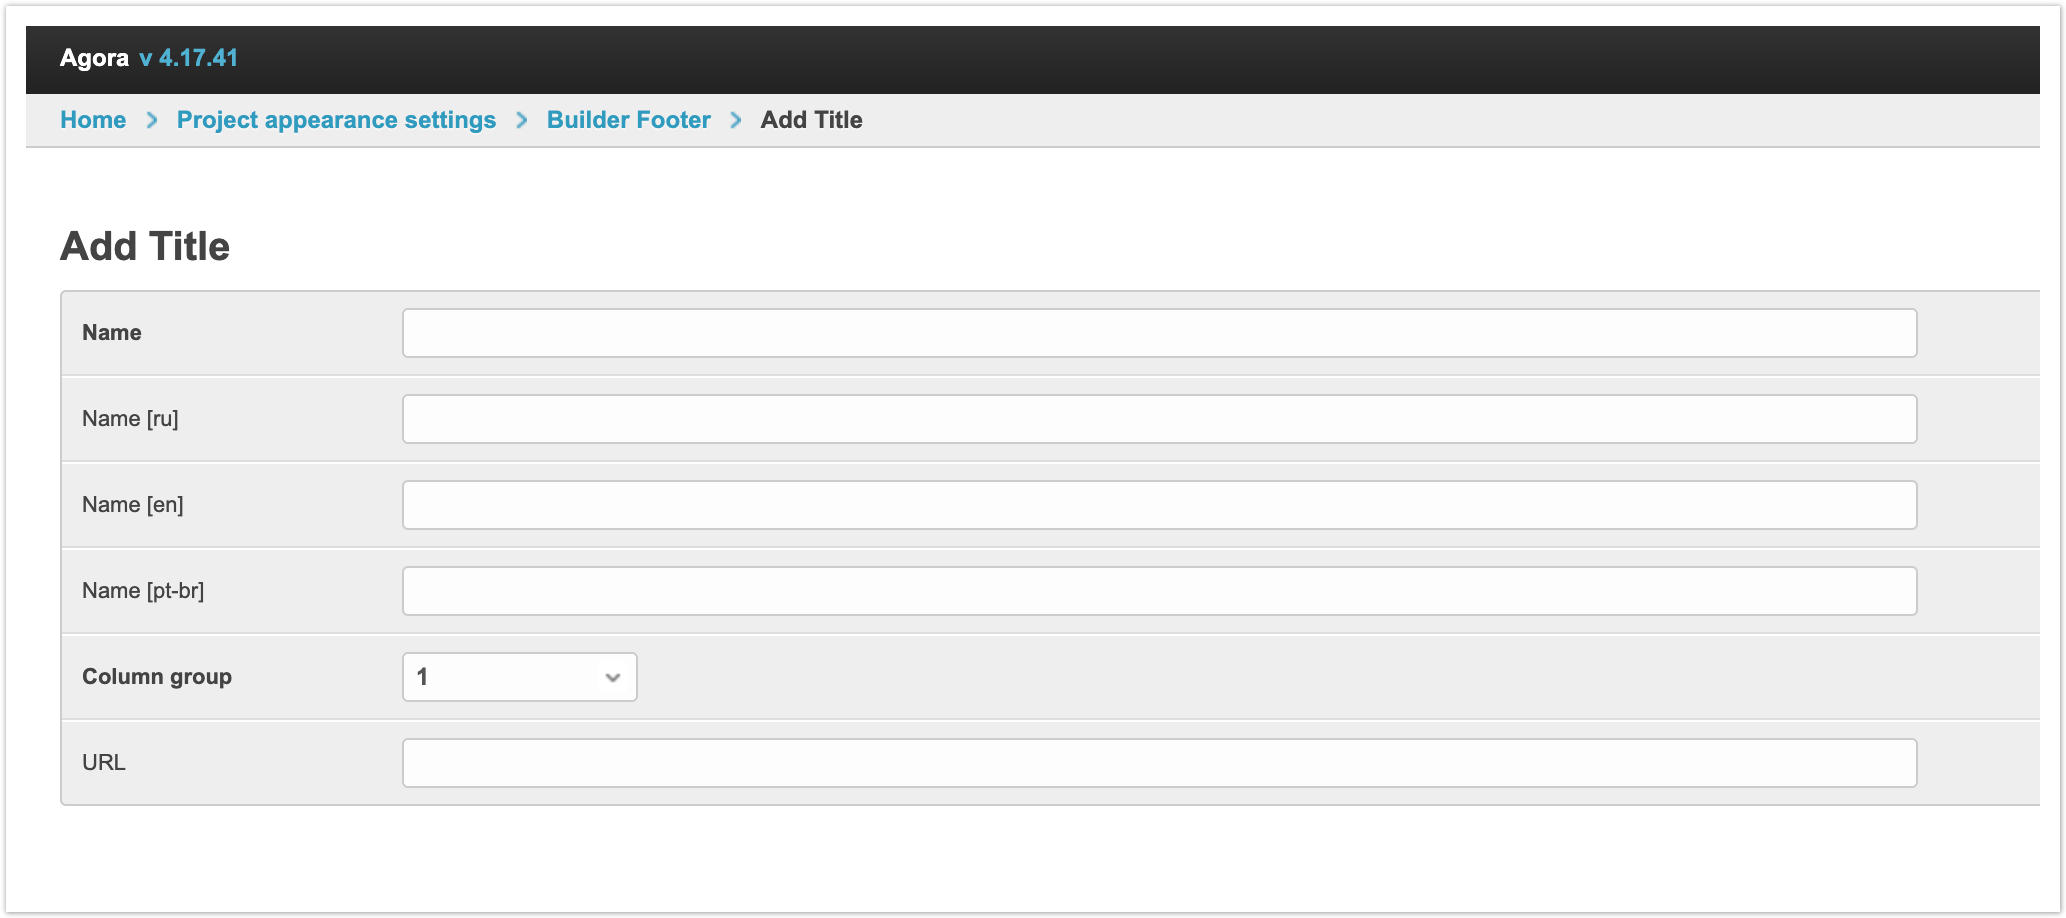
На открывшейся странице нужно заполнить поля для добавления нового заголовка футера.
Наименование - в этом поле указывается сам заголовок, который будет выводится в футере сайта на всех страницах. Если на платформе подключена мультиязычность, то можно указать наименование на разных языках. Группа колонок - в этом поле три числовых значения: 1, 2 и 3. Каждое значение определяет расположение заголовка. Футер разделен на 3 столбца или, иными словами, на 3 группы. Таким образом, если необходимо, чтобы заголовок выводился в первом столбце, то указывается значение группы - 1. Если нужно настроить вывод в среднем блоке, то нужно указать группу колонок - 2. Если нужно вывести заголовок в правом столбце, то нужно указать группу колонок - 3.
URL - адрес ссылки, по которой будет выполнен переход при нажатии на этот заголовок в футере. URL адрес может вести как на внутренние страницы платформы, так и на внешние сайты. После того, как все необходимые параметры были заполнены, необходимо сохранить Заголовок и он появится в списке.
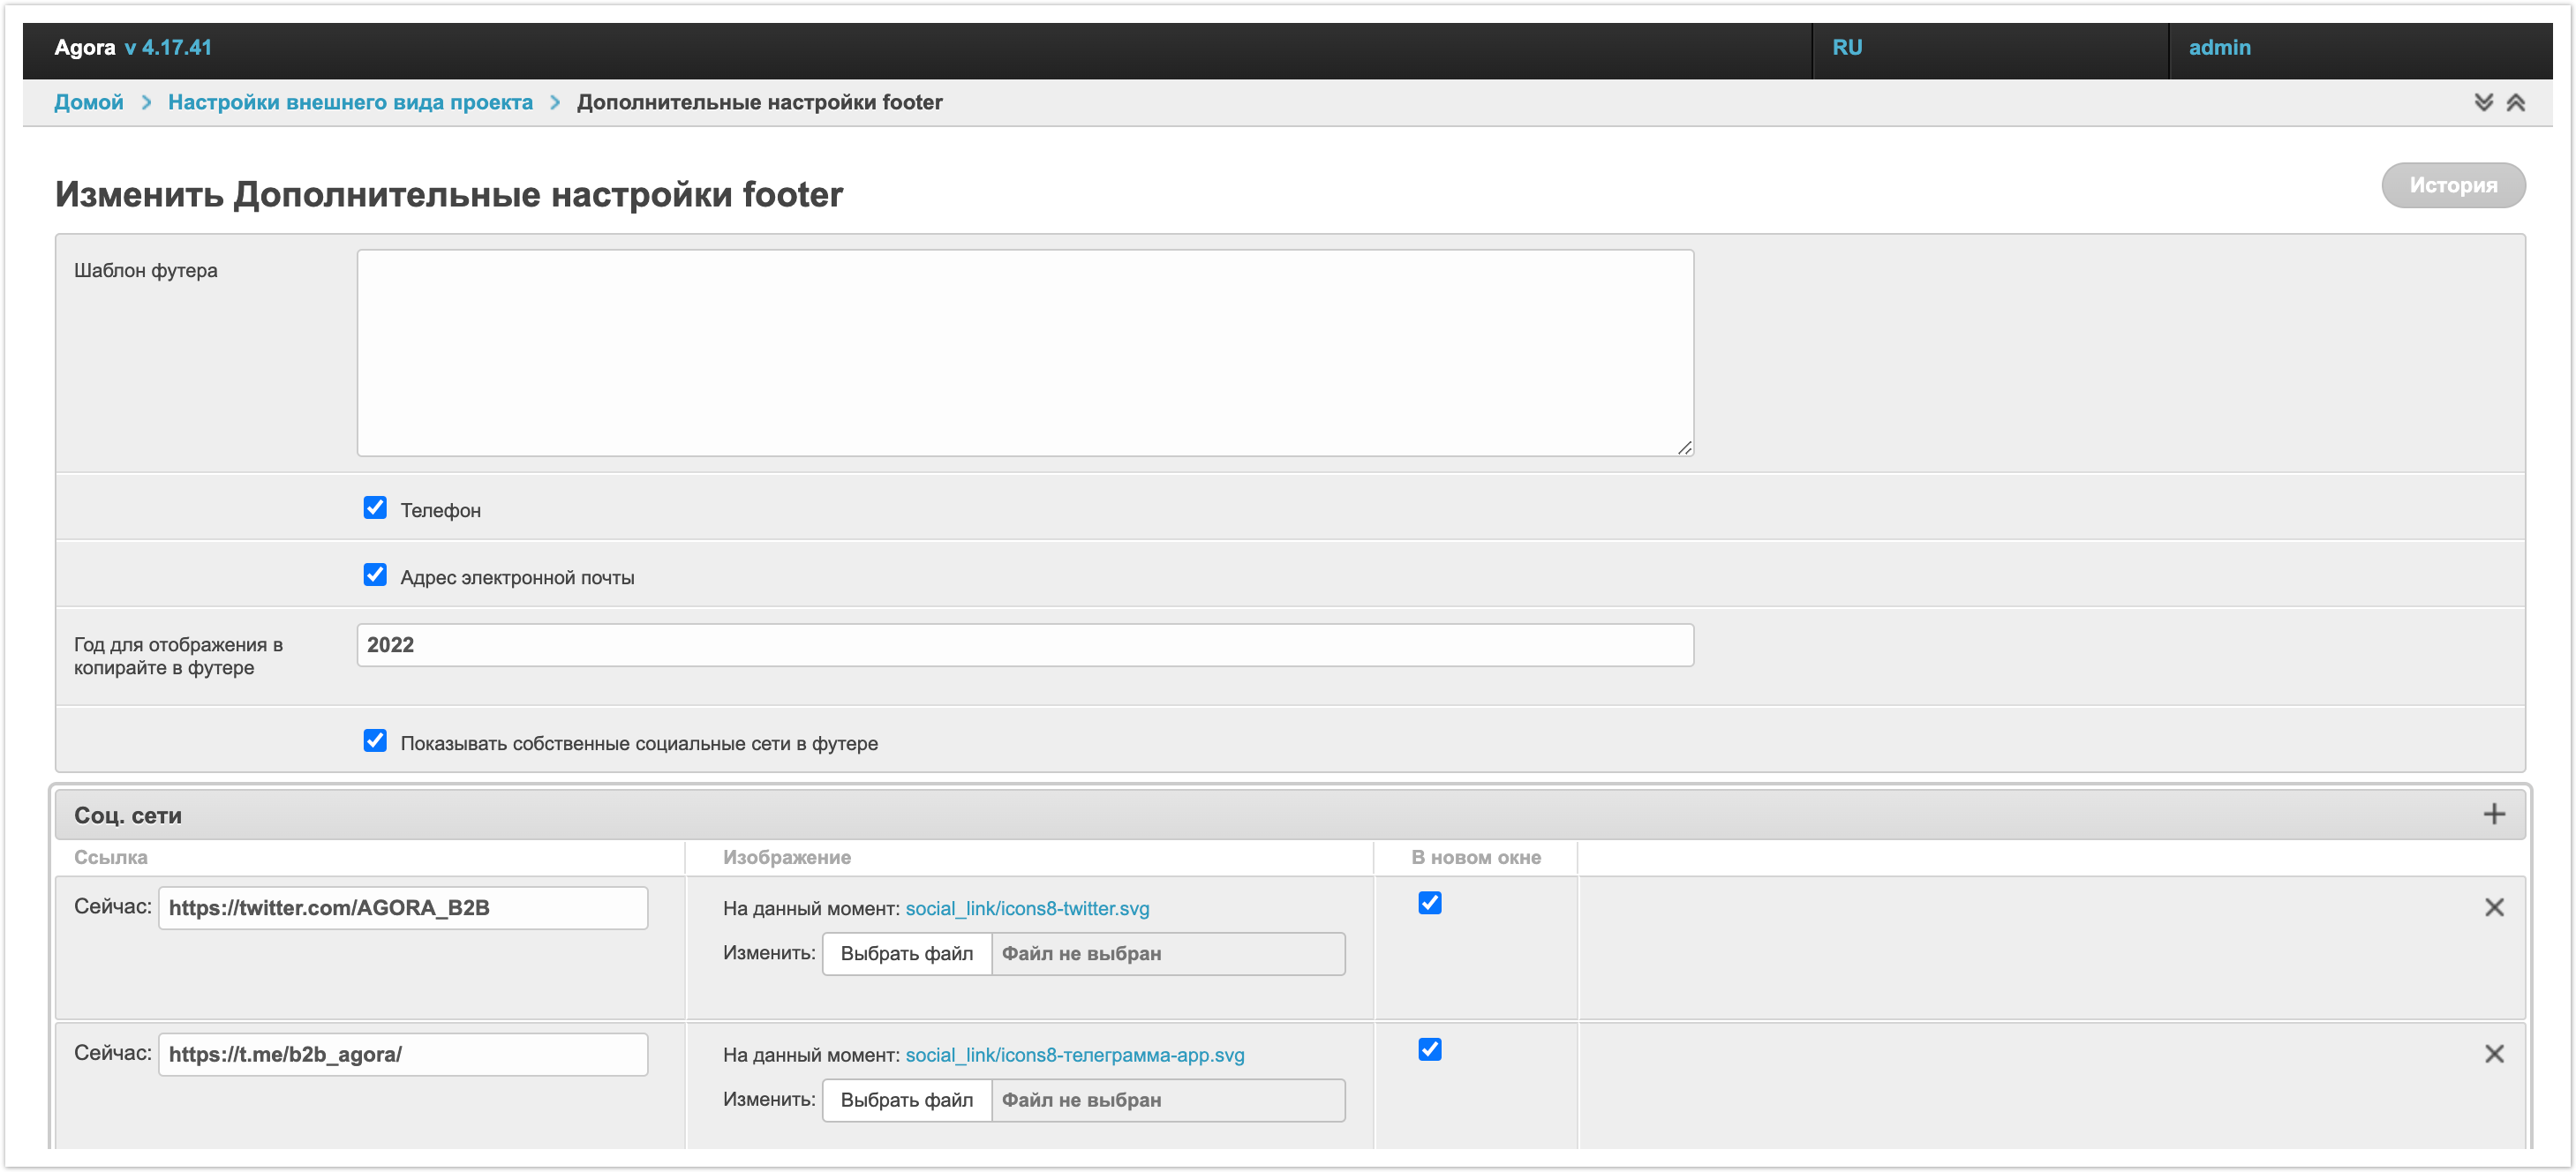
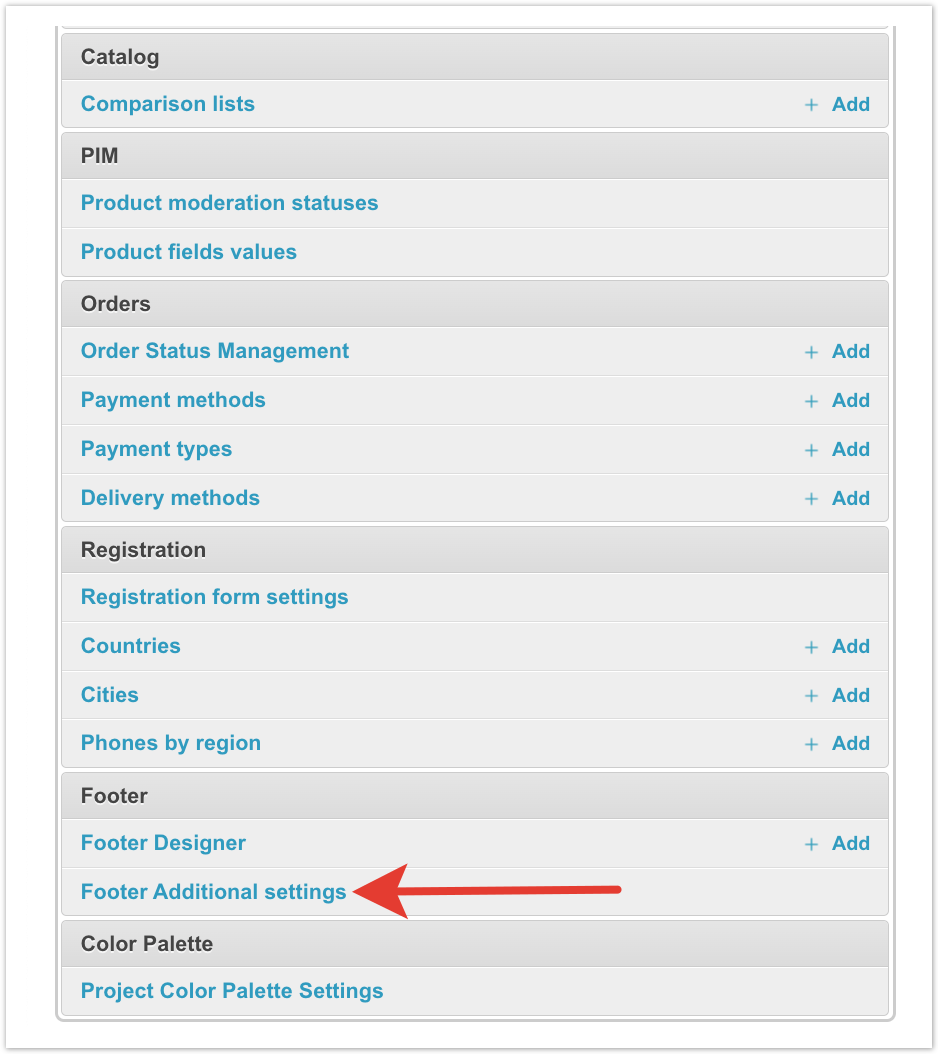
Дополнительные настройки футераВ панели администратора есть также раздел Дополнительные настройки footer.
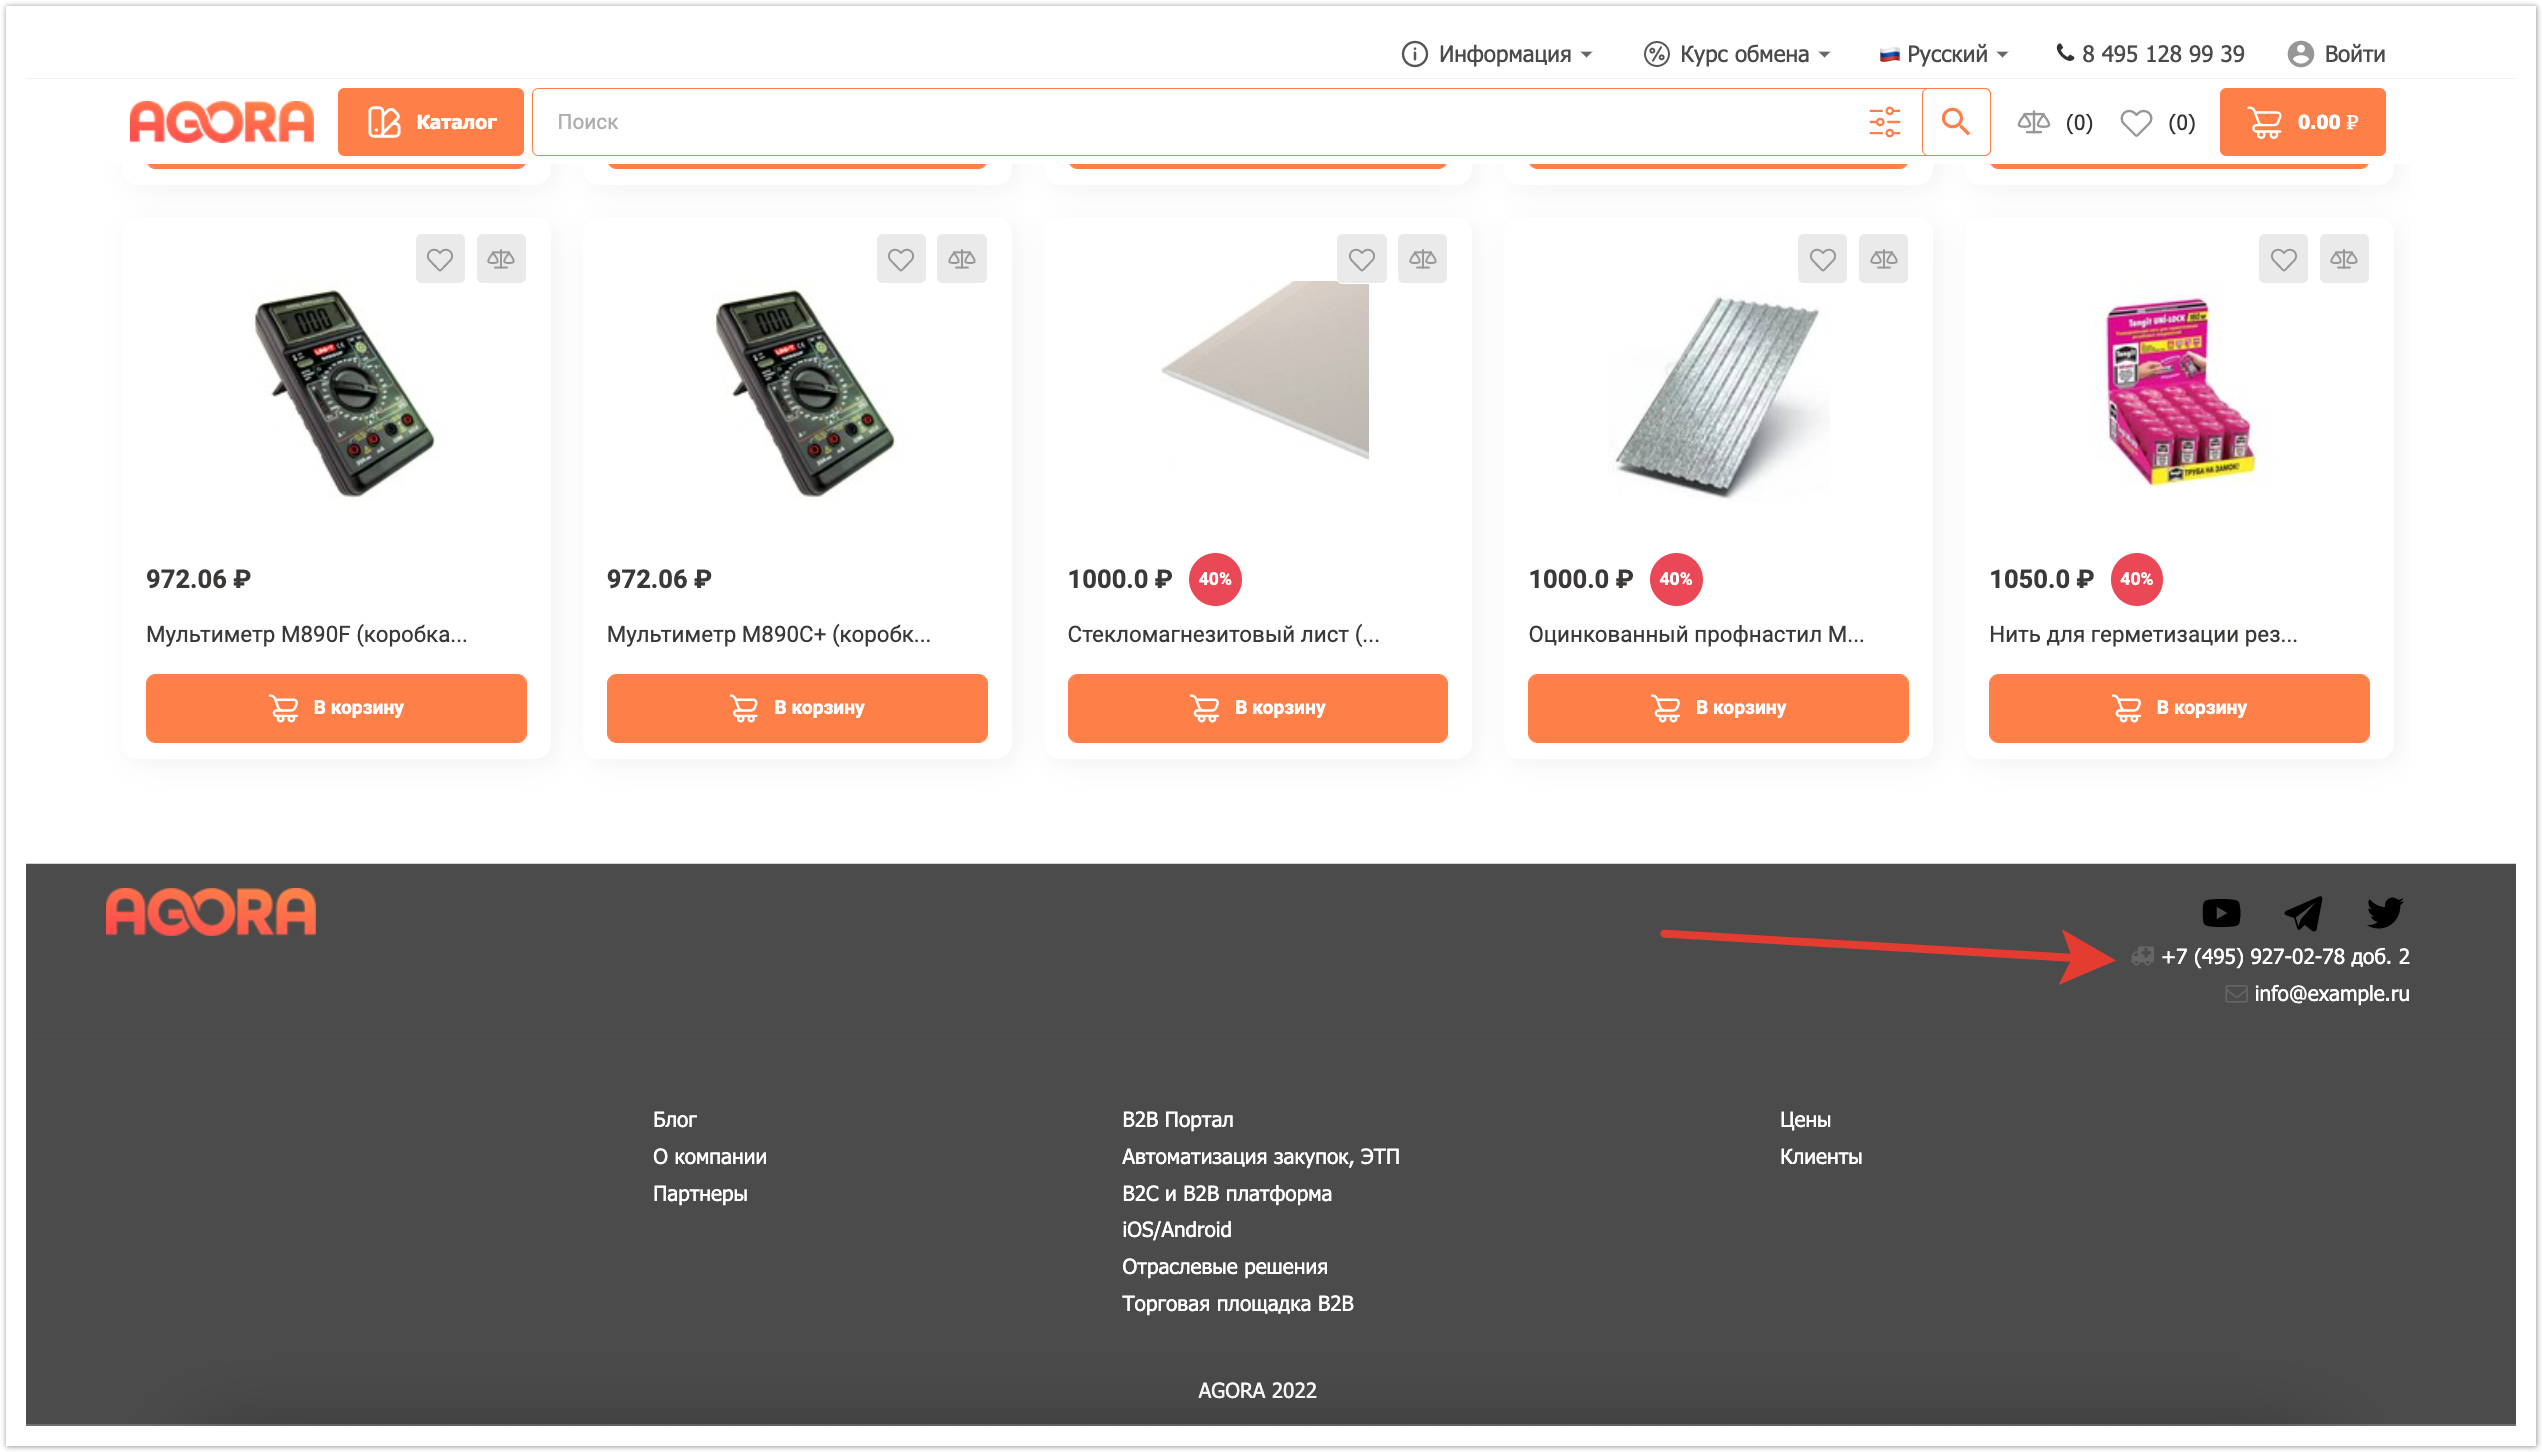
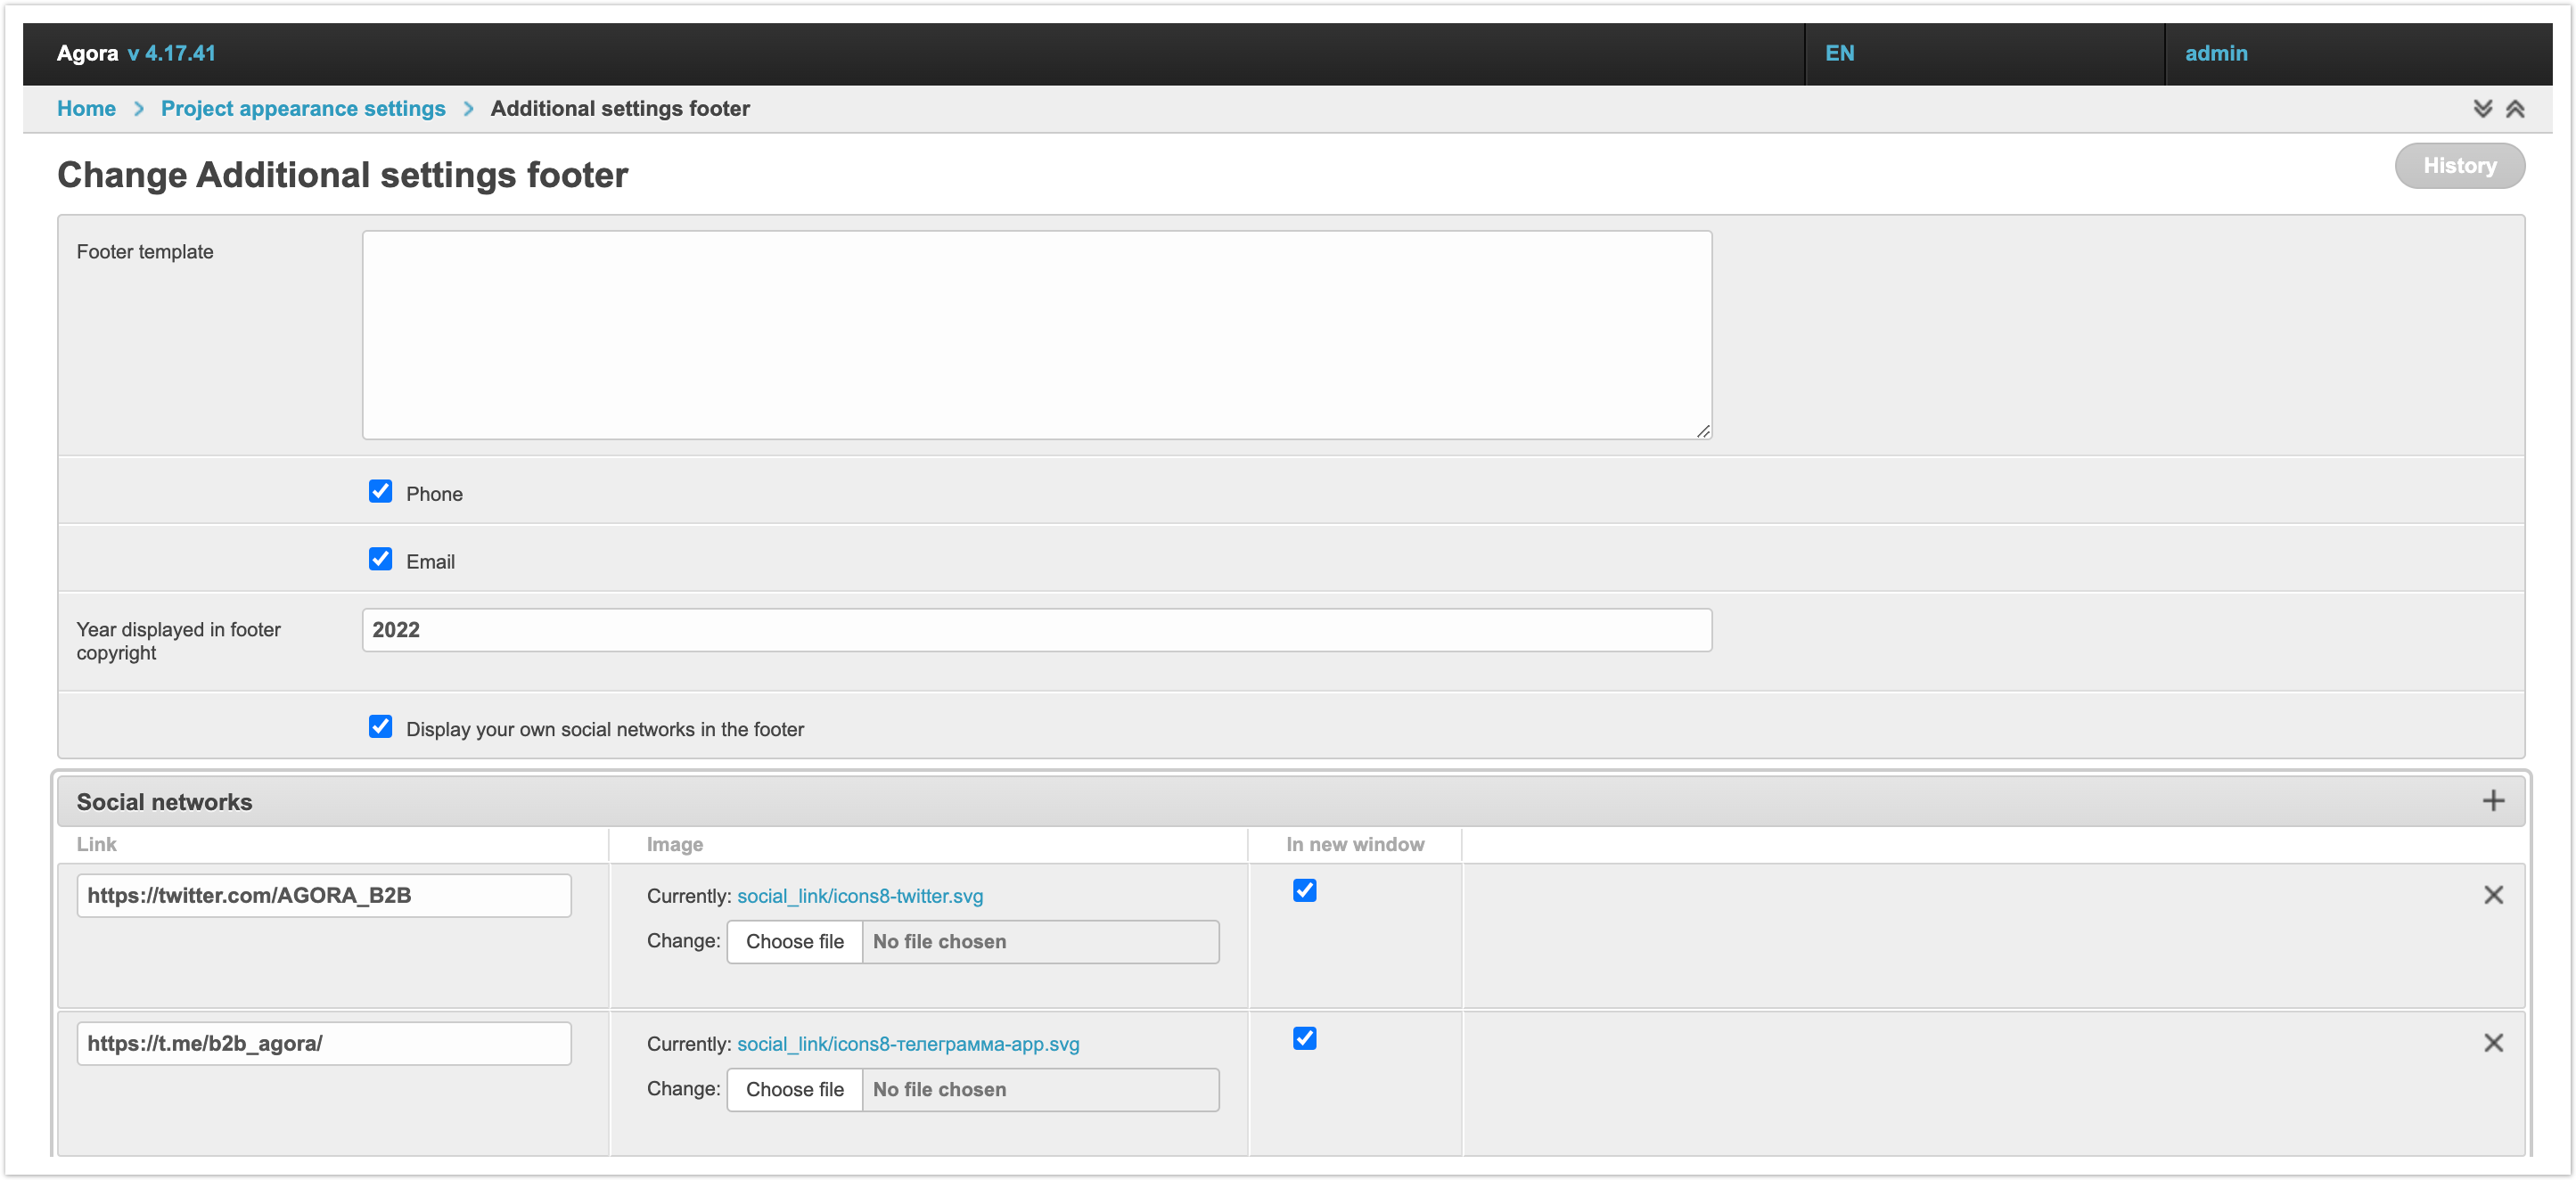
В этом разделе можно изменять данные, которые выводятся в блоке над группами заголовков справа.
Рассмотрим подробнее, что можно изменять через этот блок.
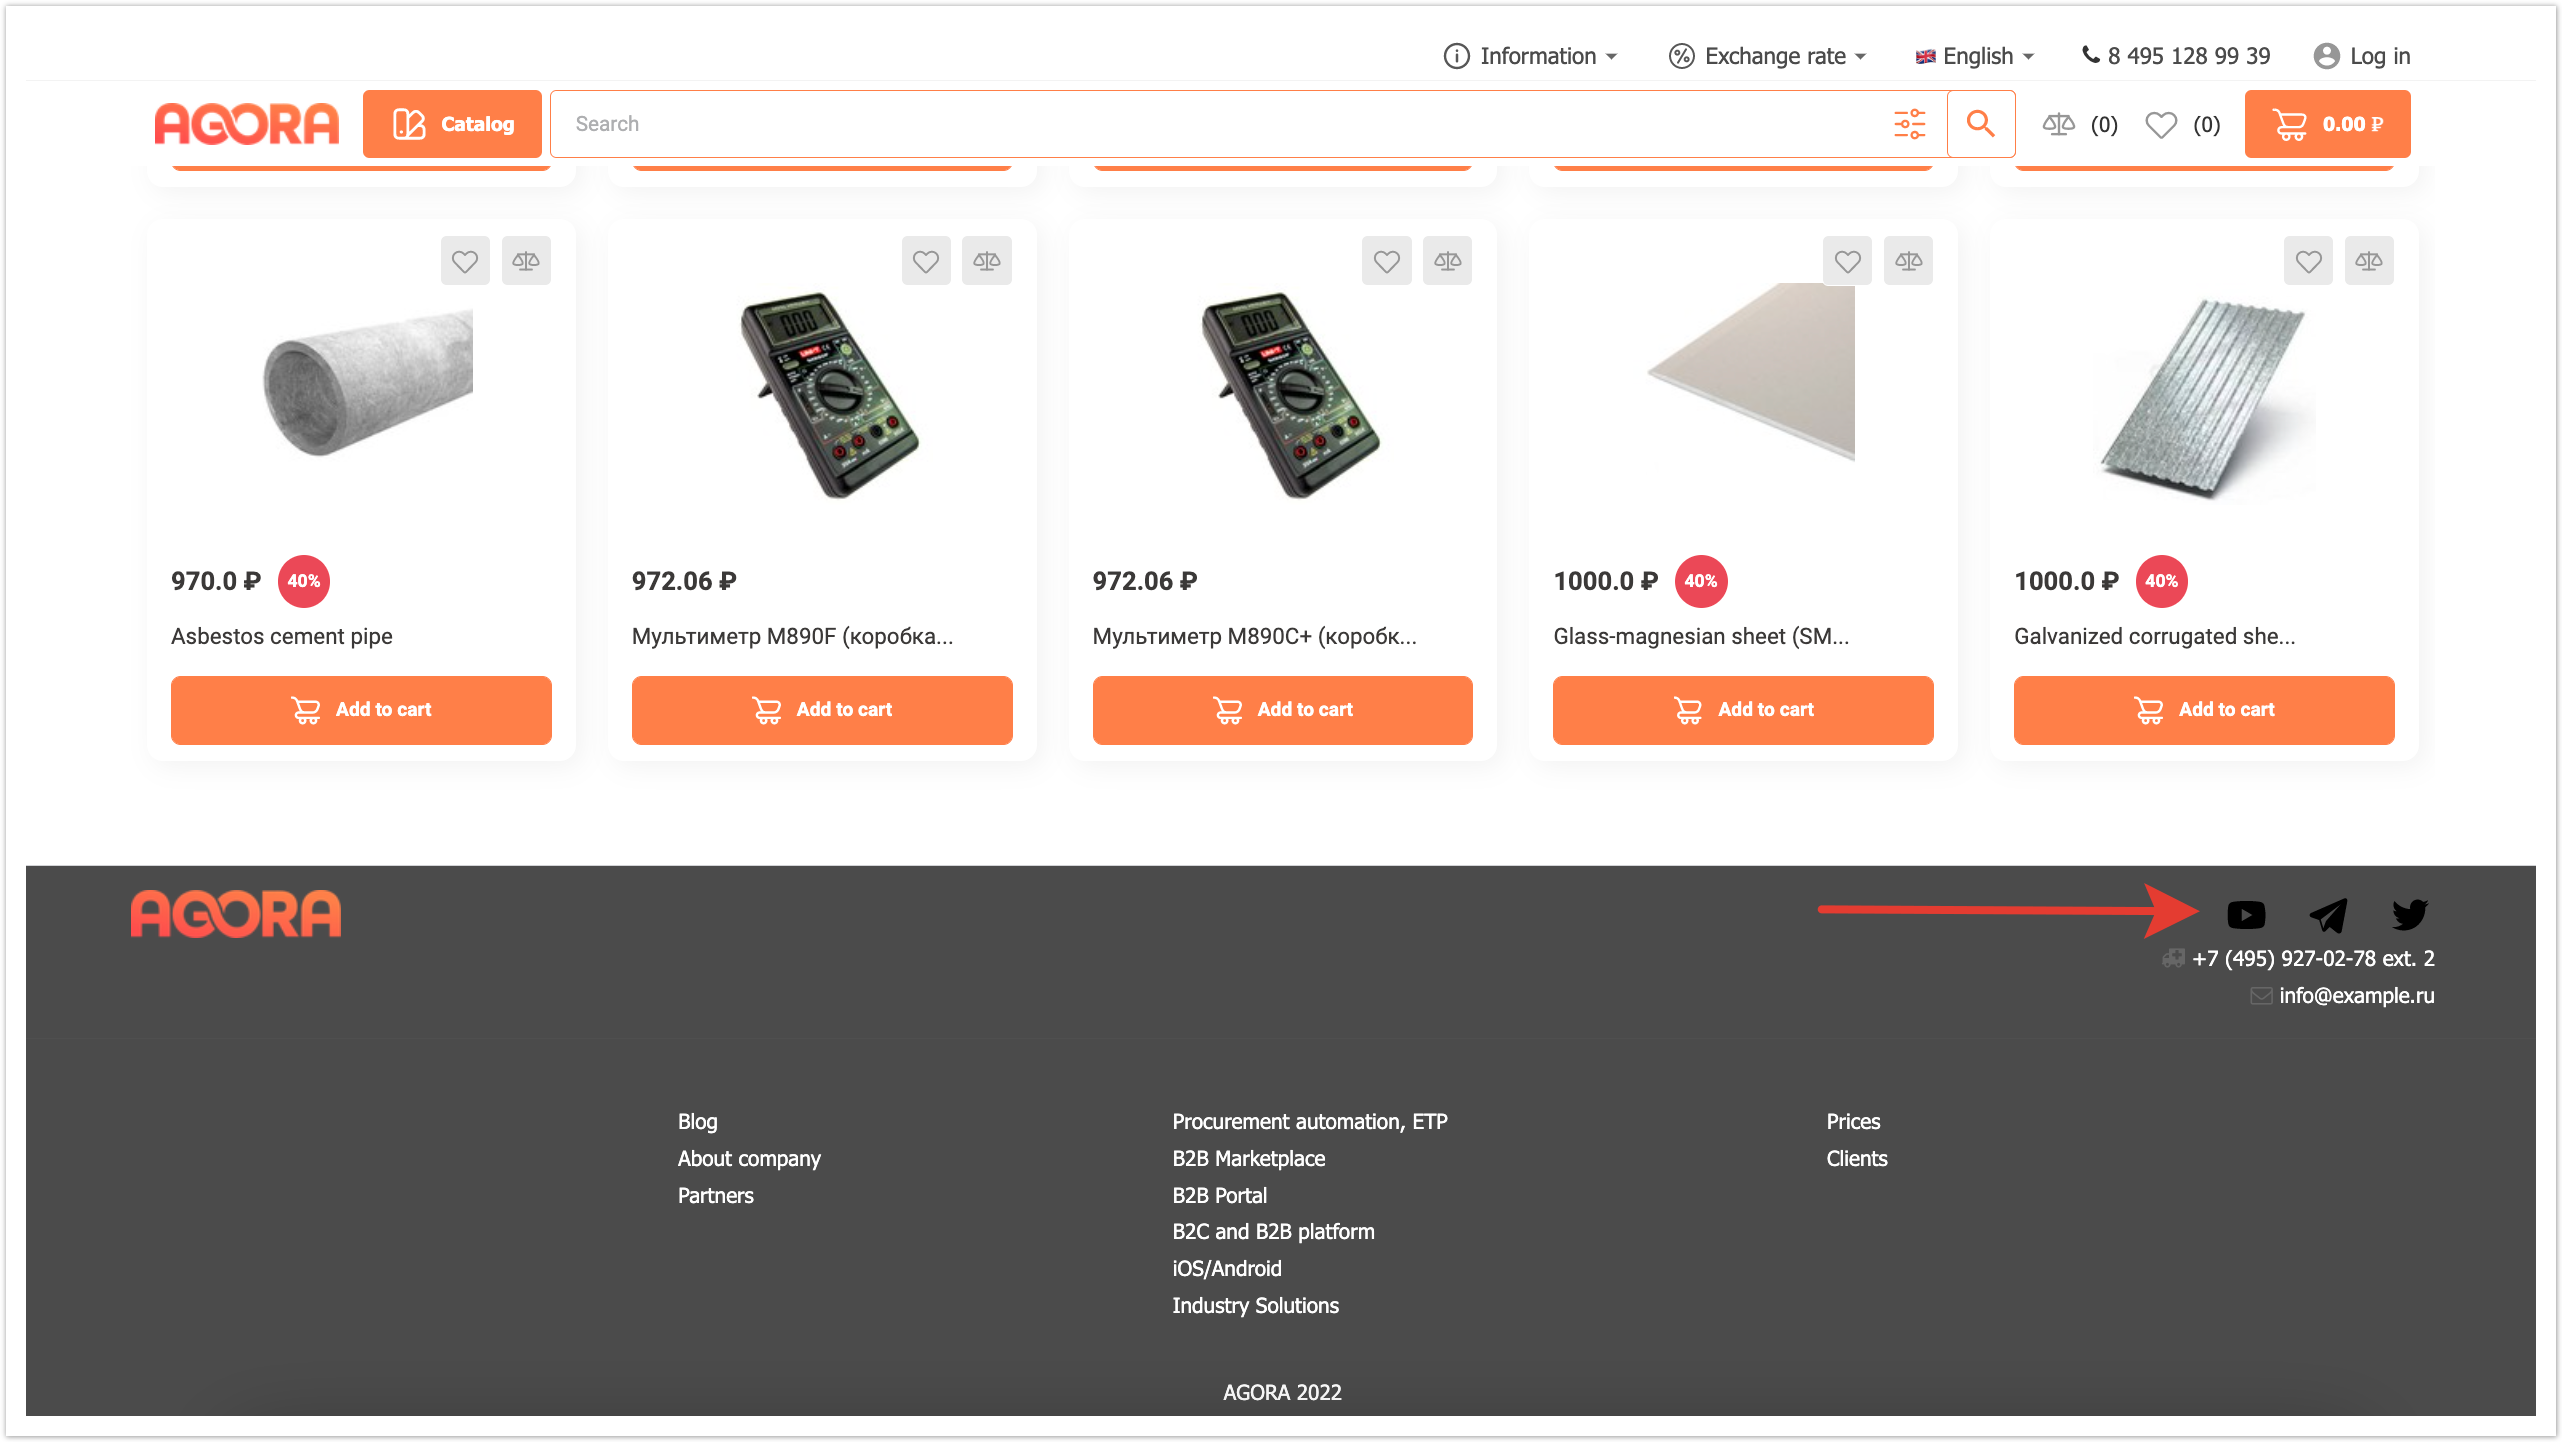
Шаблон футера - в этом поле можно выполнить переопределение внешнего вида футера с помощью CSS кода. Также здесь можно разместить сторонний скрипт, если его установка требуется в футер. Телефон и Адрес электронной почты - эти чек-боксы отвечают за вывод номера телефона и адреса электронной почты. Настройки регулируют включение и отключение вывода данных. Для того, чтобы скорректировать сами данные, которые будут выводится в футере сайта, обратитесь в техническую поддержку AGORA. Год для отображения в копирайте в футере - в этом поле указывается конкретный год или промежуток лет, в которые копирайт актуален. Если вам необходимо удалить копирайт Агора из футера, то вы также можете обратиться в техническую поддержку AGORA. Показывать собственные социальные сети в футере - эта настройка регулирует вывод кнопок для перехода в аккаунты социальных сетей. Если настройка включена, то далее в блоке Соц. сети можно настроить данные для вывода конкретных социальных сетей. В столбце Ссылка указывается прямая ссылка на аккаунт компании в выбранной социальной сети. В столбце Изображение загружается иконка SVG формата этой социальной сети, которая будет выводится в футере. Обратите внимание, что в футере будет выводится только это изображение без дополнительного текста, поэтому иконка должна быть интуитивно понятной для пользователей. Настройка В новом окне регулирует открытие ссылки. Если чек-бокс включен, то при переходе по ссылке откроется новая страница. Если чек-бокс выключен, то ссылка откроется в текущем окне, то есть пользователь уйдет с сайта.
|


| Sv translation | |||||||||||
|---|---|---|---|---|---|---|---|---|---|---|---|
| |||||||||||
Responsive footer layoutThe display of the footer on the project pages is fully adapted to the output on any device. It displays successfully on the computer:
On tablet:
On mobile phone:
|


| Примечание | ||
|---|---|---|
| ||
If you have any questions about using or configuring the functionality, please contact AGORA technical support. |
| Sv translation | |||||||||||
|---|---|---|---|---|---|---|---|---|---|---|---|
| |||||||||||
Layout de footer adaptativoA tela do rodapé nas páginas do projeto está totalmente adaptada à saída em qualquer dispositivo. É exibido com sucesso no computador:
Em seu tablet:
No seu celular:
Construtor FooterVocê pode personalizar o conteúdo do footer através do painel de administração. Para fazer isso, vá para a seção Construtor do Footer.
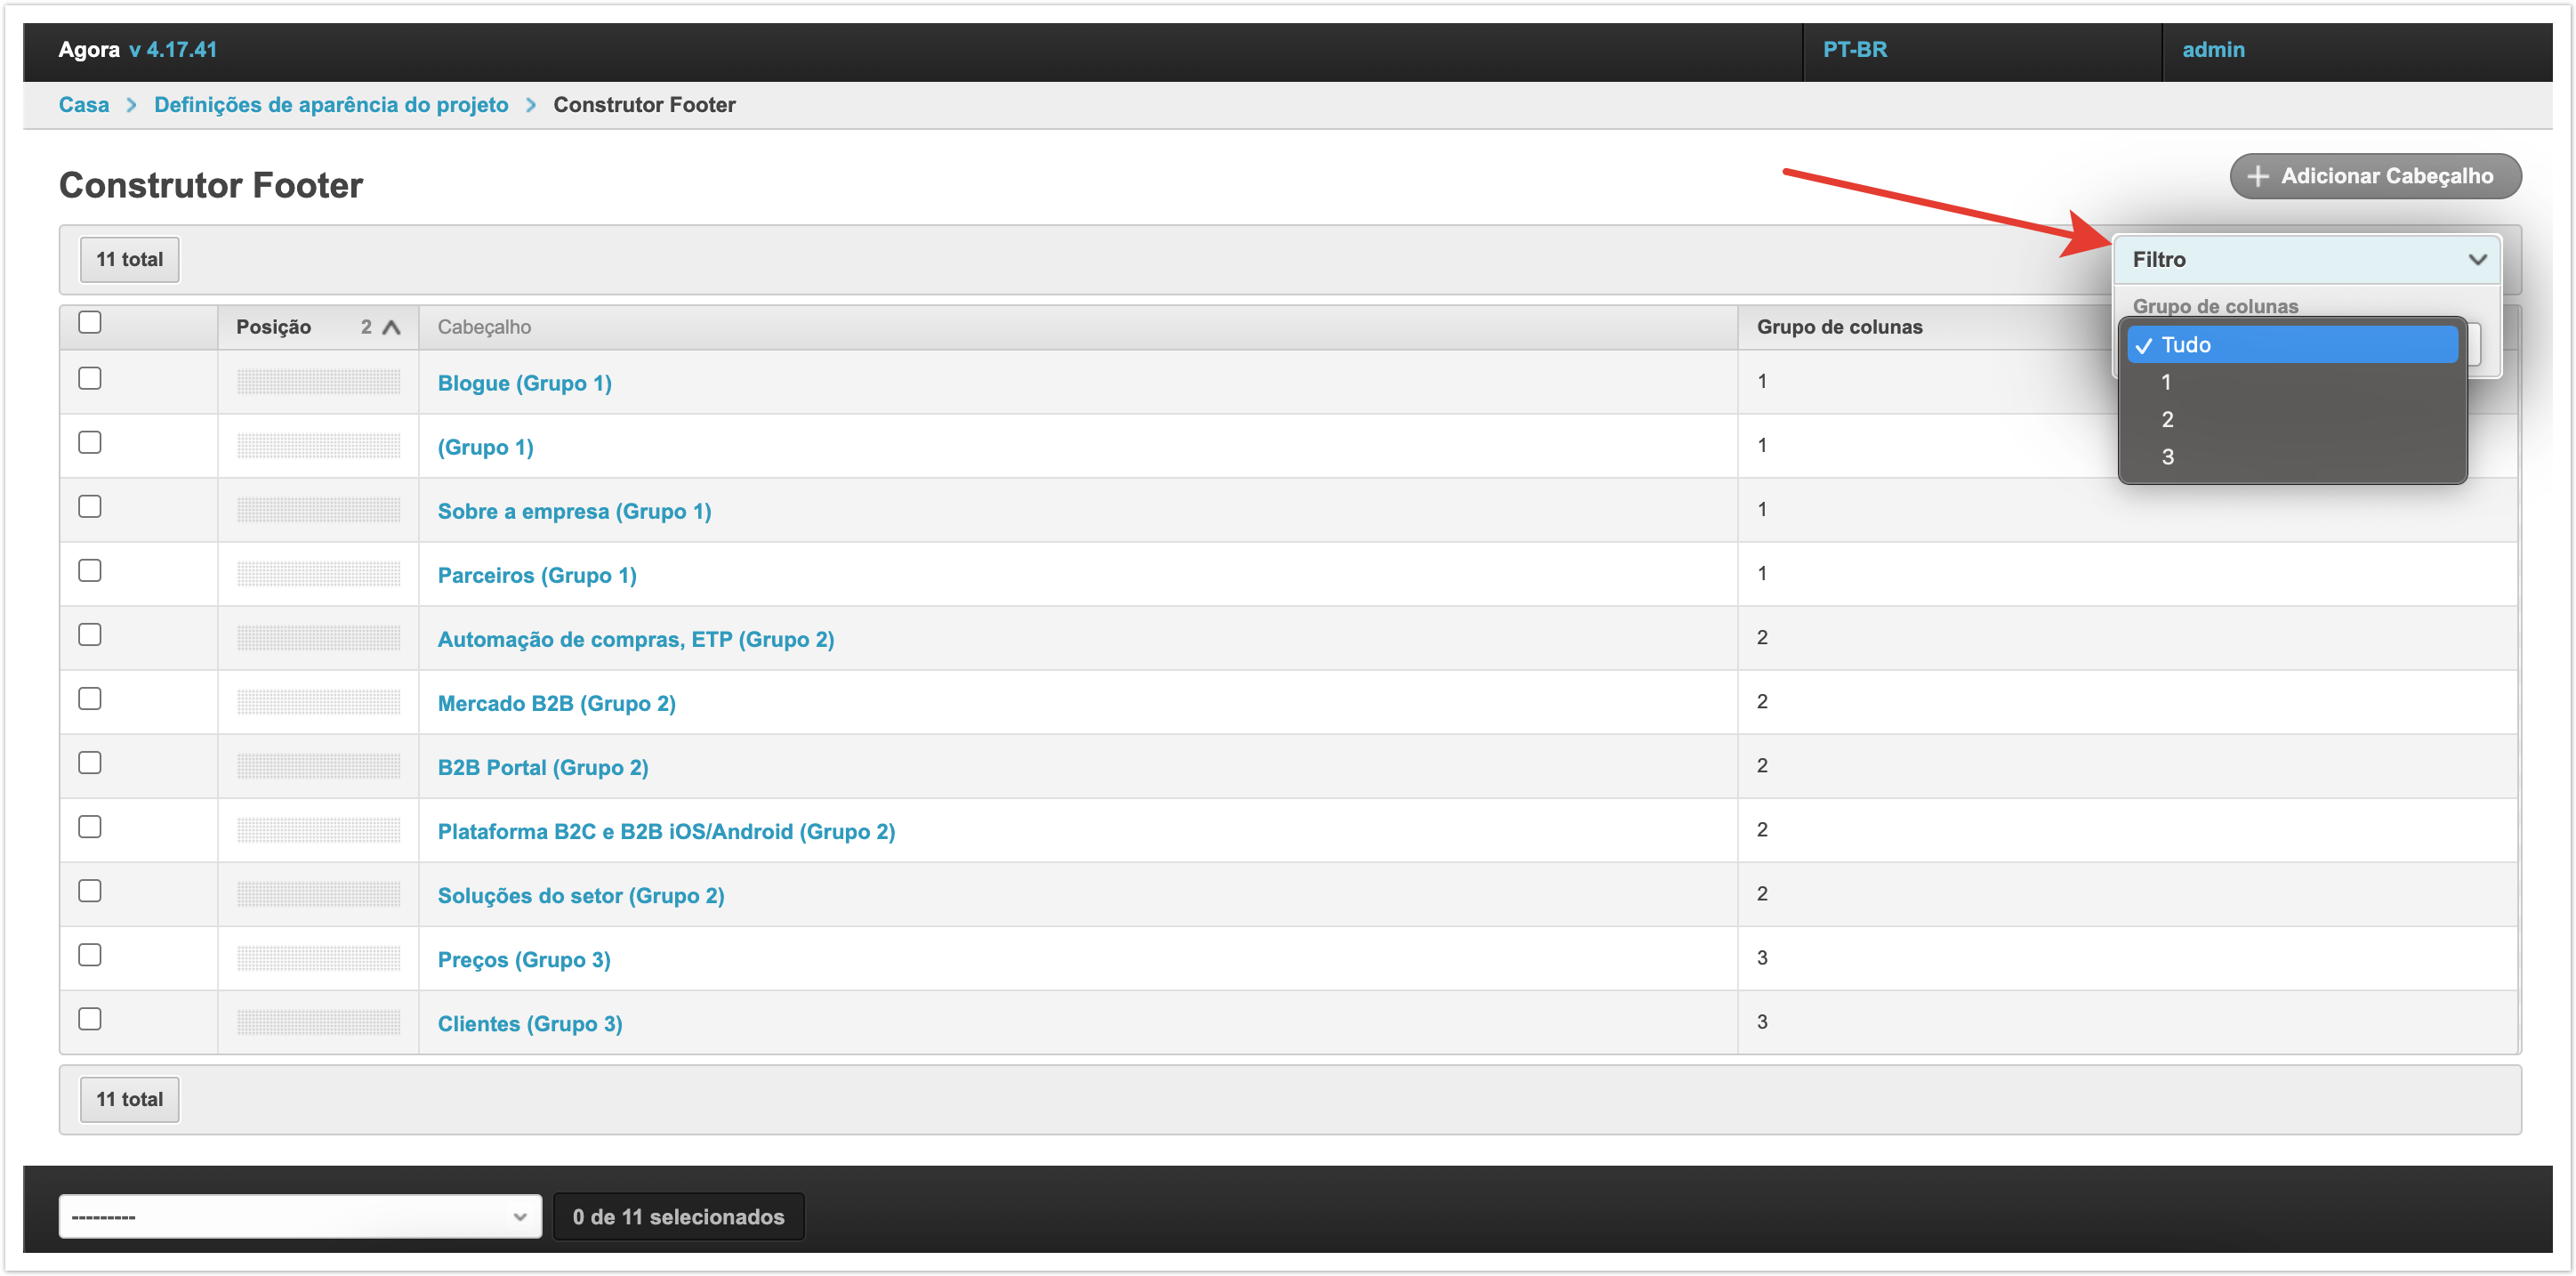
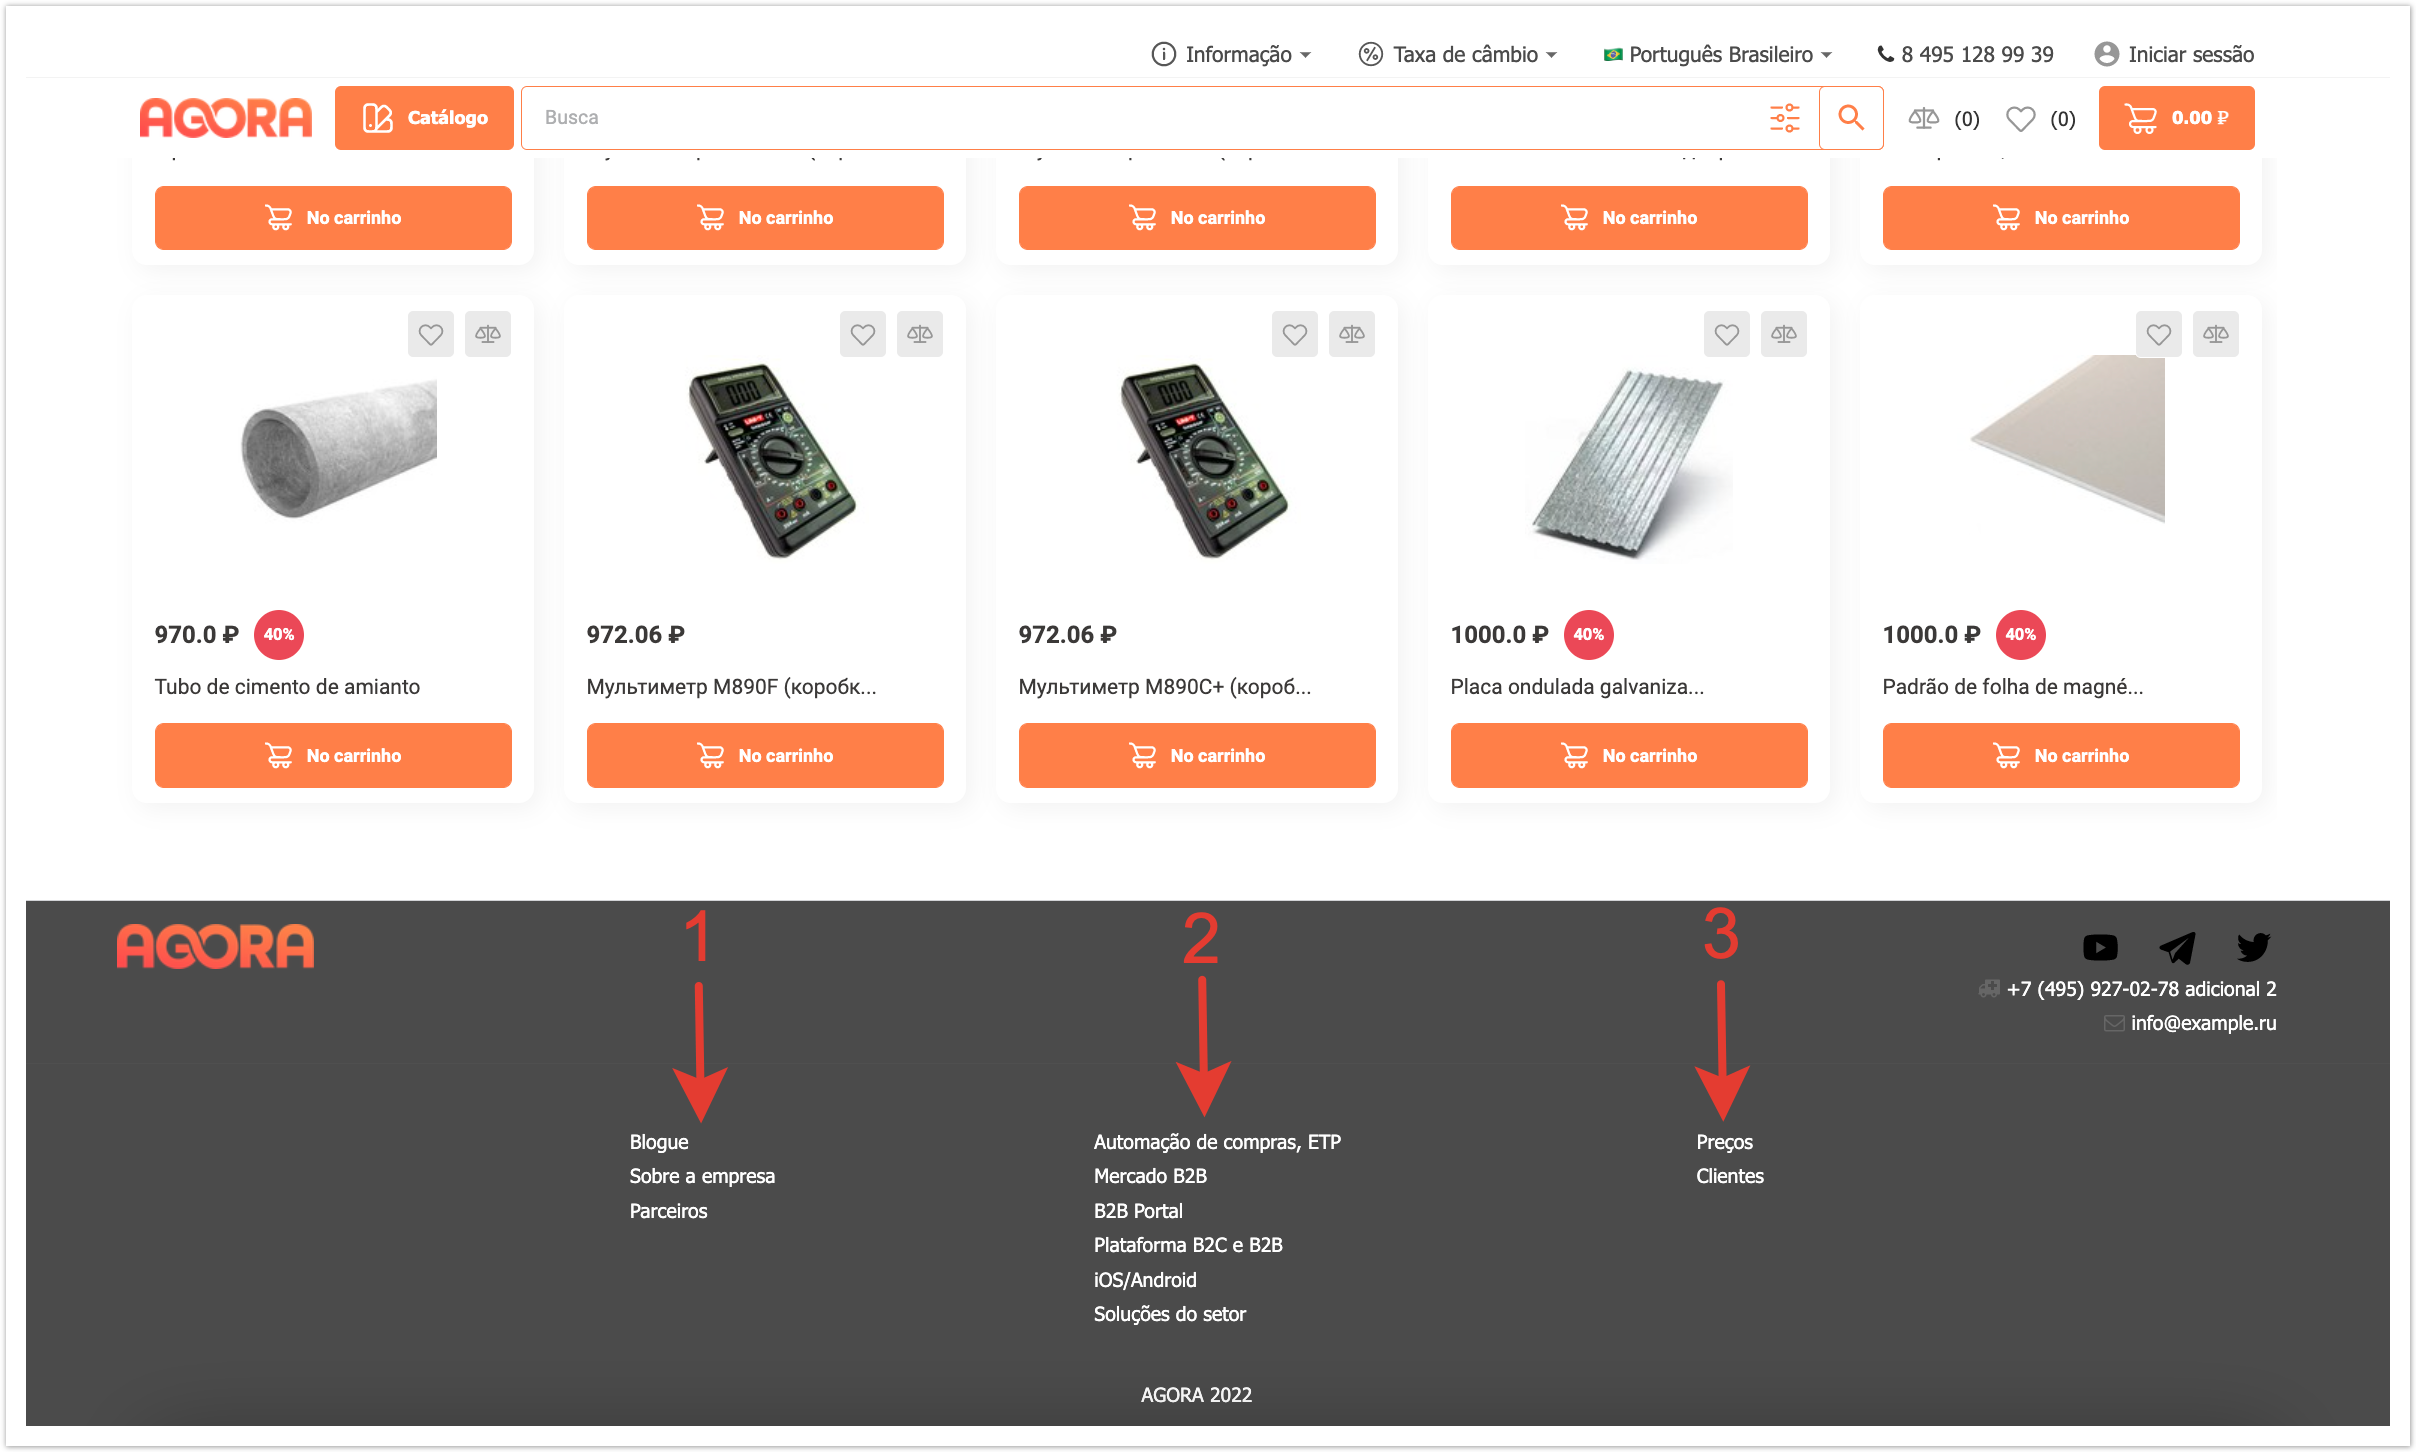
A página que abre exibe as seções do footer que foram criadas anteriormente. Posição - esta coluna com a ajuda da funcionalidade arrastar e soltar permite alterar a ordem de exibição de cabeçalhos na página. Basta puxar o retângulo cinza na linha desejada e transferi-lo para o lugar que ele deve ocupar. Cabeçalho - Esta coluna contém cabeçalhos que ajudam o administrador da plataforma a navegar na lista. Grupo de Colunas - Esta coluna mostra a qual grupo cada cabeçalho pertence. Por padrão, as linhas são classificadas por esse valor, ou seja, todos os cabeçalhos que pertencem ao primeiro grupo são exibidos primeiro, depois para o segundo e depois para o terceiro. A página também fornece filtragem por grupo de coluna. Ele pode ser usado para exibir apenas os títulos que pertencem a um grupo específico.
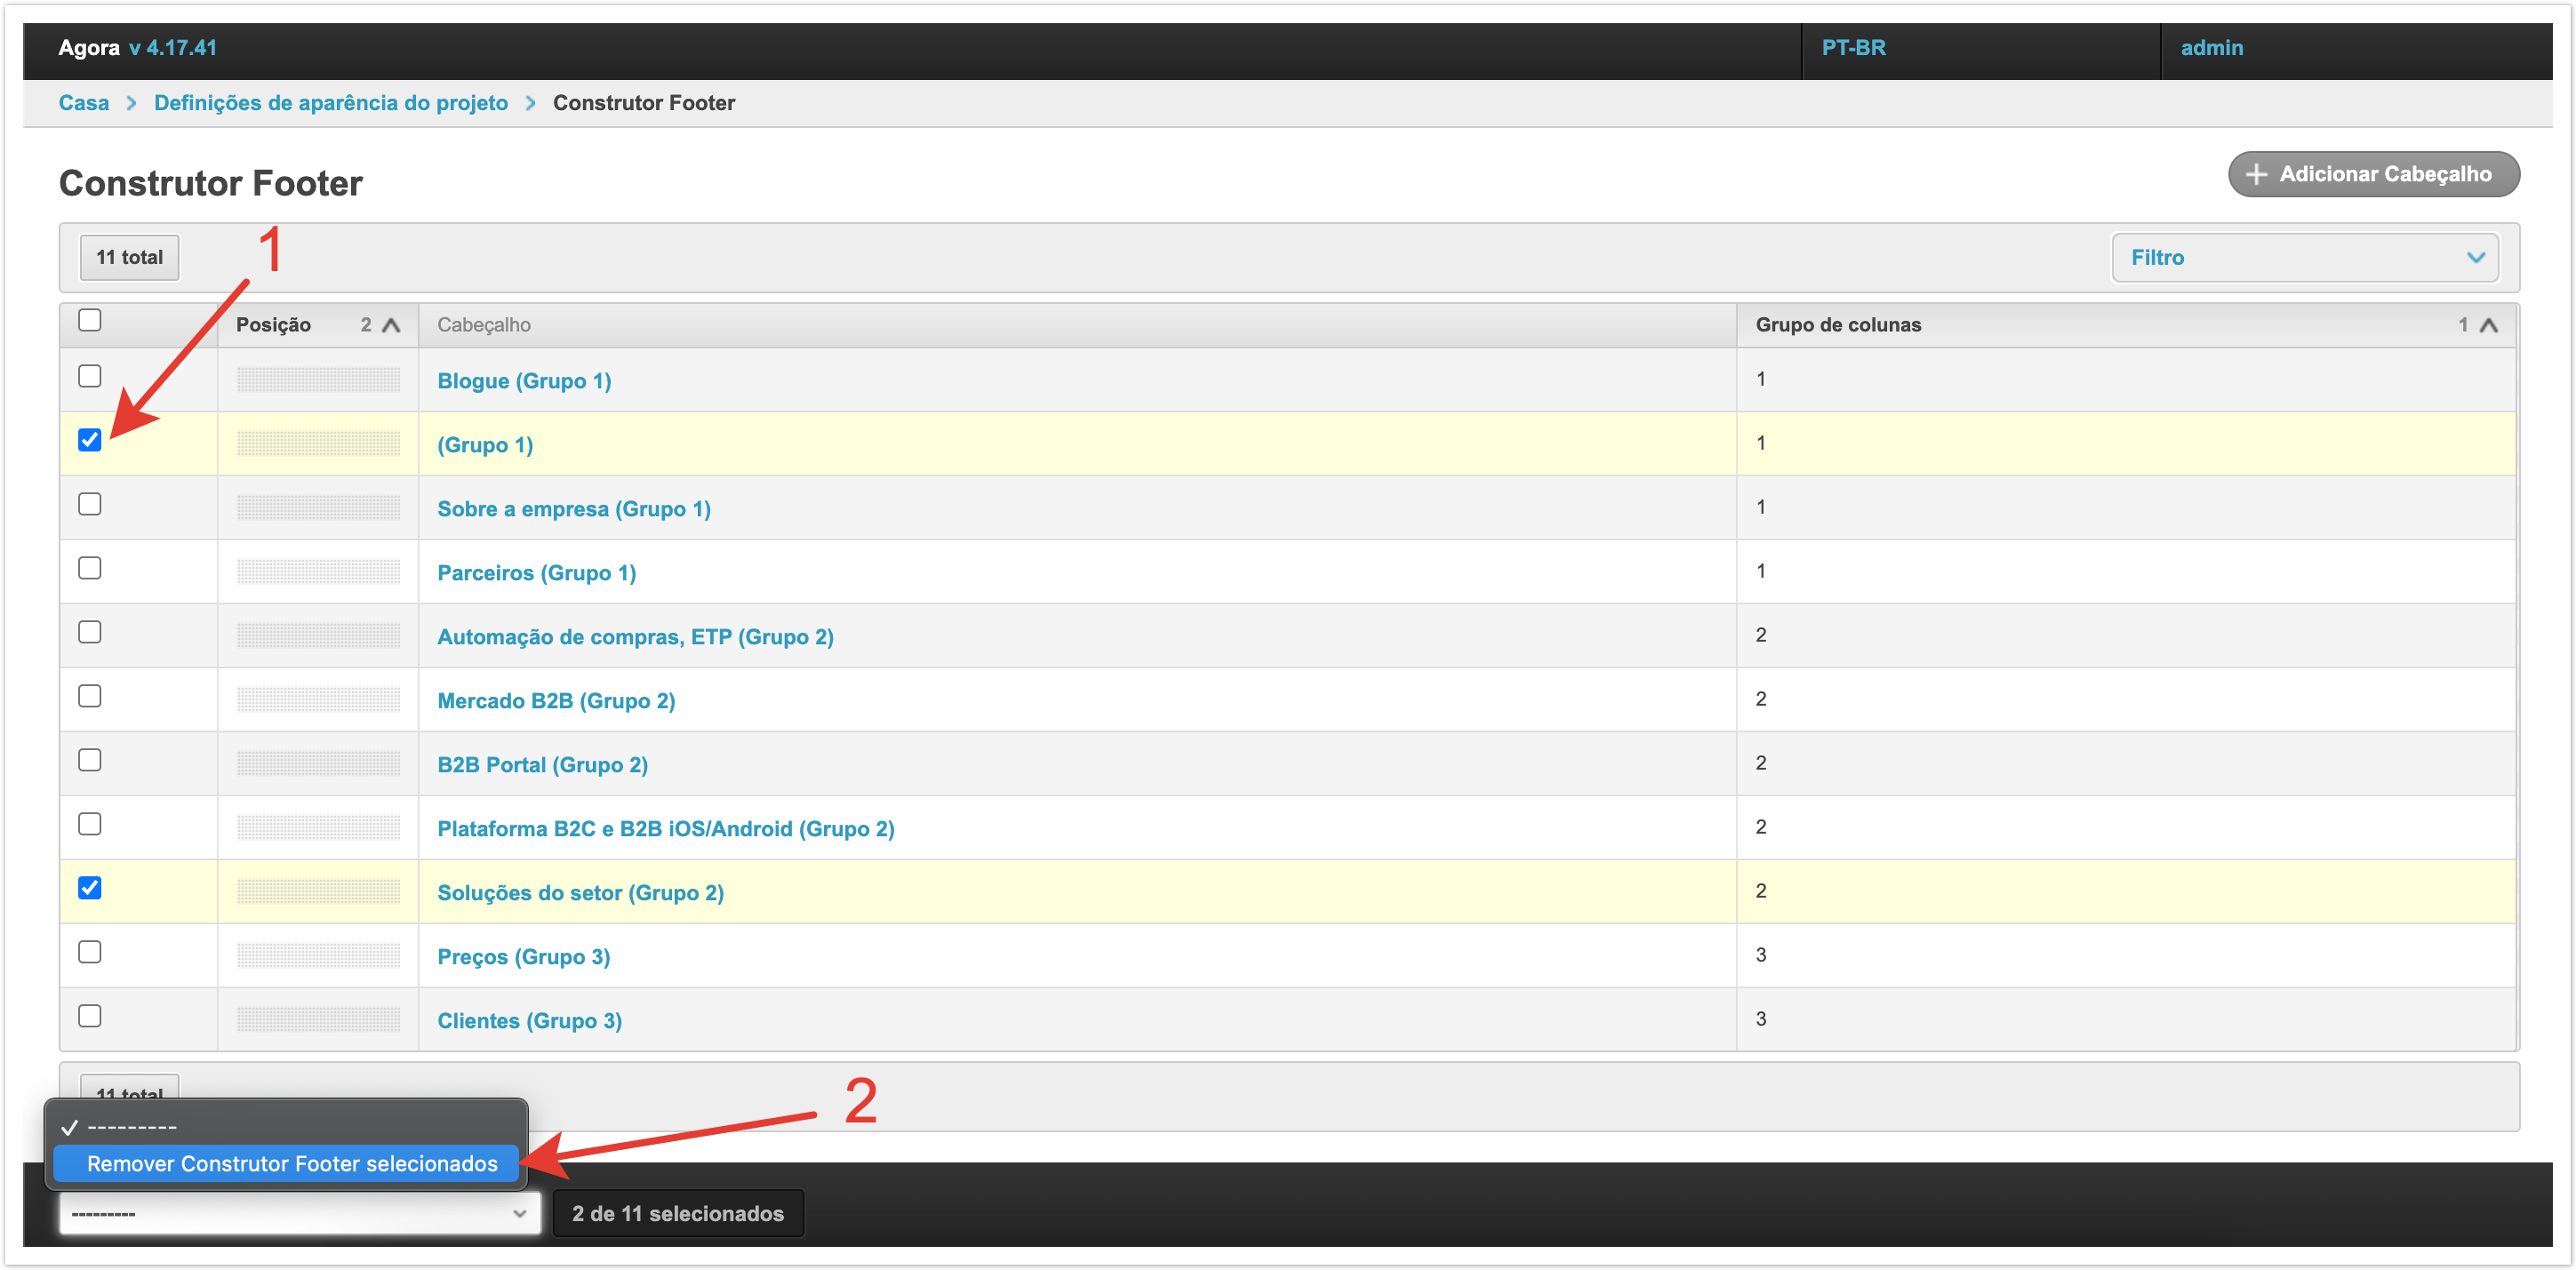
Remova cabeçalhos footerPara remover qualquer um dos cabeçalhos disponíveis do rodapé, você precisa destacá-los com caixas de seleção na primeira coluna e, em seguida, na parte inferior esquerda na lista de gotas selecione Remover Construtor Footer selecionados.
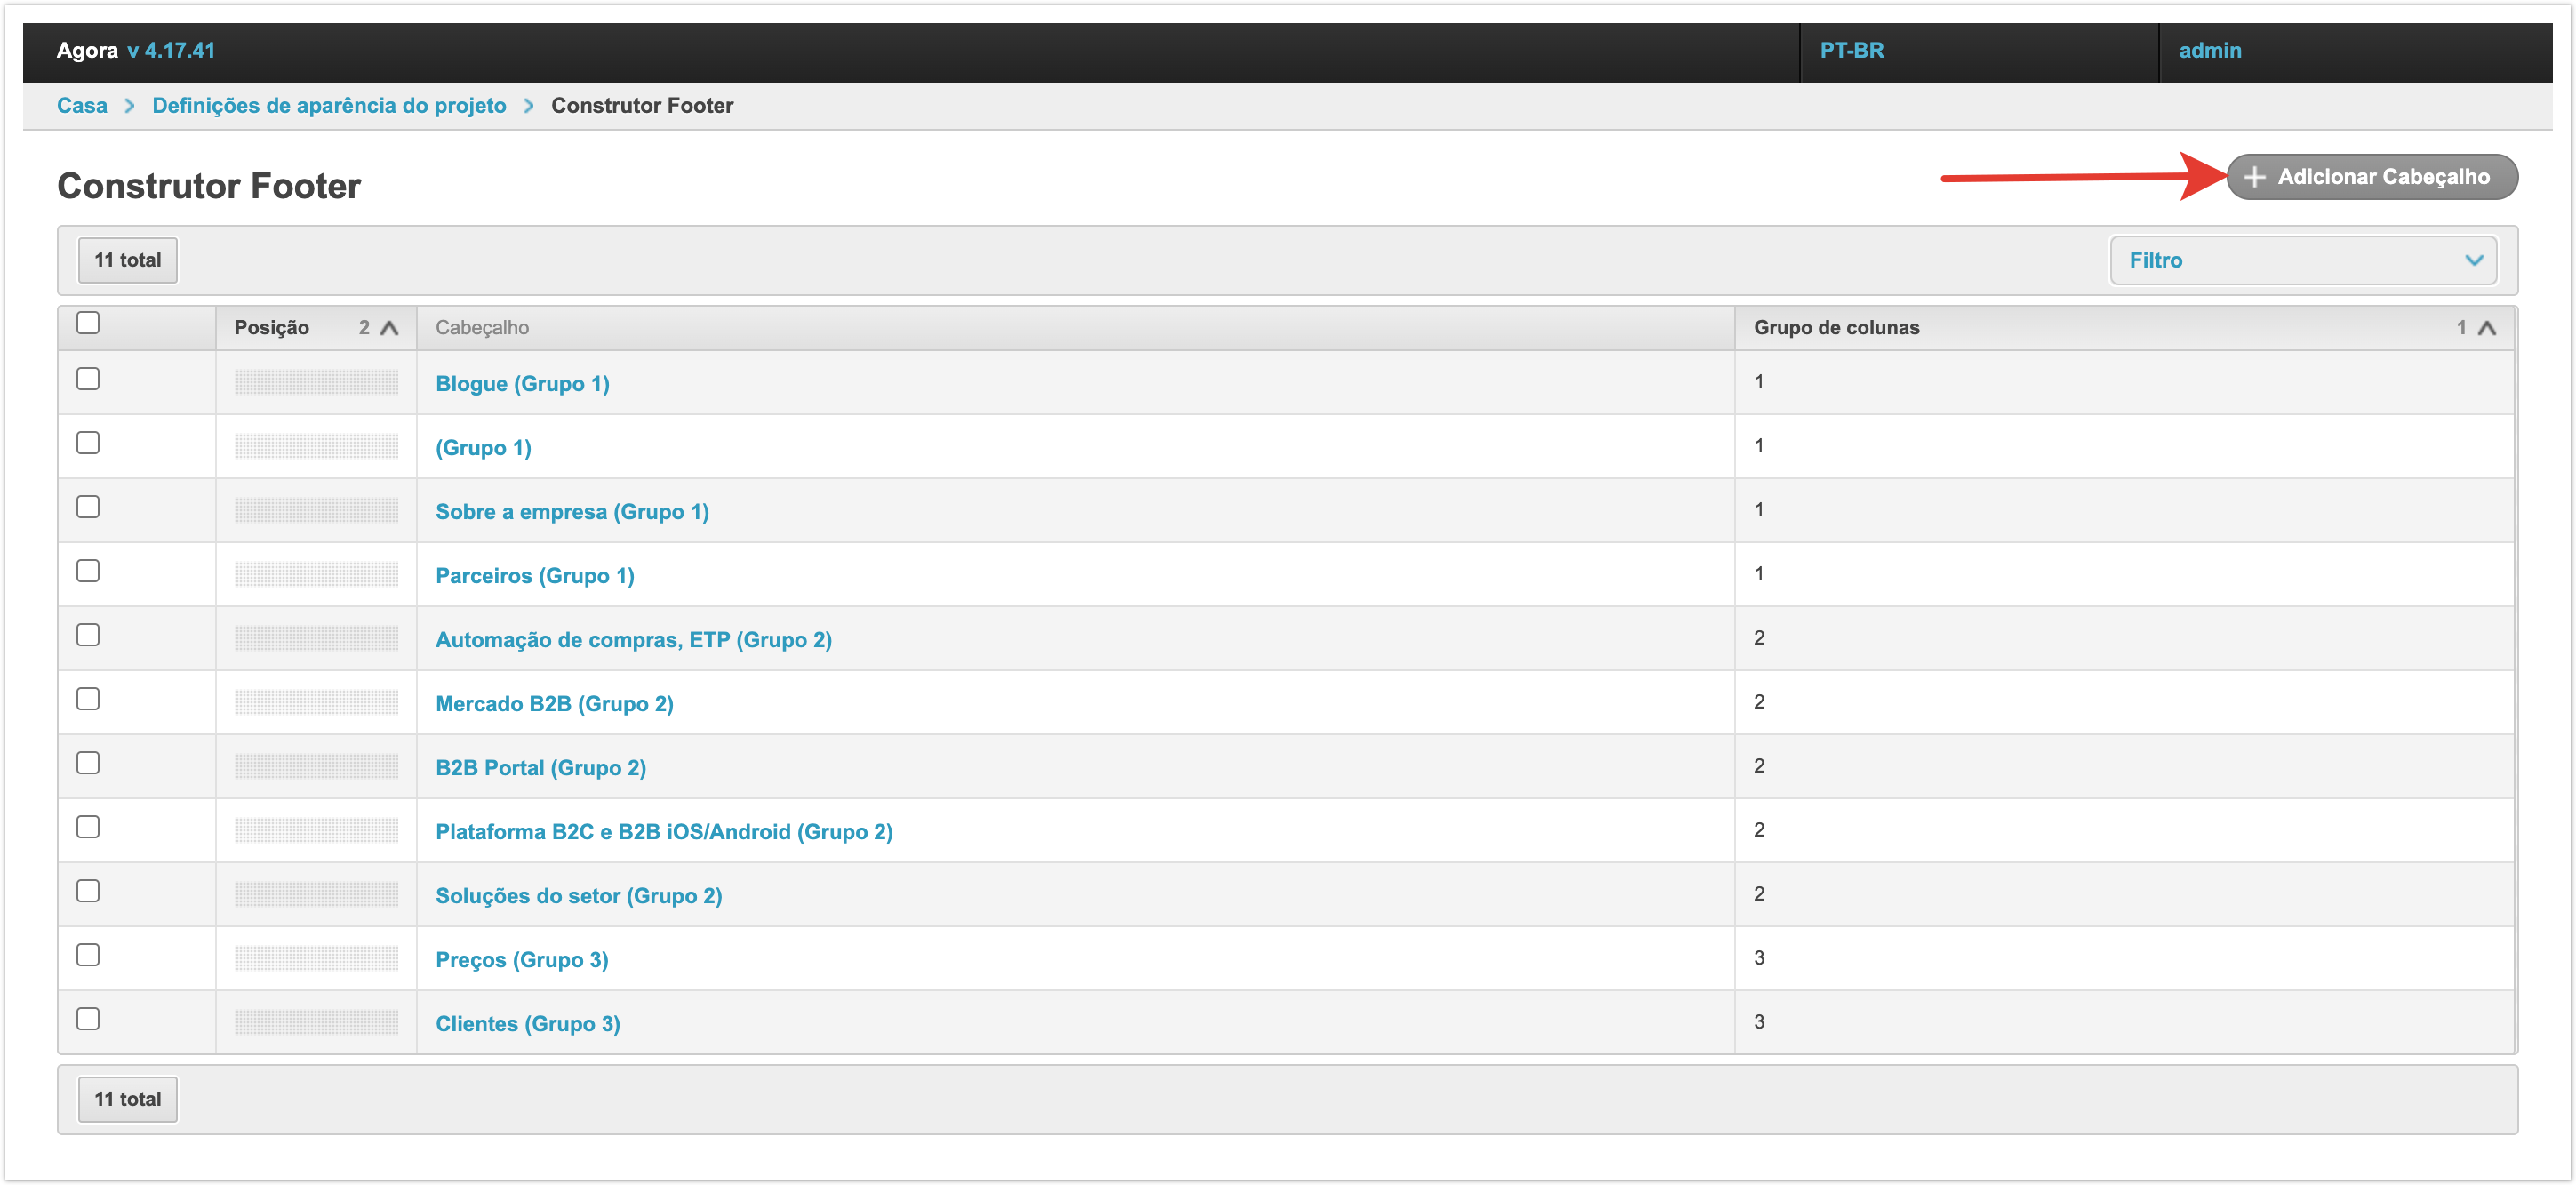
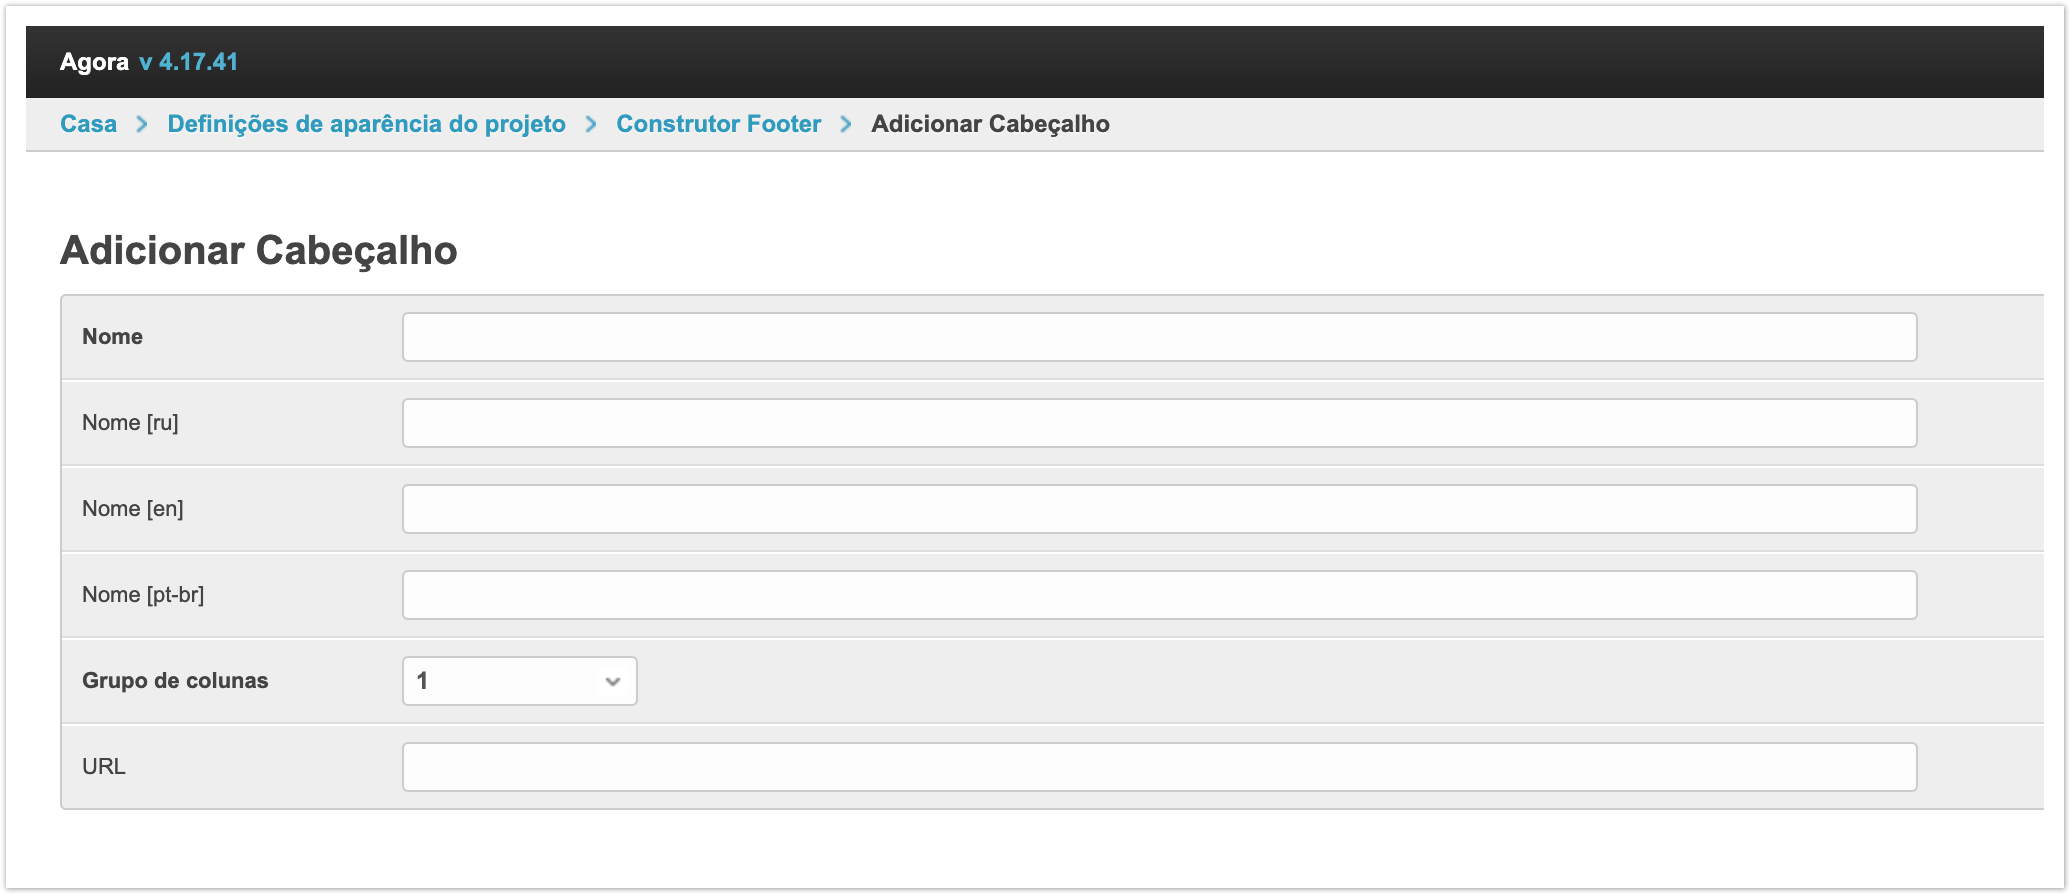
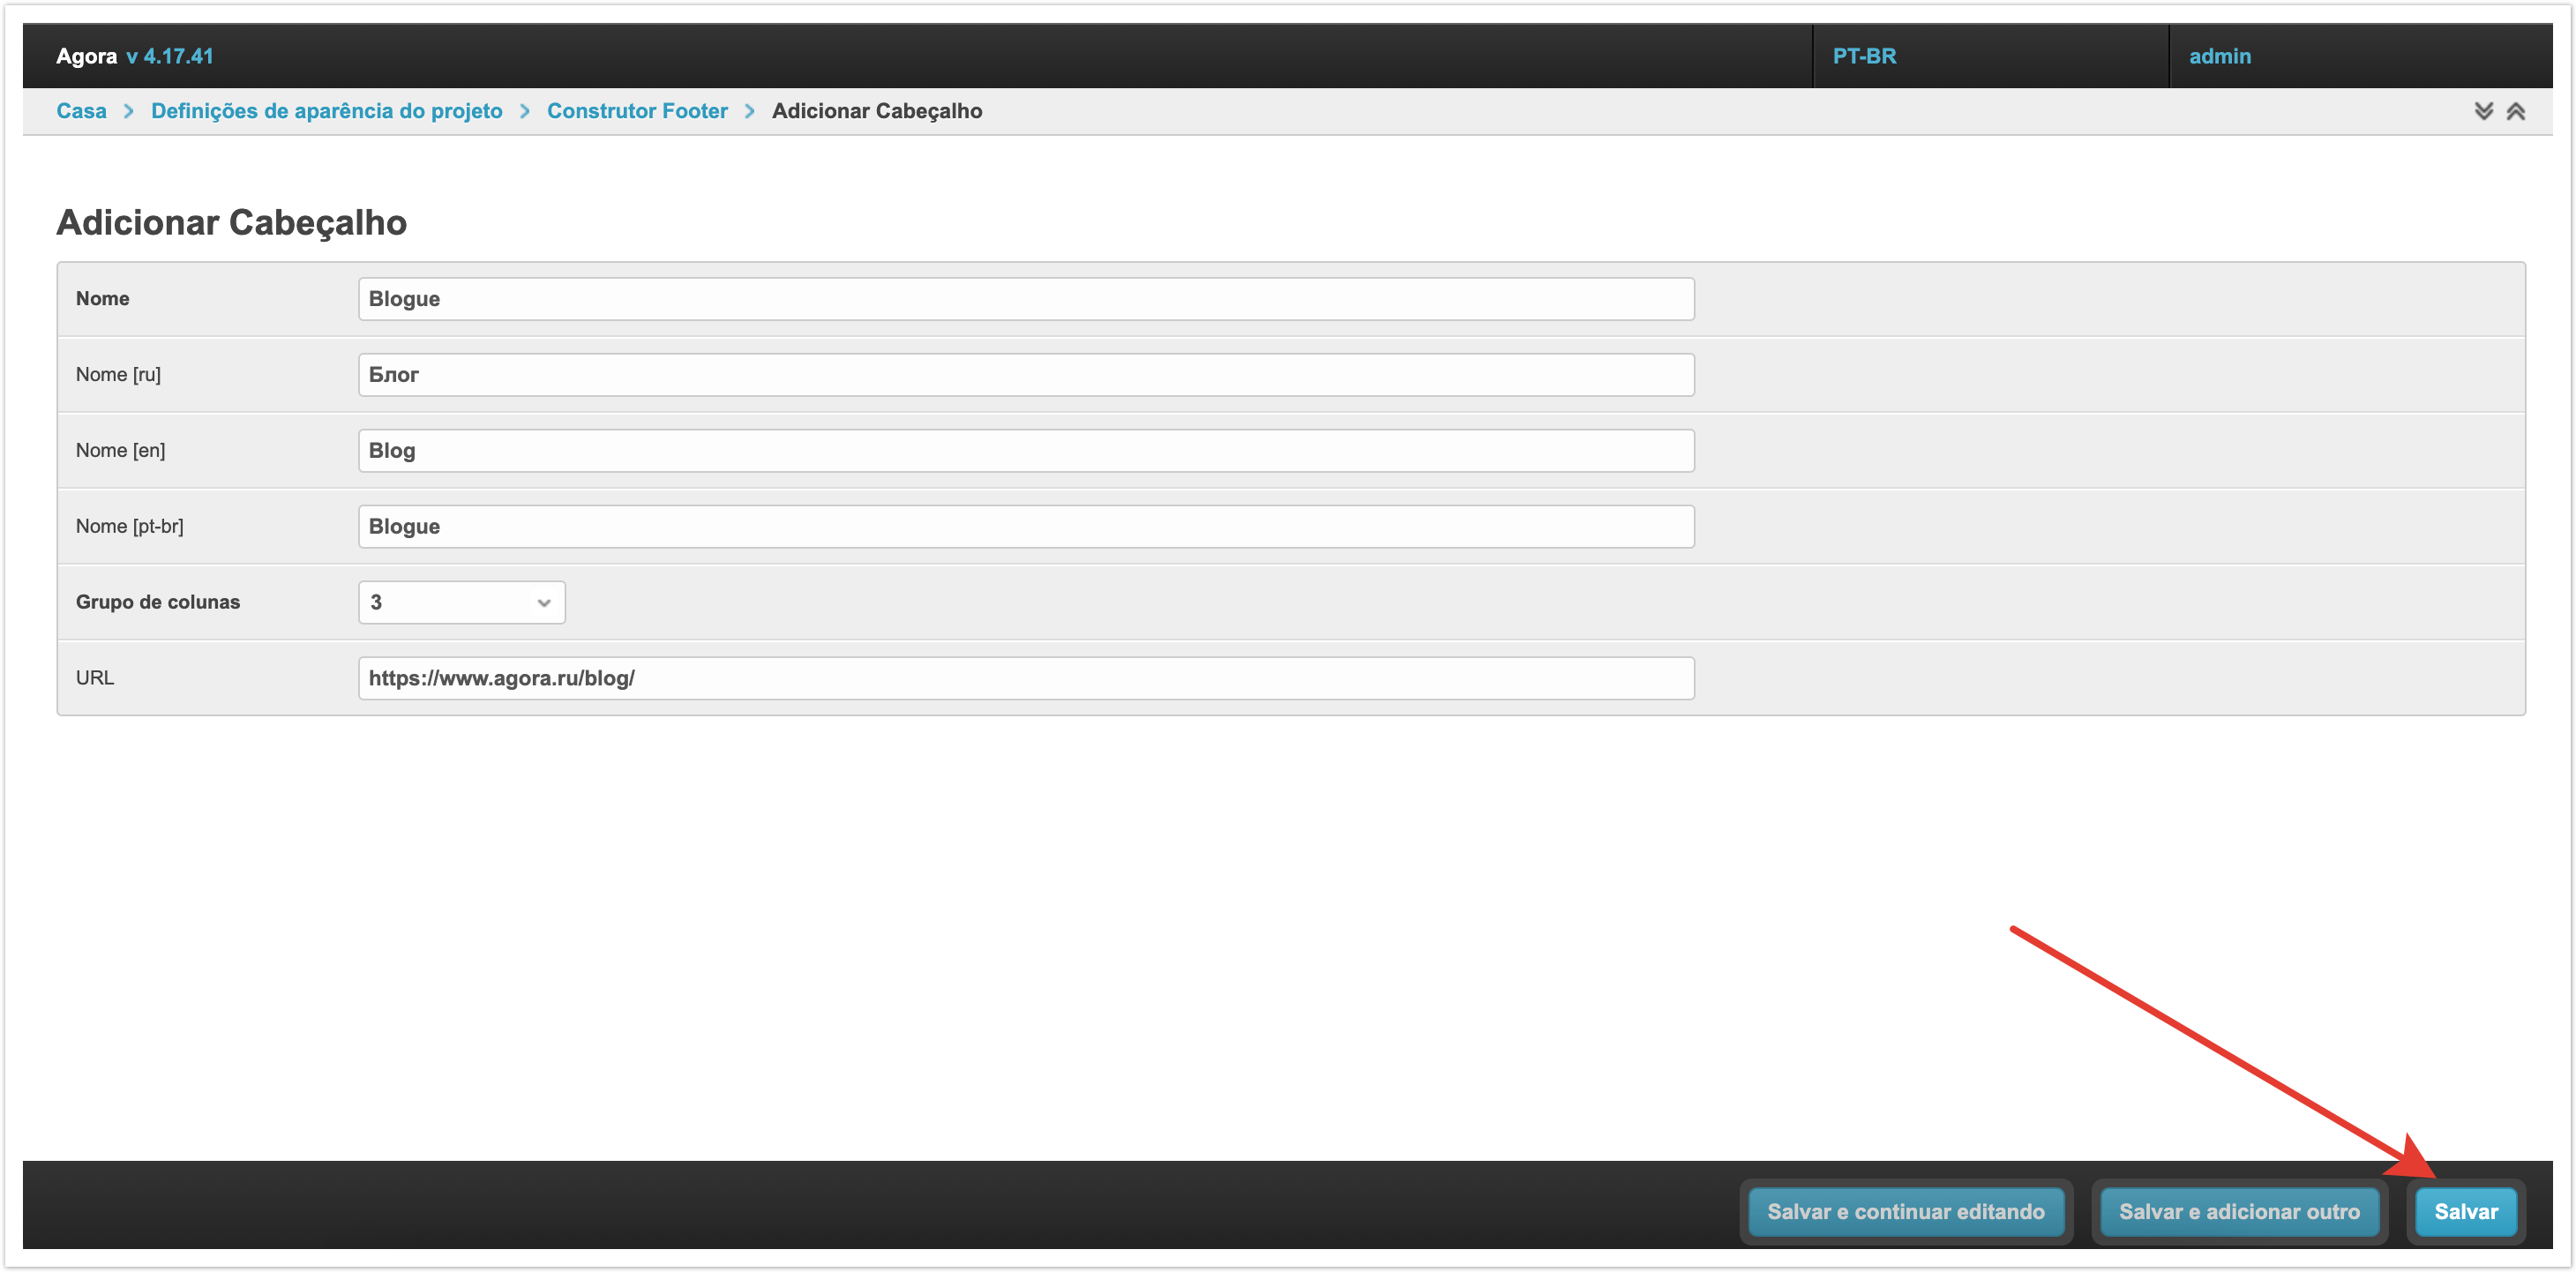
Adicione um cabeçalho footerPara adicionar um novo cabeçalho de footer, clique no botão Adicionar Cabeçalho no canto superior direito da página. Na página que abre, você precisa preencher os campos para adicionar um novo cabeçalho de footer.
Nome - este campo indica o próprio título, que será exibido no rodapé do site em todas as páginas. Se o multilíngue estiver ativado na plataforma, então você pode especificar o nome em diferentes idiomas. Grupo de colunas - há três valores numéricos neste campo: 1, 2 e 3. Cada valor determina a localização do cabeçalho. O rodapé é dividido em 3 colunas ou, ou seja, em 3 grupos. Assim, se você quiser que o cabeçalho apareça na primeira coluna, você especificar um valor de grupo de 1. Se você precisar configurar a saída no bloco intermediário, então você precisa especificar um grupo de colunas - 2. Se você quiser exibir o cabeçalho na coluna direita, você precisa especificar um grupo de colunas - 3.
URL - o endereço do link que será clicado quando você clicar neste título no footer. O endereço URL pode levar tanto a páginas internas da plataforma quanto a sites externos. Depois de todos os parâmetros necessários terem sido preenchidos, você precisa salvar o Cabeçalho e ele aparecerá na lista.
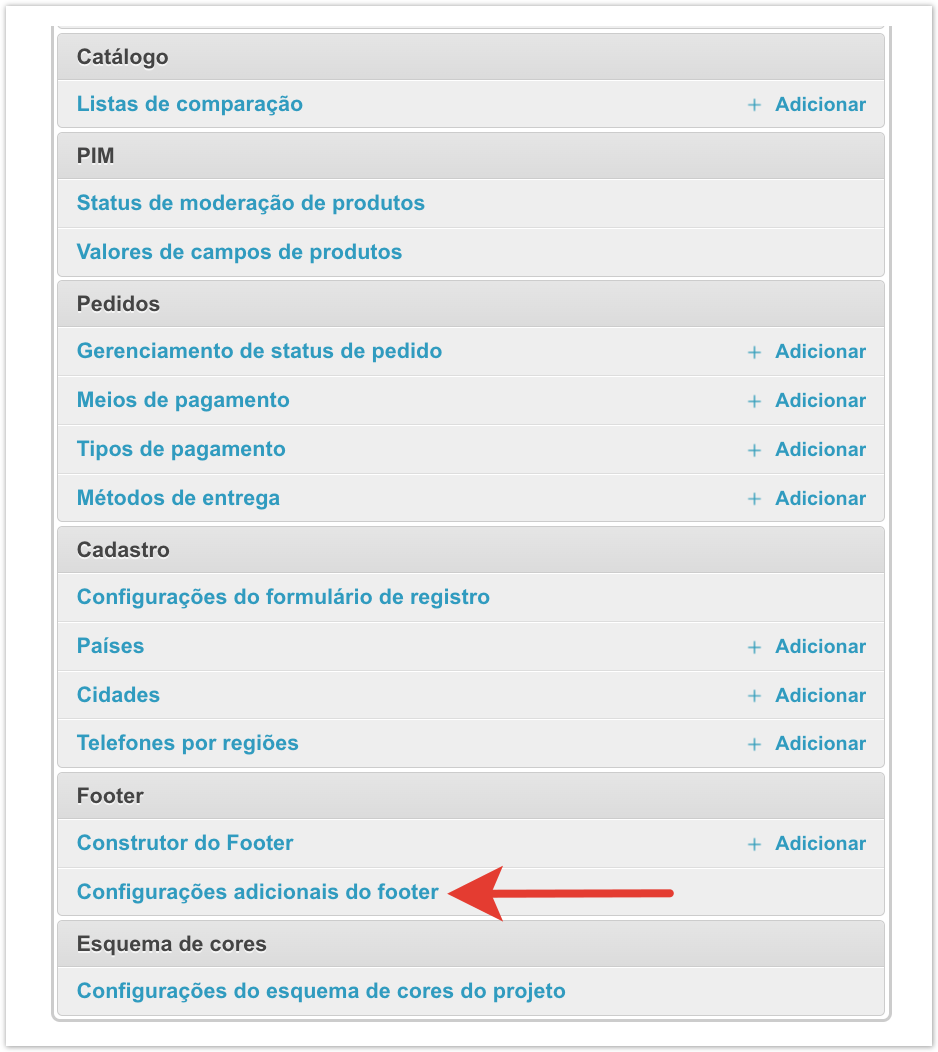
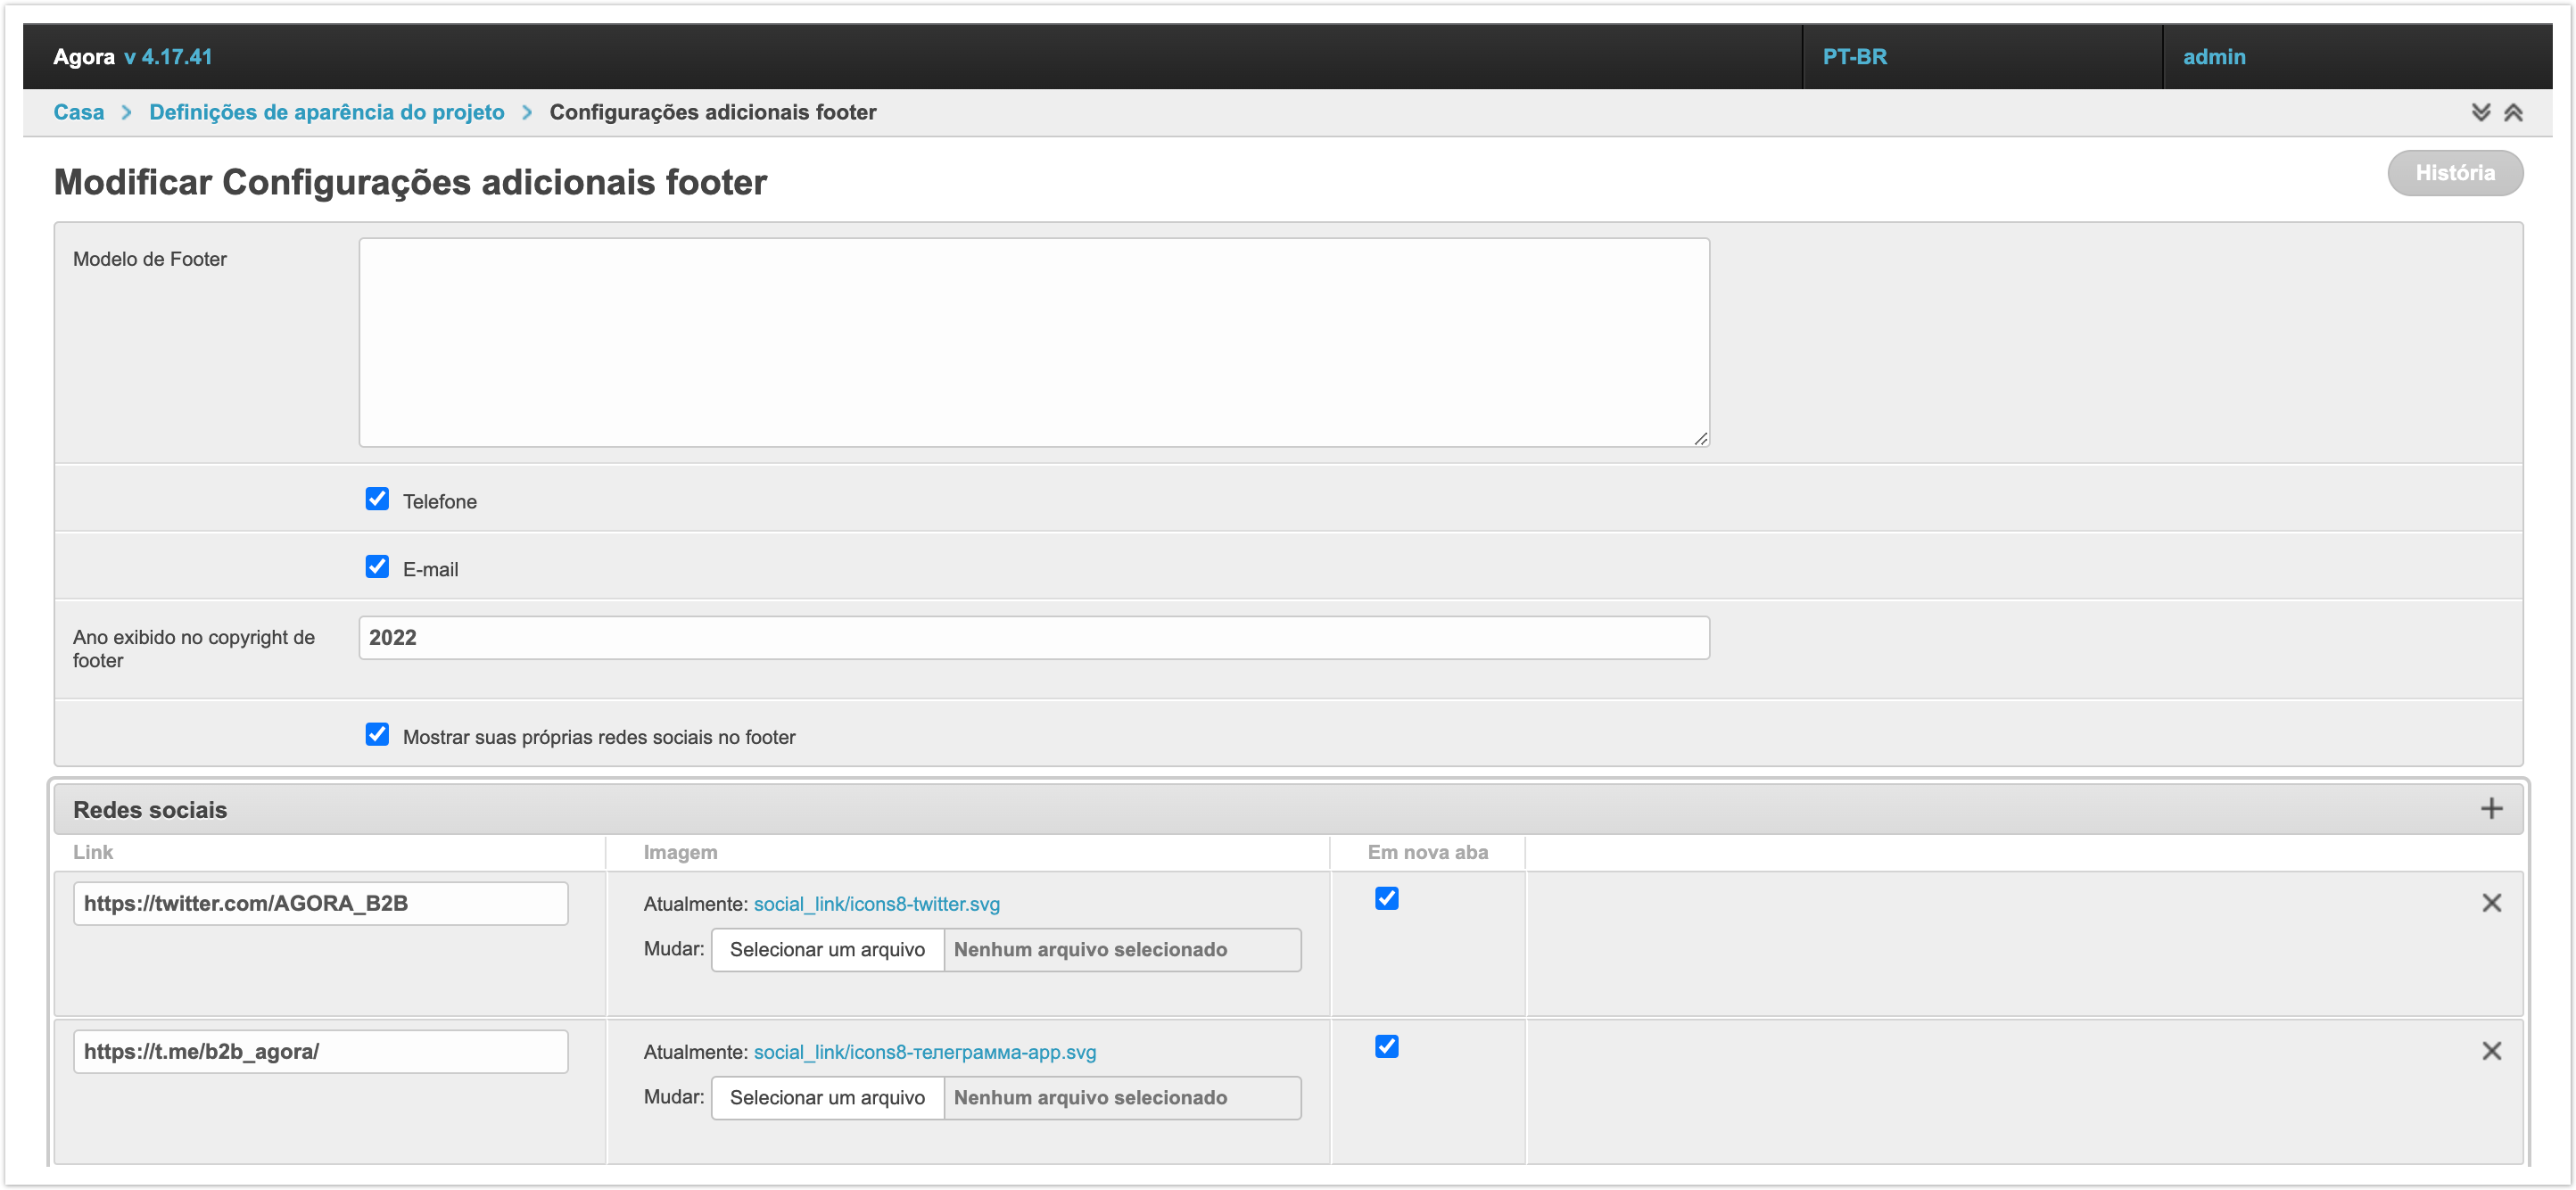
Configurações adicionais footerNo painel de administração há também uma seção Configuração adicionais do footer.
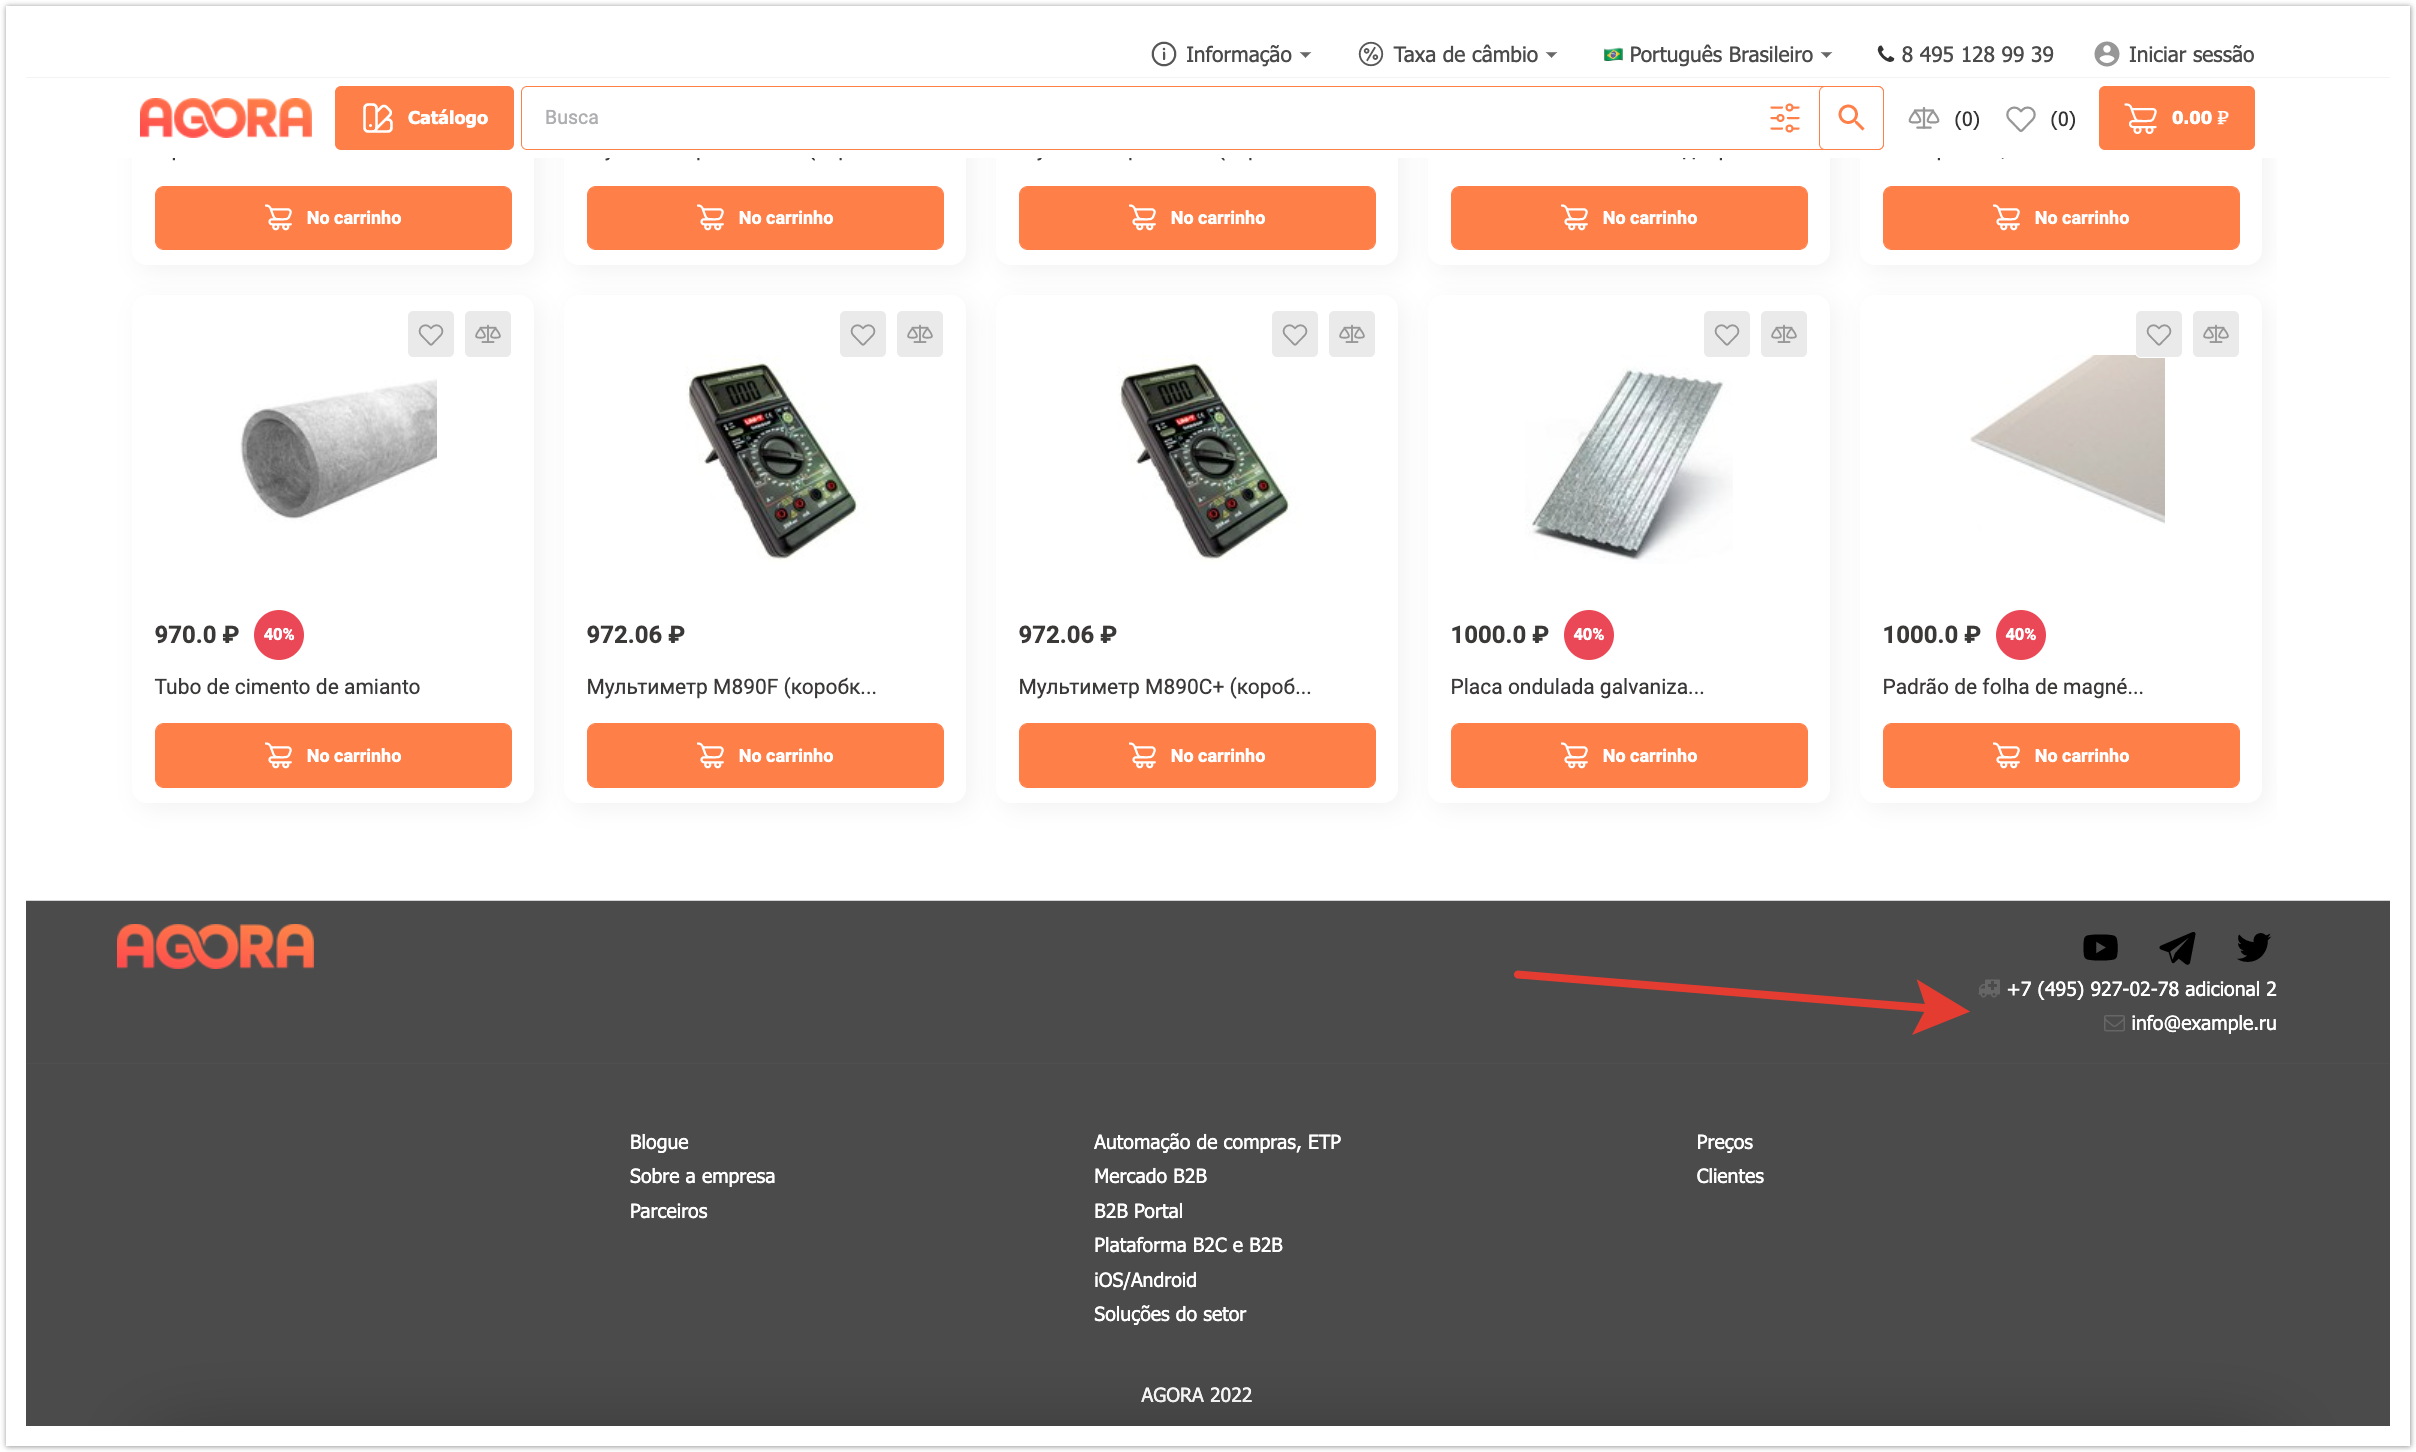
Nesta seção, você pode modificar os dados exibidos no bloco acima dos grupos de cabeçalho à direita.
Modelo de Footer - neste campo você pode substituir a aparência do rodapé usando código CSS. Você também pode colocar um script de terceiros aqui se sua instalação for necessária no rodapé. Telefone e E-mail – Essas caixas de seleção são responsáveis por exibir o número de telefone e endereço de e-mail. As configurações controlam se a saída está ativada ou desativada. Para corrigir os dados que serão exibidos no rodapé do site, entre em contato com o suporte técnico da AGORA. Ano exibido no copyright de footer - este campo indica o ano específico ou período de anos em que os direitos autorais são relevantes. Se você precisar remover os direitos autorais do Agora do rodapé, você também pode entrar em contato com o suporte técnico da AGORA. Mostre suas próprias redes sociais no footer - esta configuração regula a exibição de botões para ir às contas da rede social. Se a configuração estiver ativada, então no Social. As redes podem configurar dados para produzir redes sociais específicas. A coluna Link contém um link direto para a conta da empresa na rede social selecionada. Na coluna Imagem, o ícone SVG desta rede social é carregado, que será exibido no rodapé. Observe que apenas esta imagem será exibida no rodapé sem texto adicional, de modo que o ícone deve ser intuitivo para os usuários. Configuração Em nova aba, ele controla a abertura do link. Se a caixa de seleção estiver ativada, uma nova página será aberta quando você clicar no link. Se a caixa de seleção for desligada, o link será aberto na janela atual, ou seja, o usuário deixará o site.
|

